How it works
When a user completes a subscription purchase in your funnel:- Profile creation: FunnelFox creates a RevenueCat customer with the App User ID.
- Purchase tracking: The initial subscription purchase is sent to RevenueCat.
- Ongoing monitoring: RevenueCat monitors the subscription directly with Stripe/Paddle for renewals, cancellations, and revenue events.
- App verification: Your app checks subscription status through the RevenueCat SDK.
One-time purchases create profiles only if an entitlement is configured.FunnelFox checks for an entitlement in the Checkout element first. If none is found, it checks Integrations > RevenueCat. If there’s still no entitlement, no profile is created and access isn’t granted.
Setup
Choose your integration method based on your payment setup:- FunnelFox: If you use Stripe or Paddle as your payment provider.
- FunnelFox Billing: If you use FunnelFox Billing instead of a direct payment provider integration.
FunnelFox
Get RevenueCat API keys
- Log into RevenueCat Dashboard.
- Go to Project Settings → API Keys.
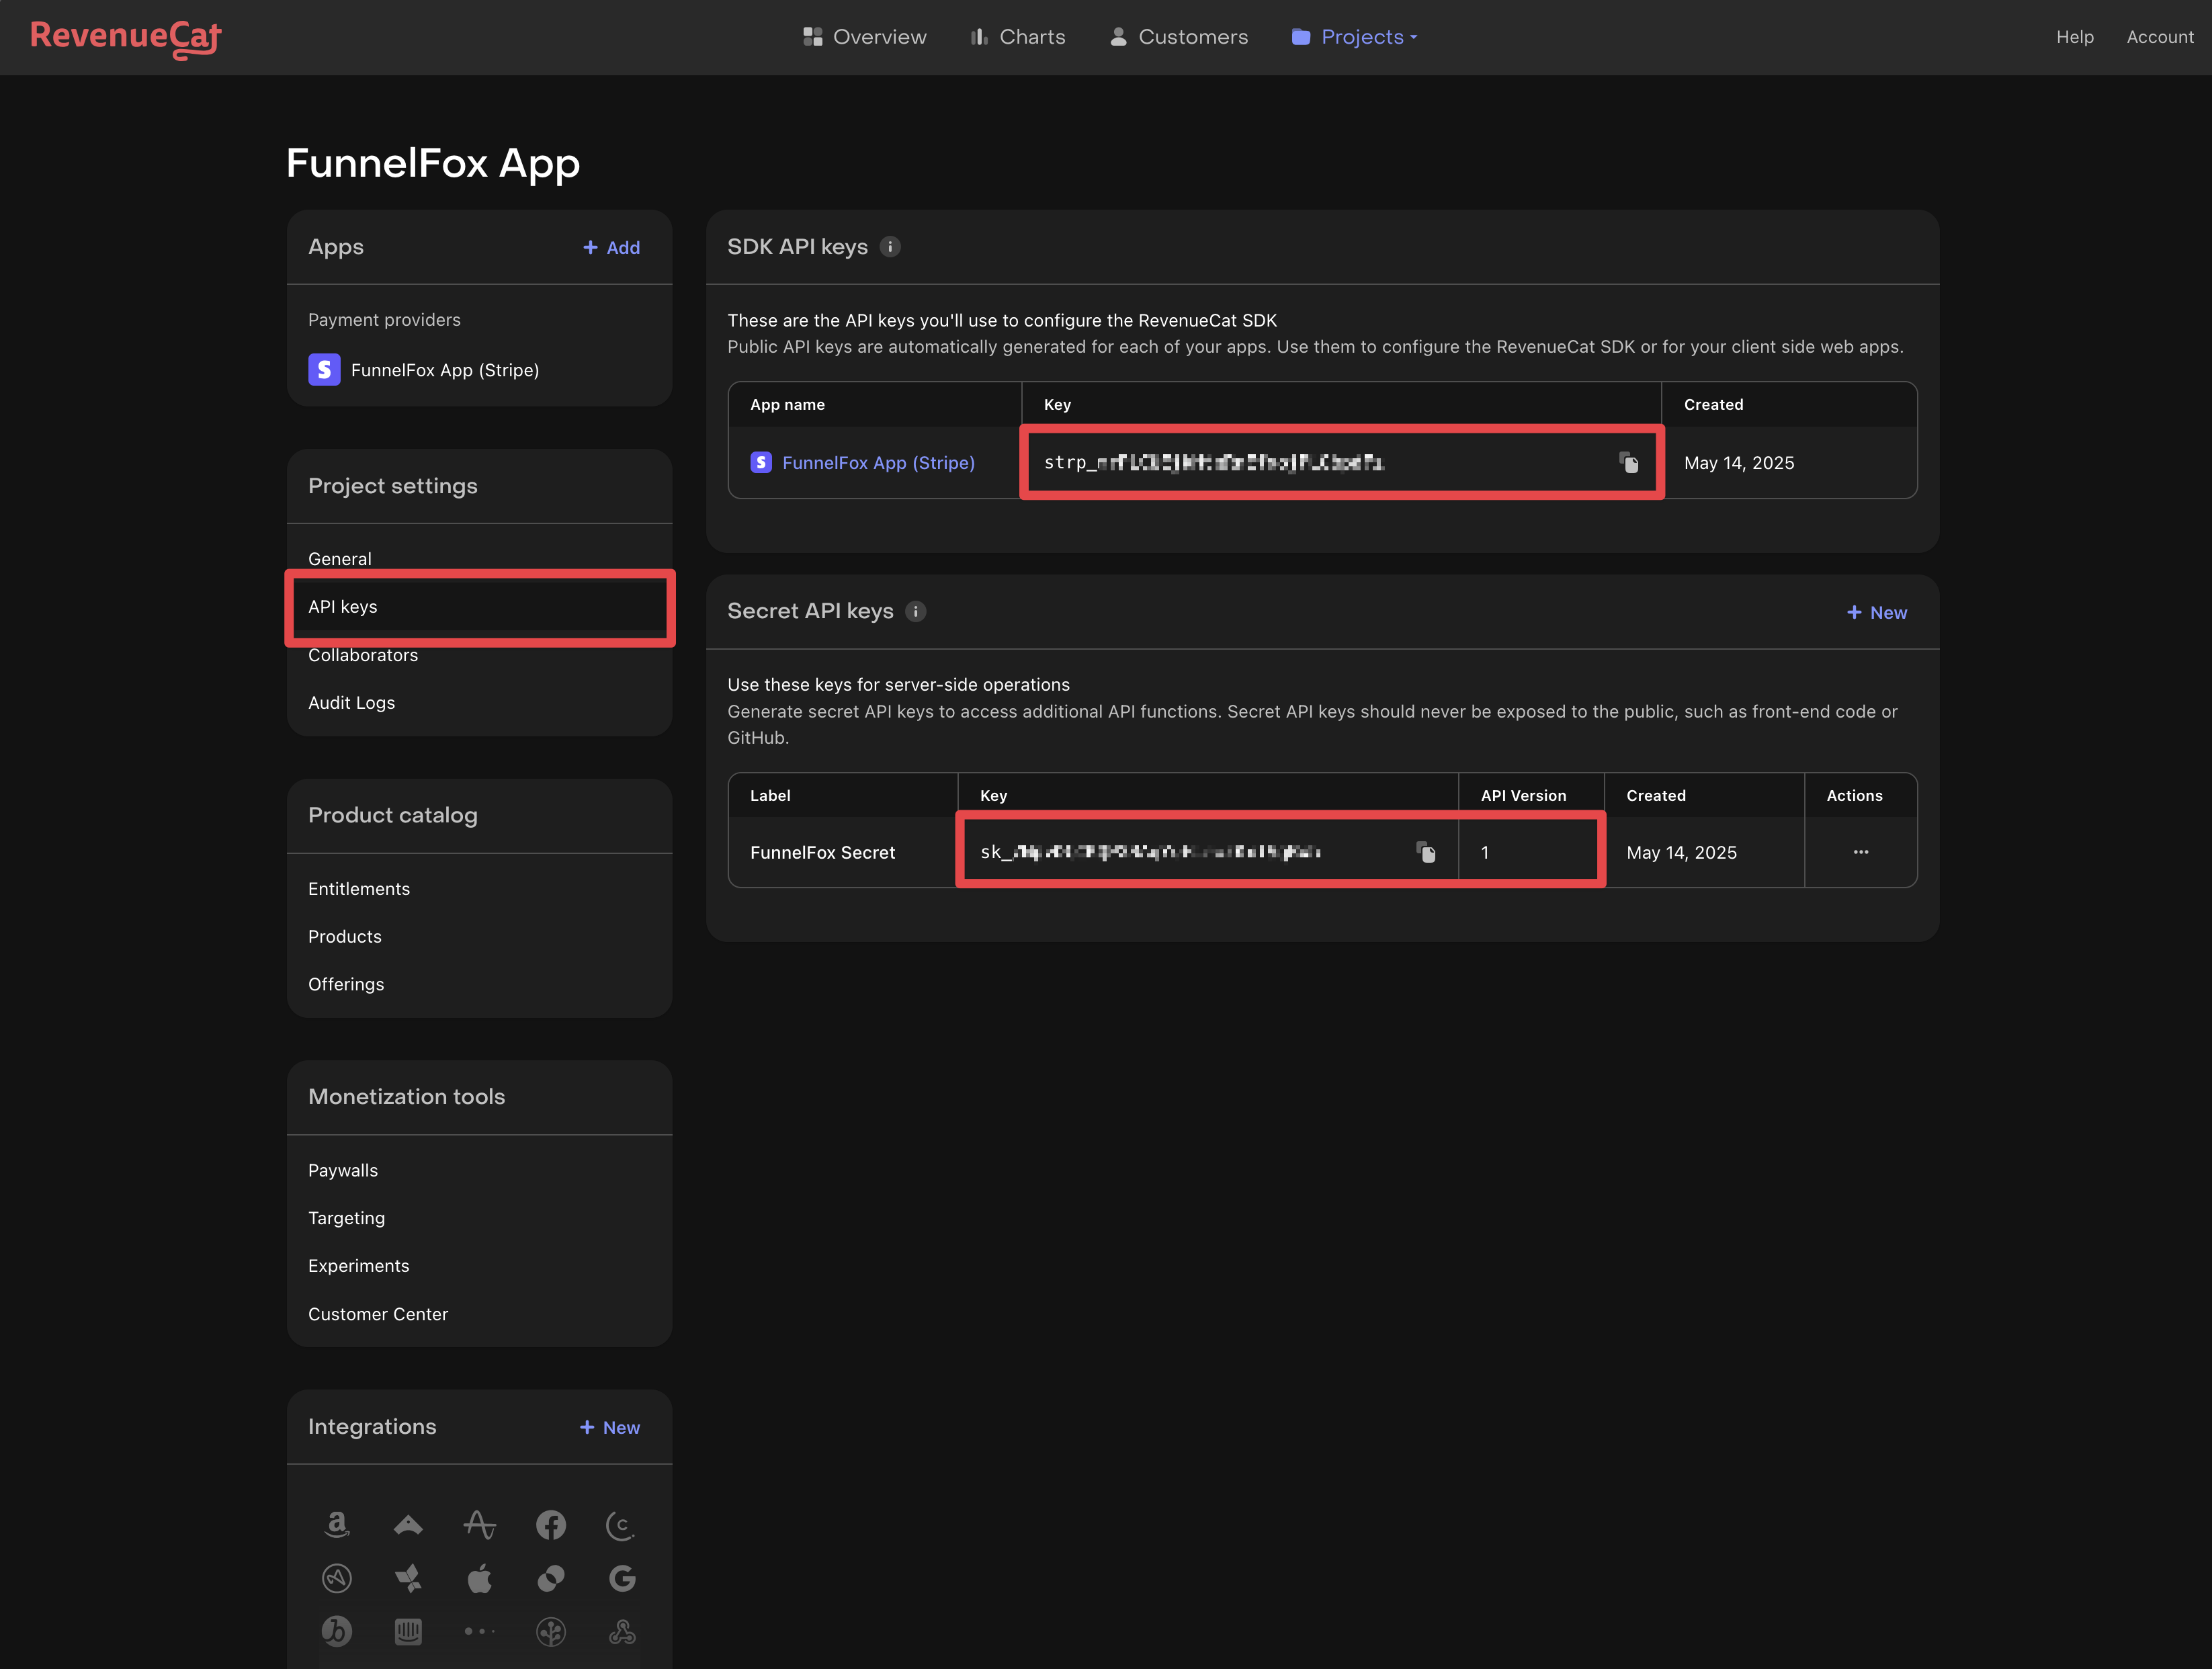
- Create a Secret Key with API Version set to V1.
- Copy the Secret Key.
Get payment provider app keys
- Stripe
- Paddle
- In RevenueCat, go to your app settings.
- Find the Stripe App Key (starts with
strp_). - Ensure Track new purchases from server-to-server notifications is disabled.
- Copy the Stripe App Key.
Configure FunnelFox integration
You only need to configure the app key for your active payment provider (Stripe or Paddle).
- Stripe
- Paddle
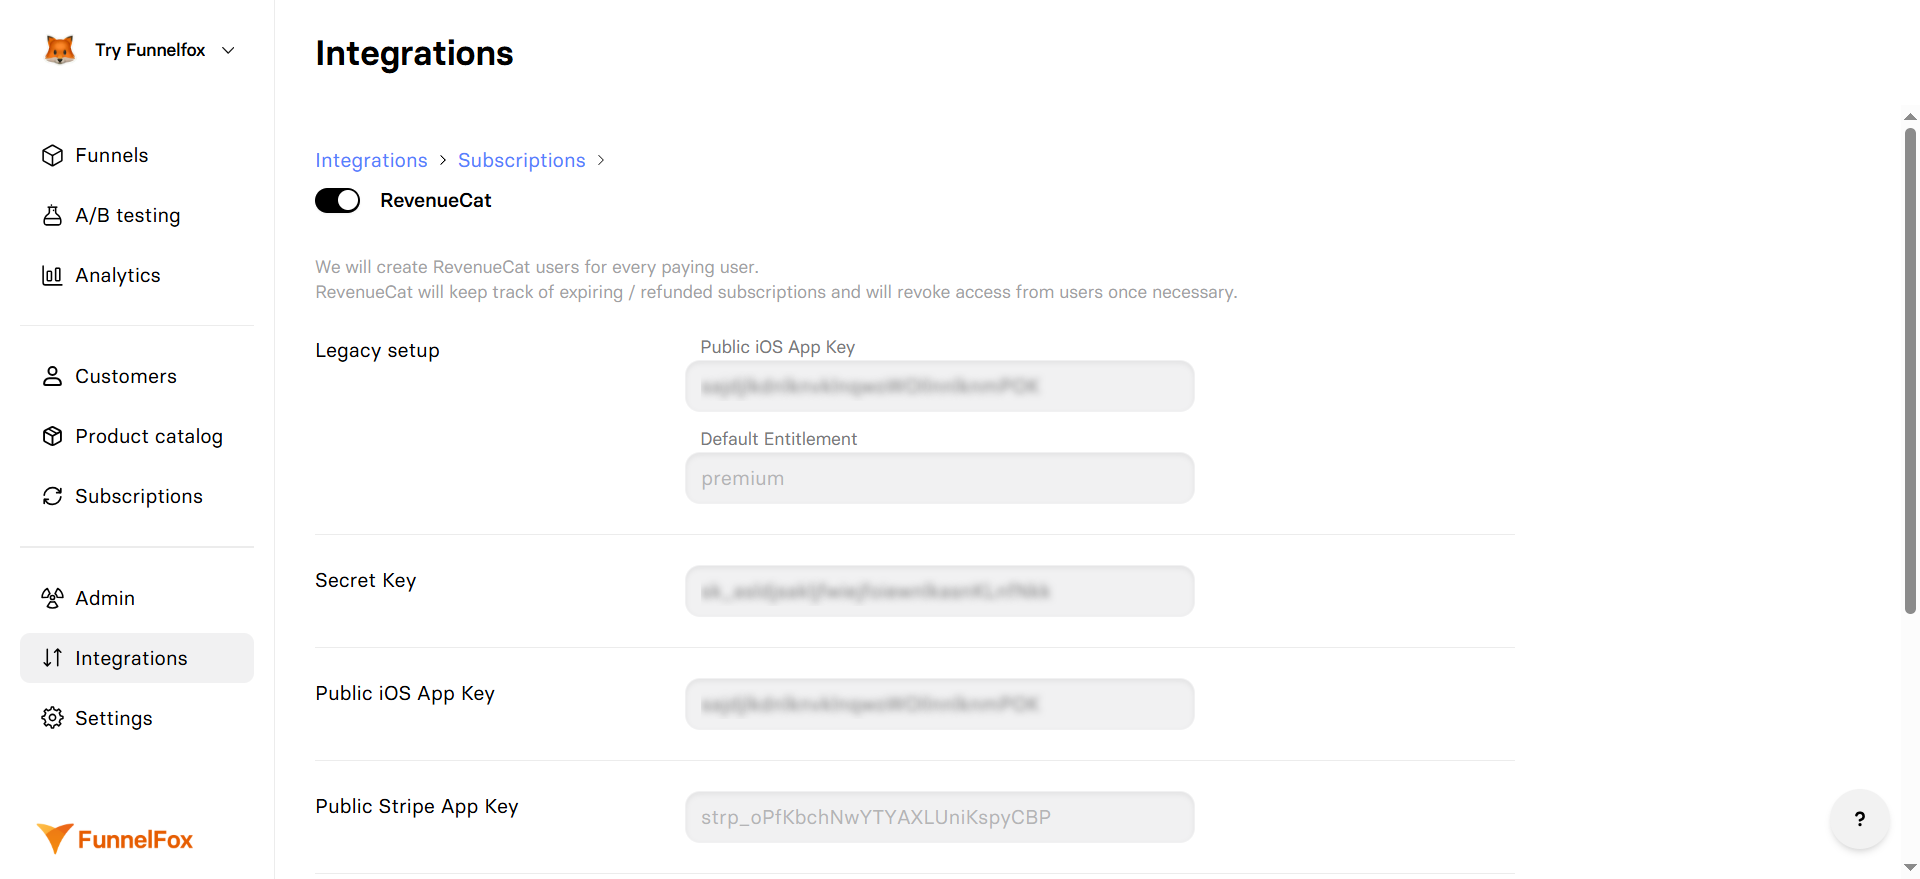
- Go to Integrations → RevenueCat.
- Paste your Secret Key.
- Paste your app key into Public Stripe App Key.
- Click Save changes.
Map products to entitlements
After your first test purchase: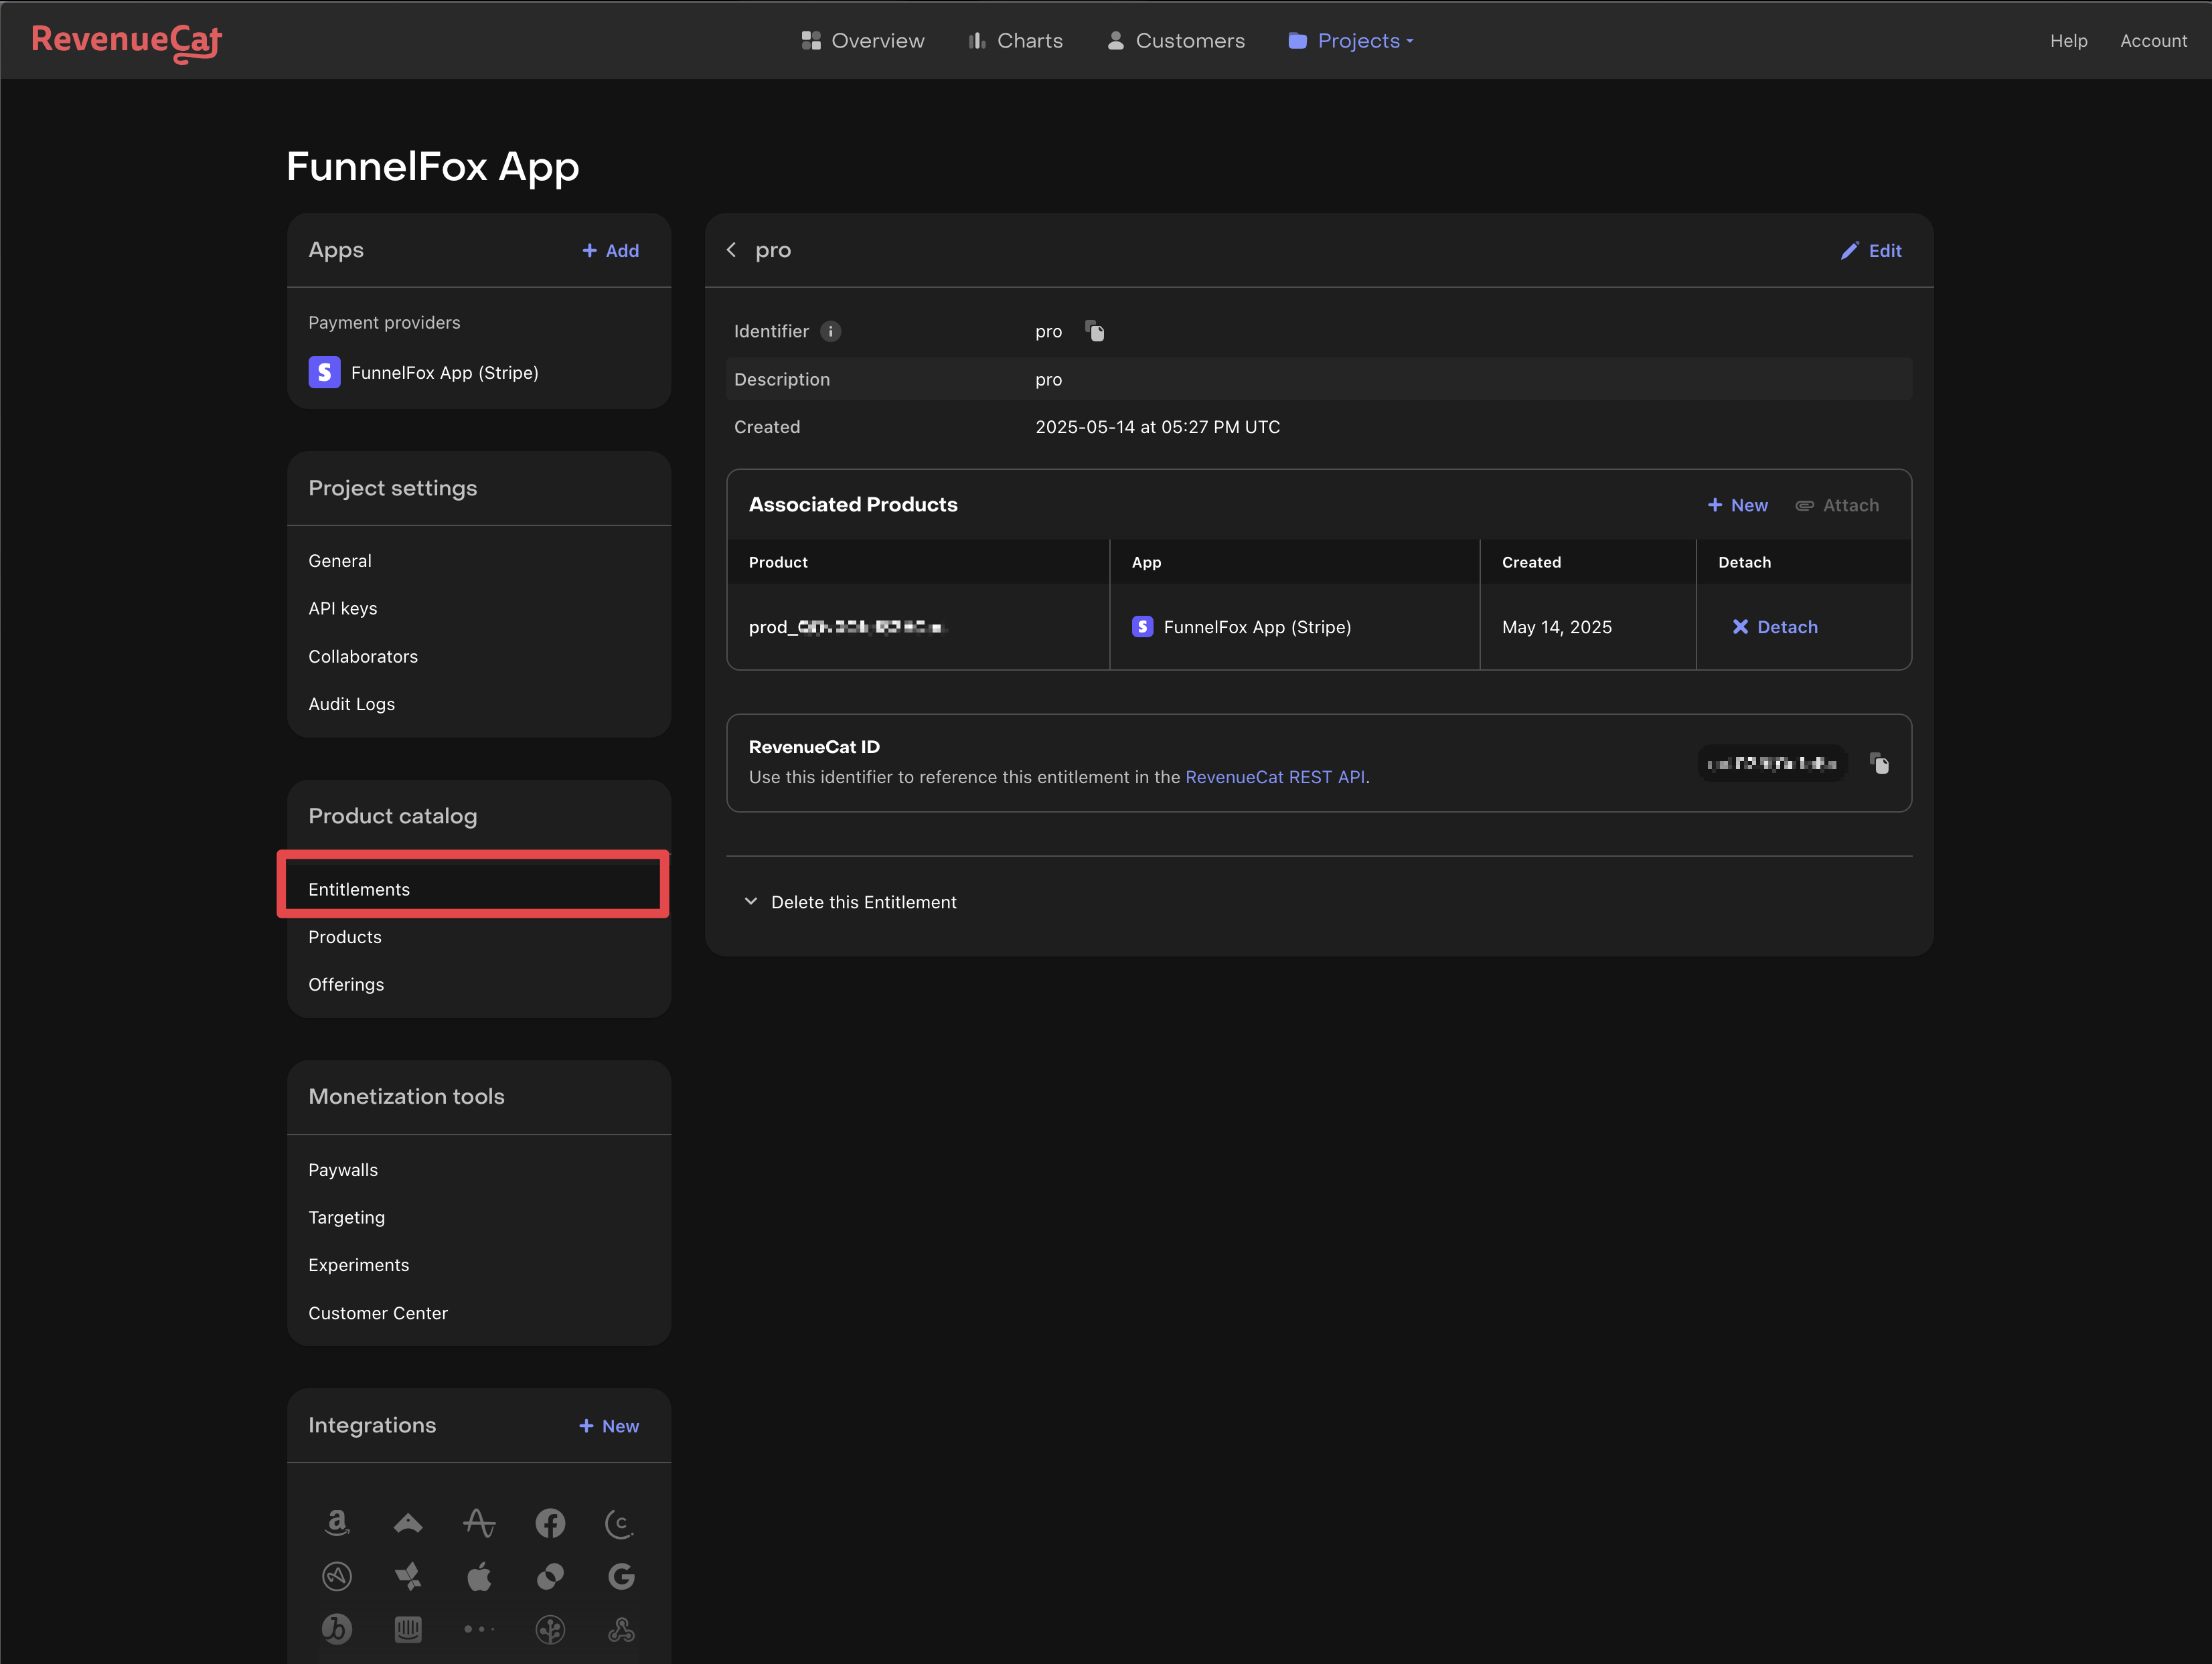
- Check the RevenueCat dashboard for the new customer.
- Map your Stripe/Paddle products to RevenueCat entitlements.
- Configure product identifiers to match your app.\
The example shows a
pro entitlement mapped to a Stripe product.FunnelFox Billing
Follow this section if you’re using FunnelFox Billing instead of integrating directly with Stripe or Paddle.You need a FunnelFox Billing account for this setup. Request our support team if you don’t have one.
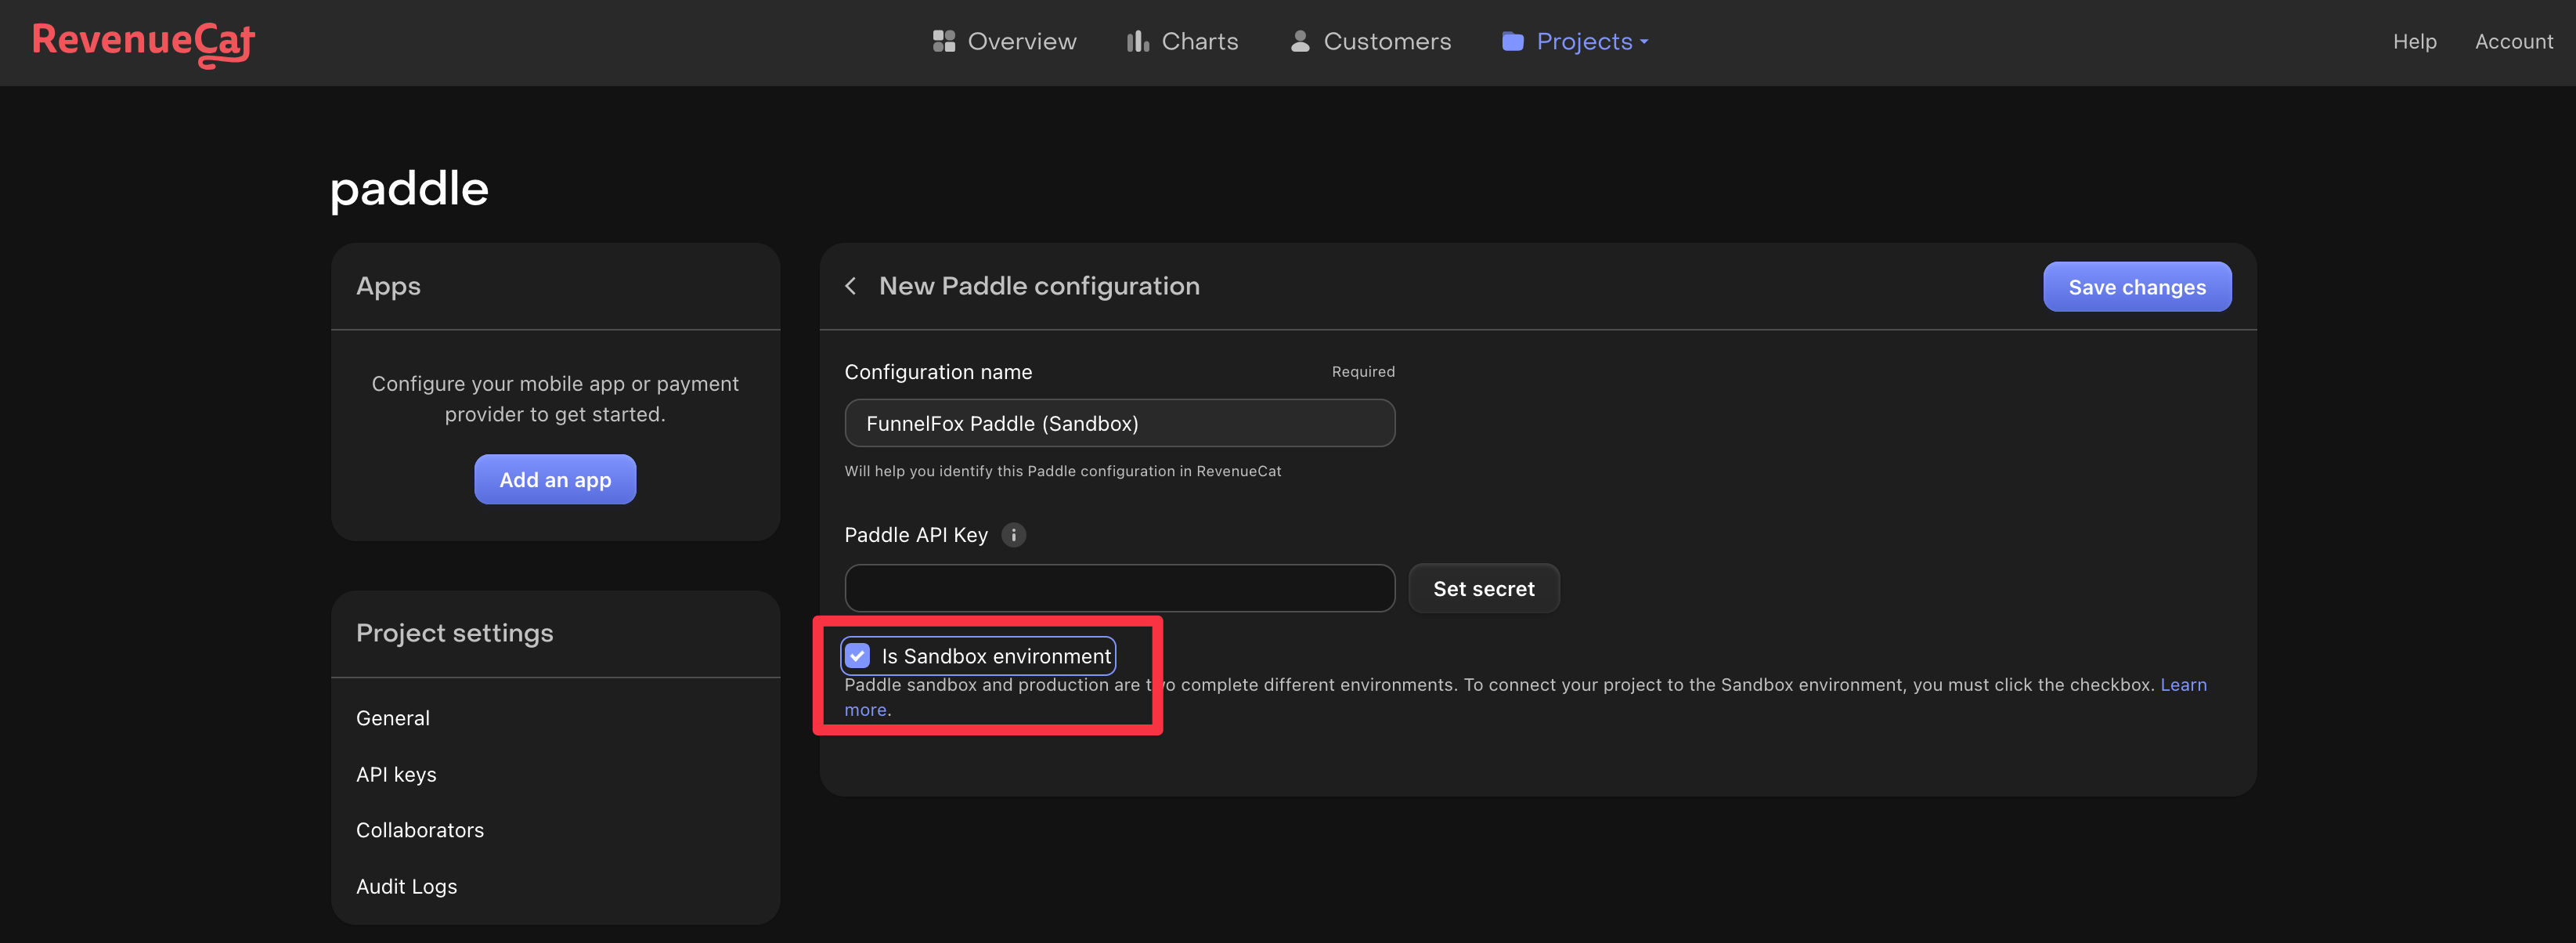
Create app configuration in RevenueCat
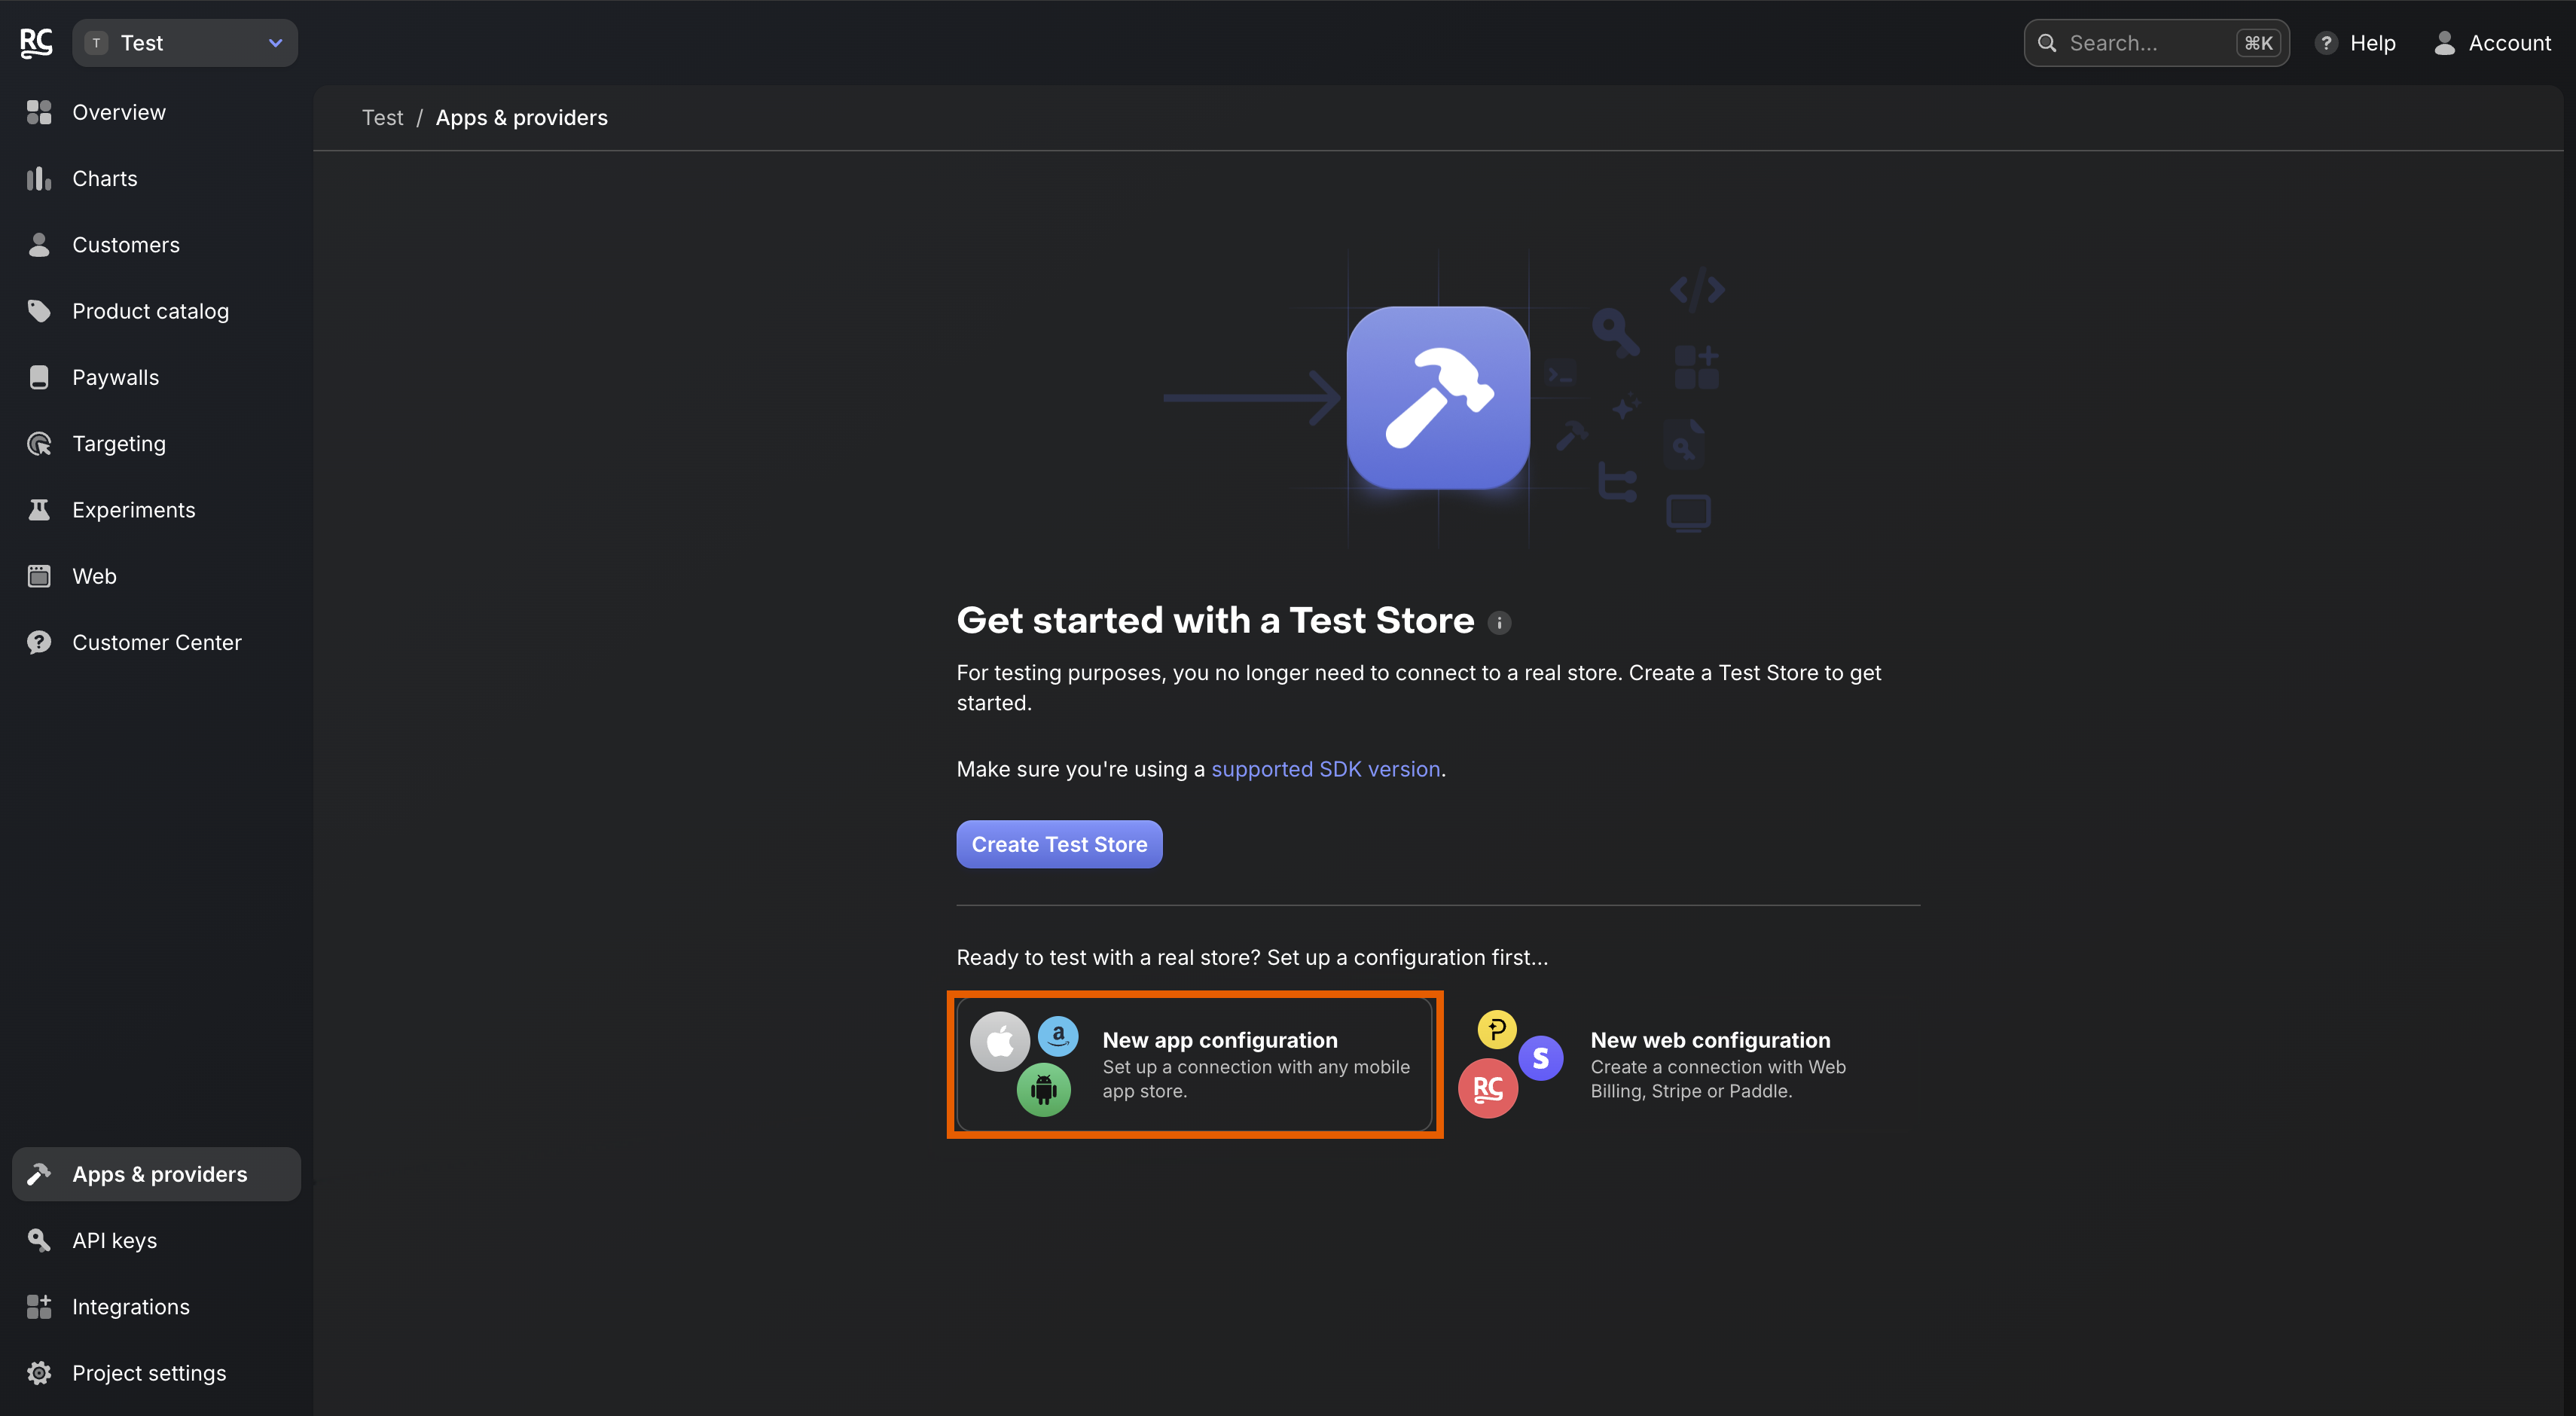
- Go to Apps & providers and click New app configuration.
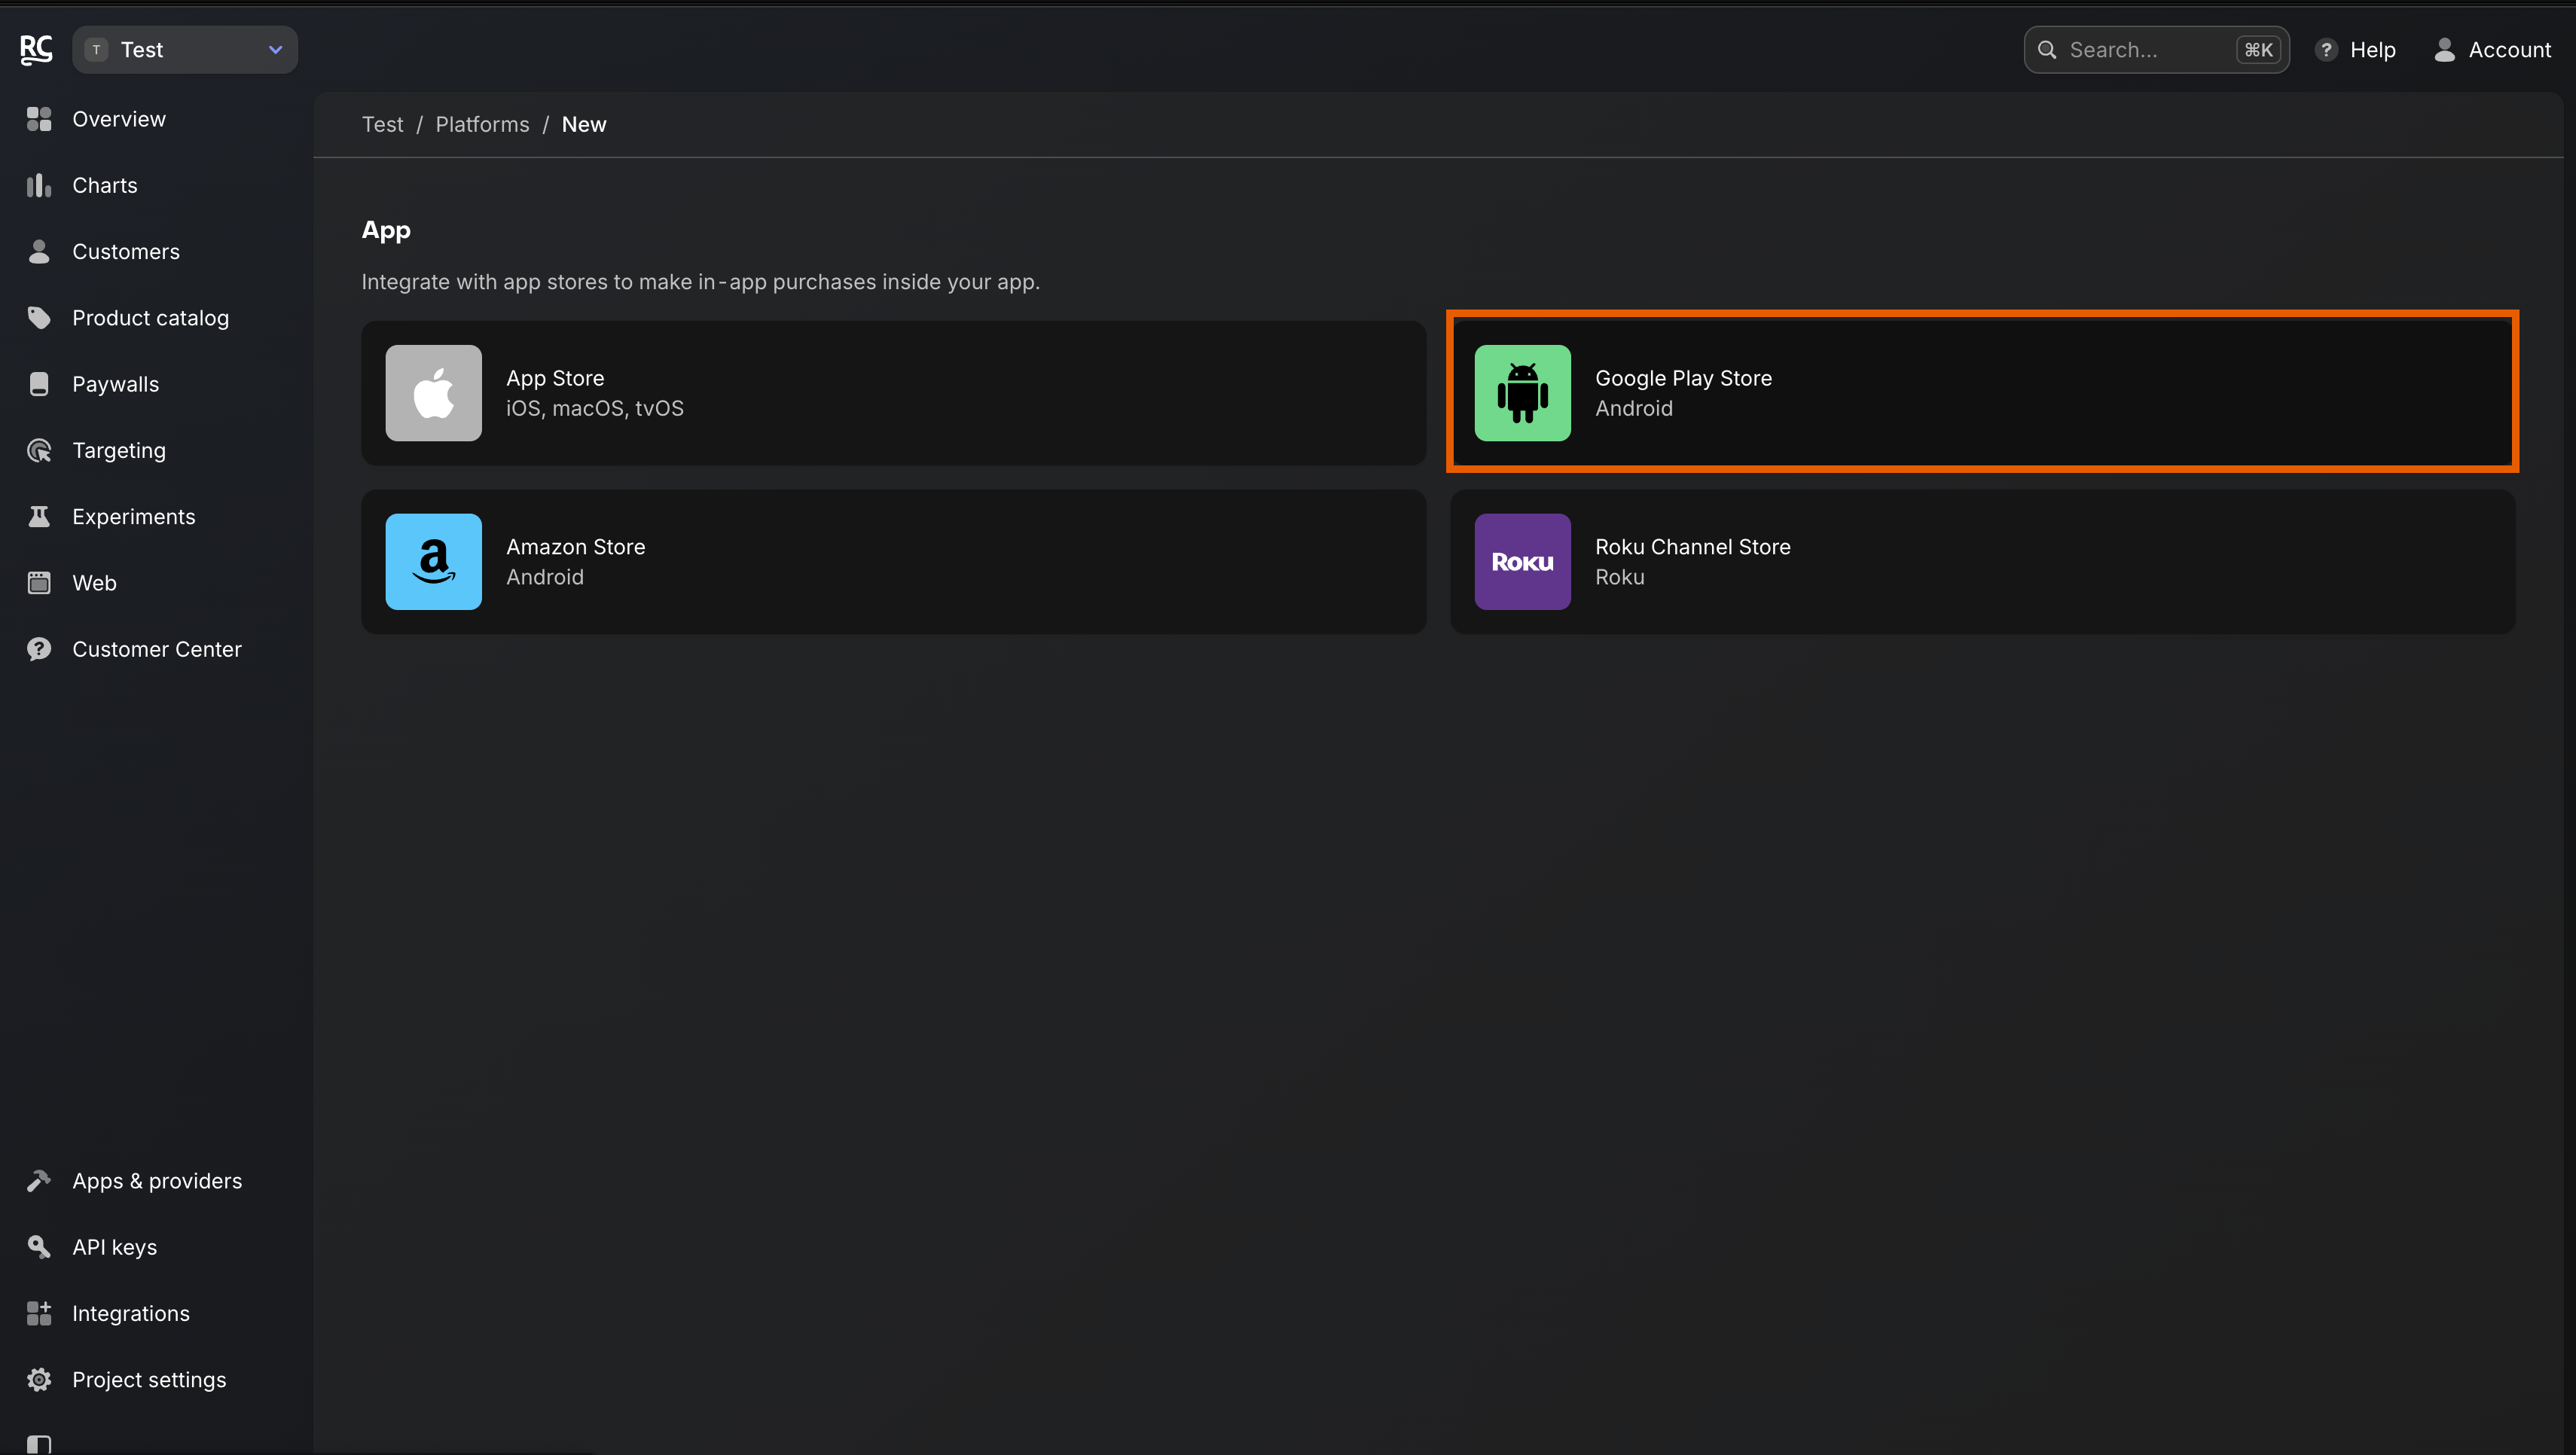
- Click Google Play Store.
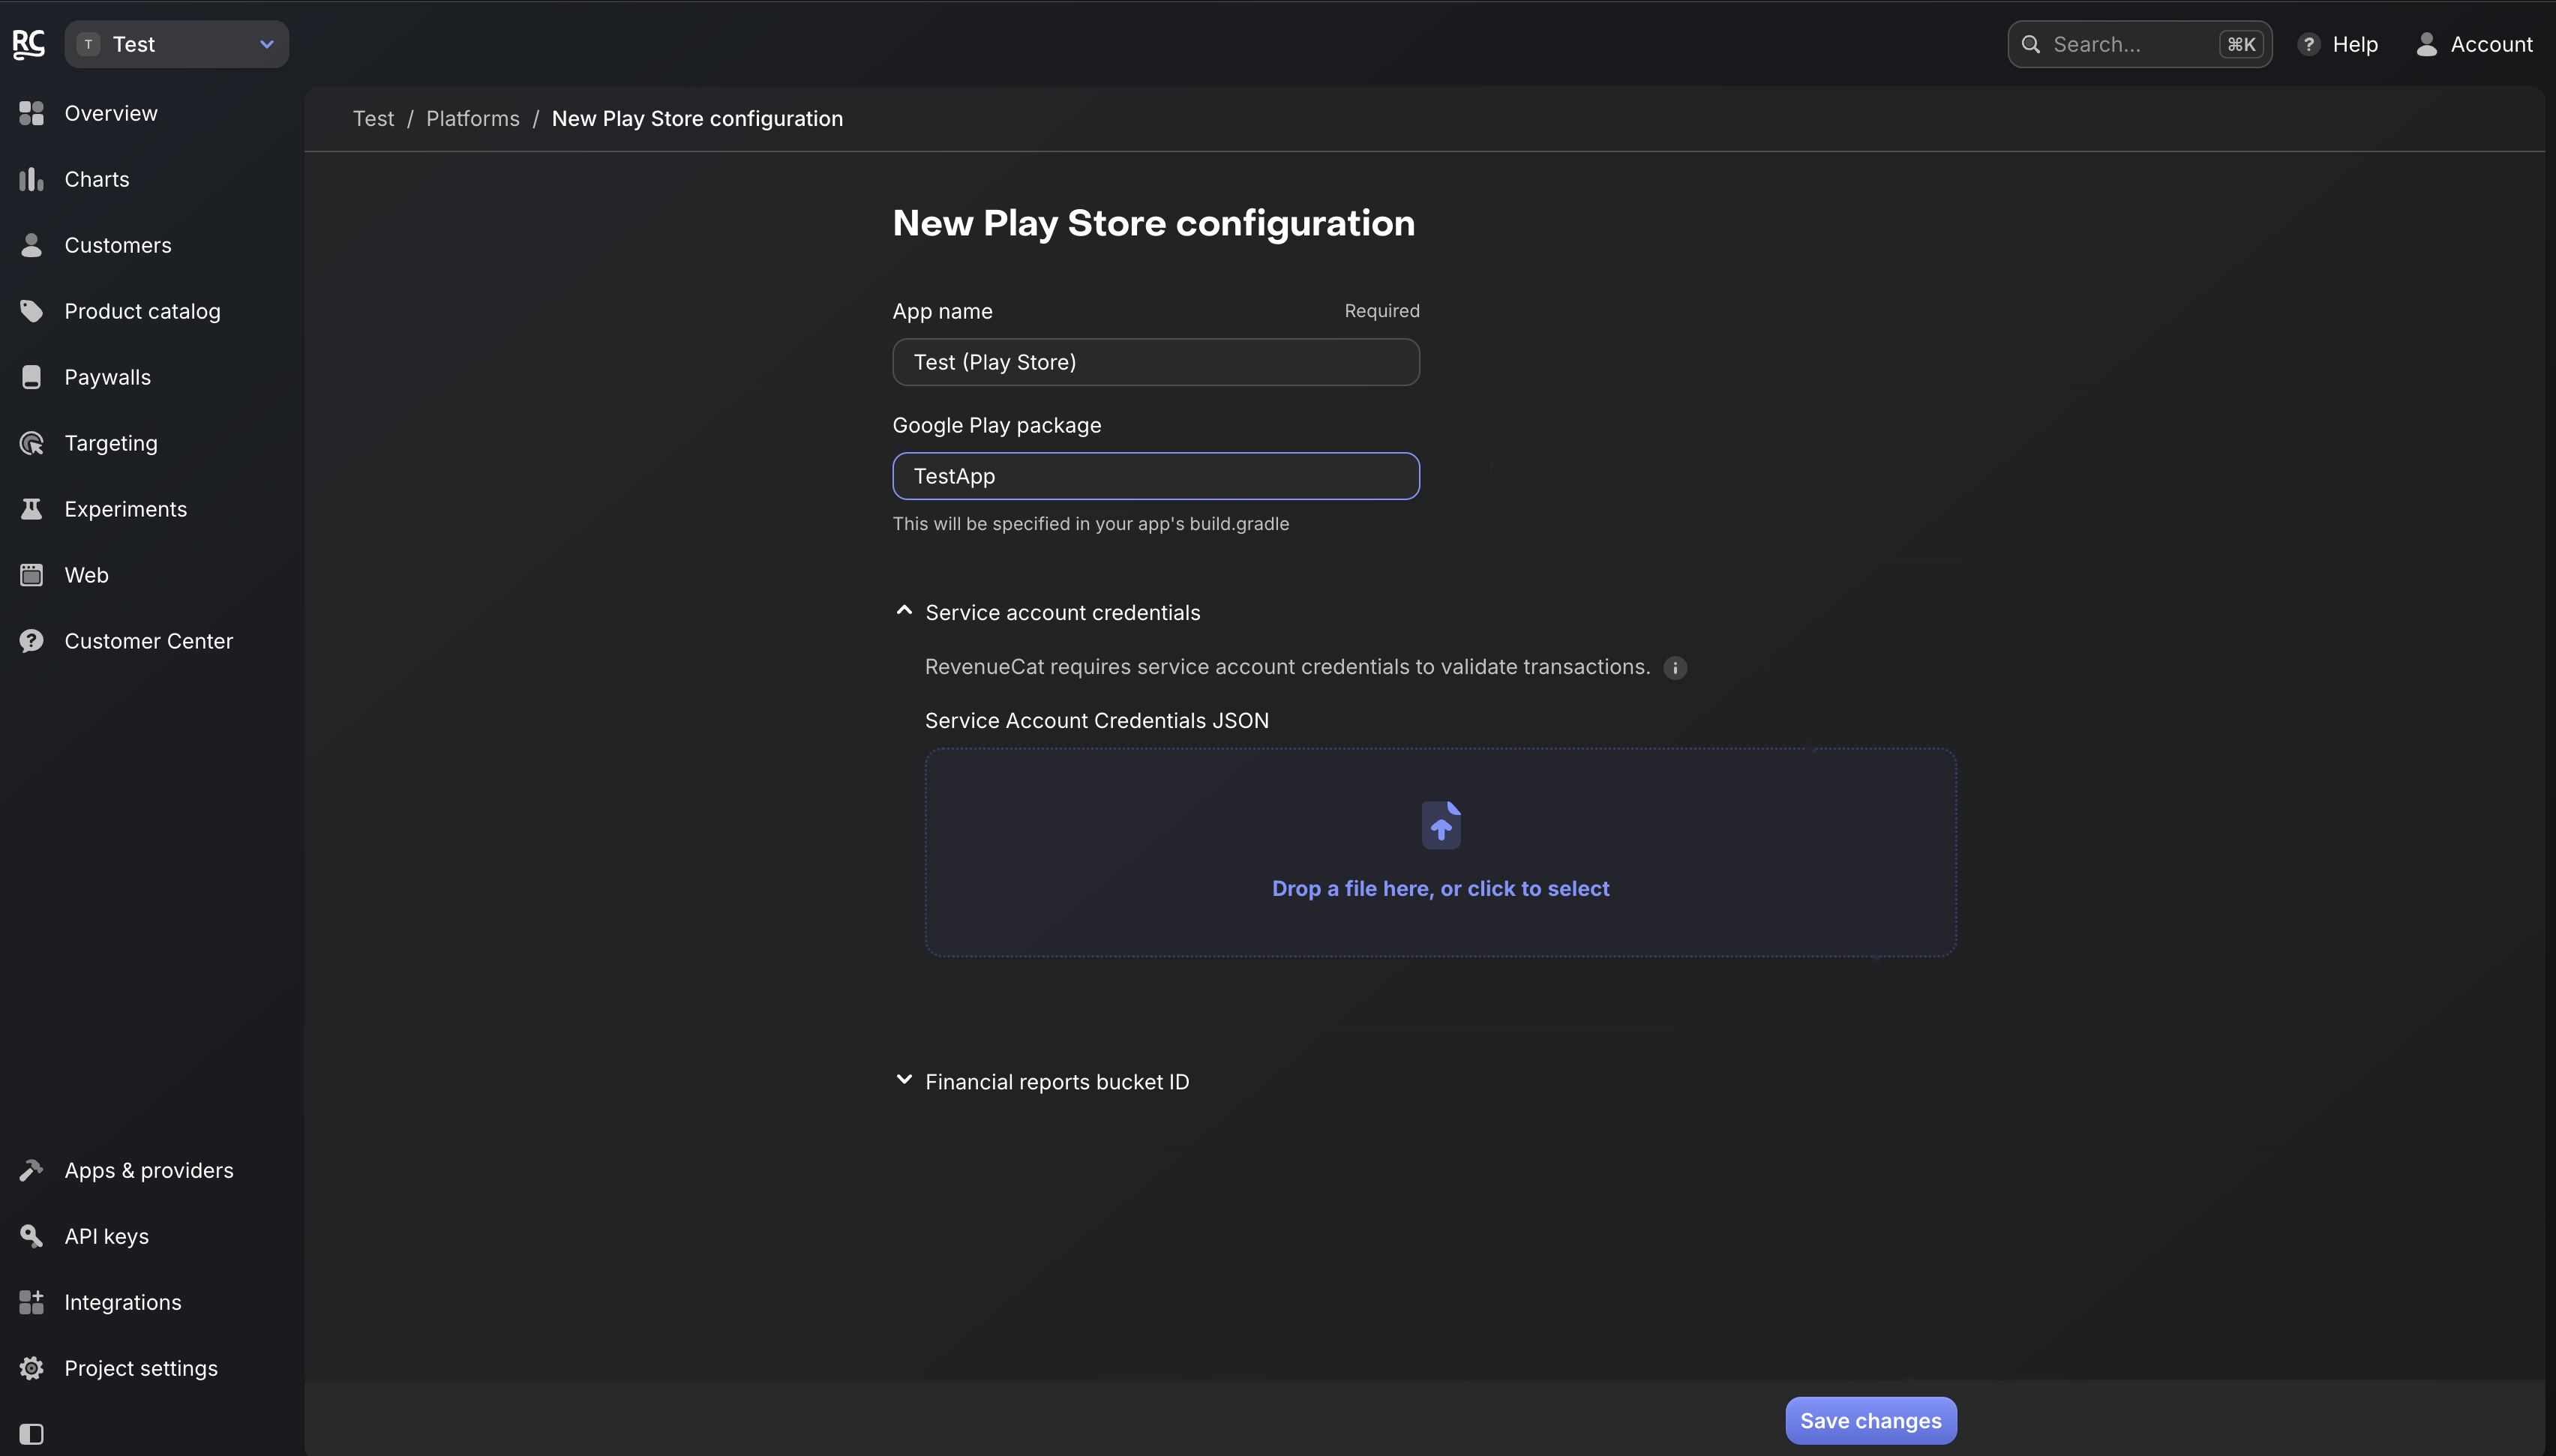
- Name your app and Google Play package, then click Save changes.
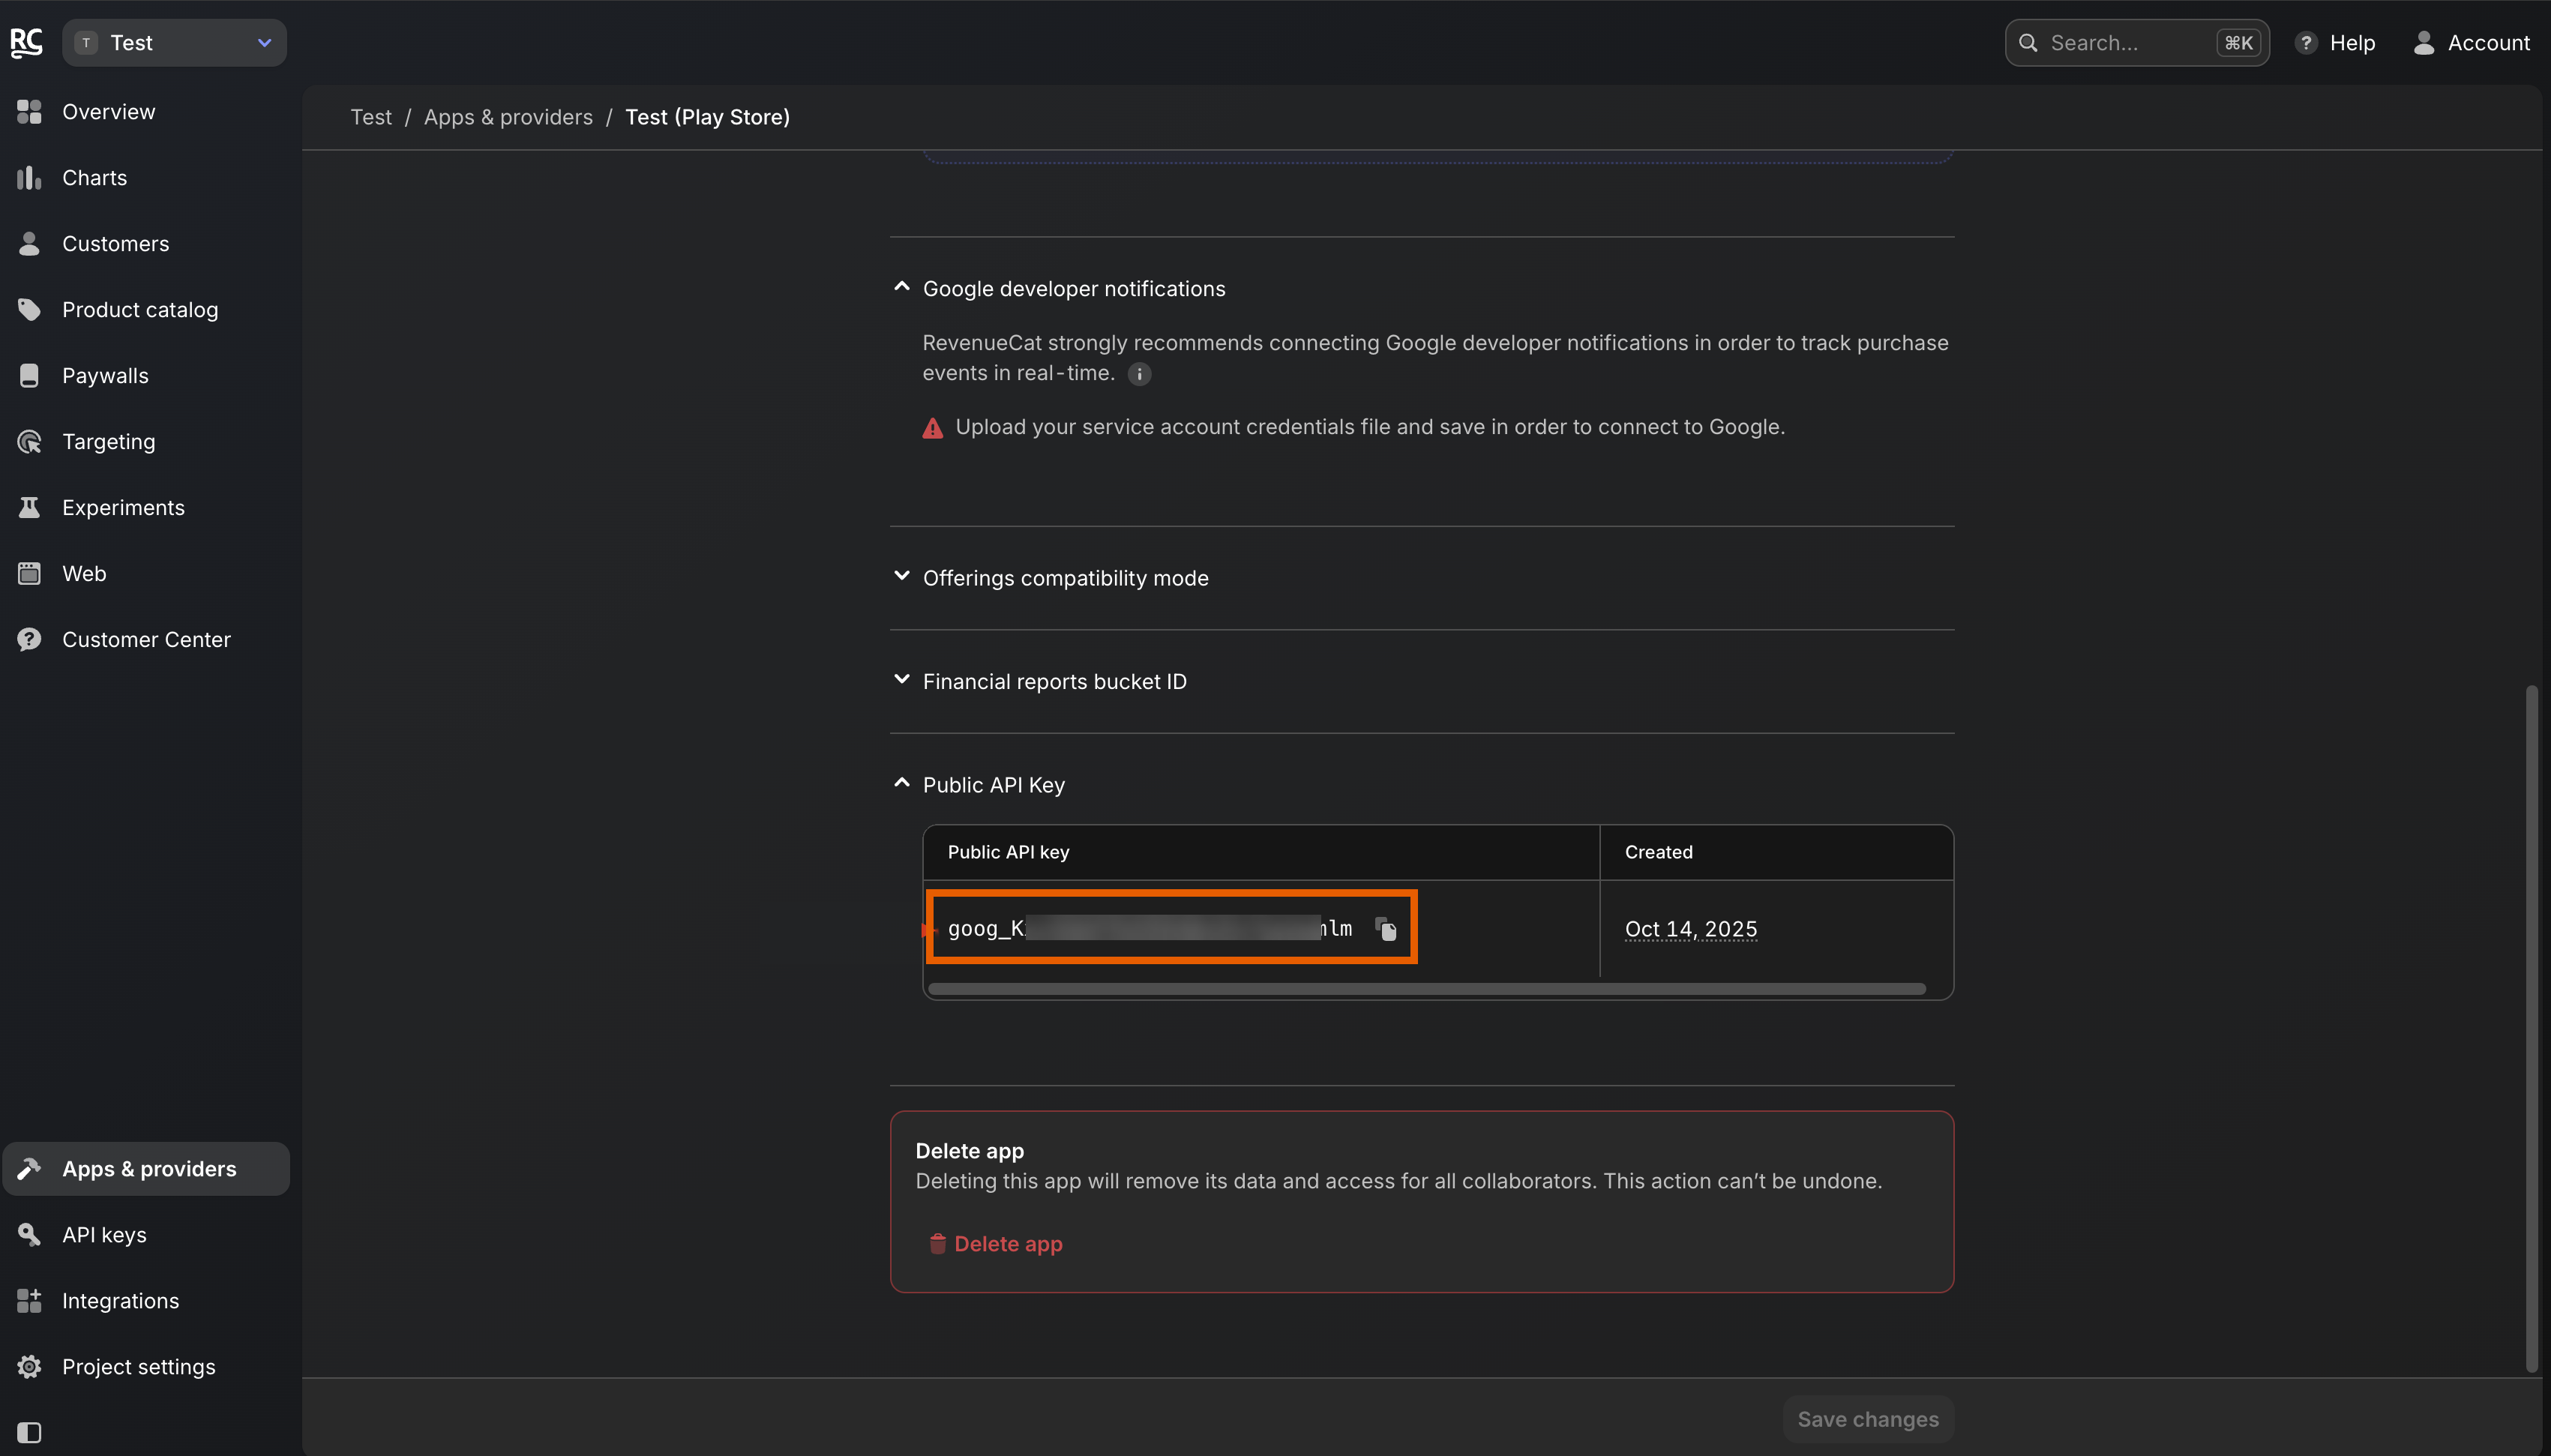
Configure public API key
- Copy the Public API key.
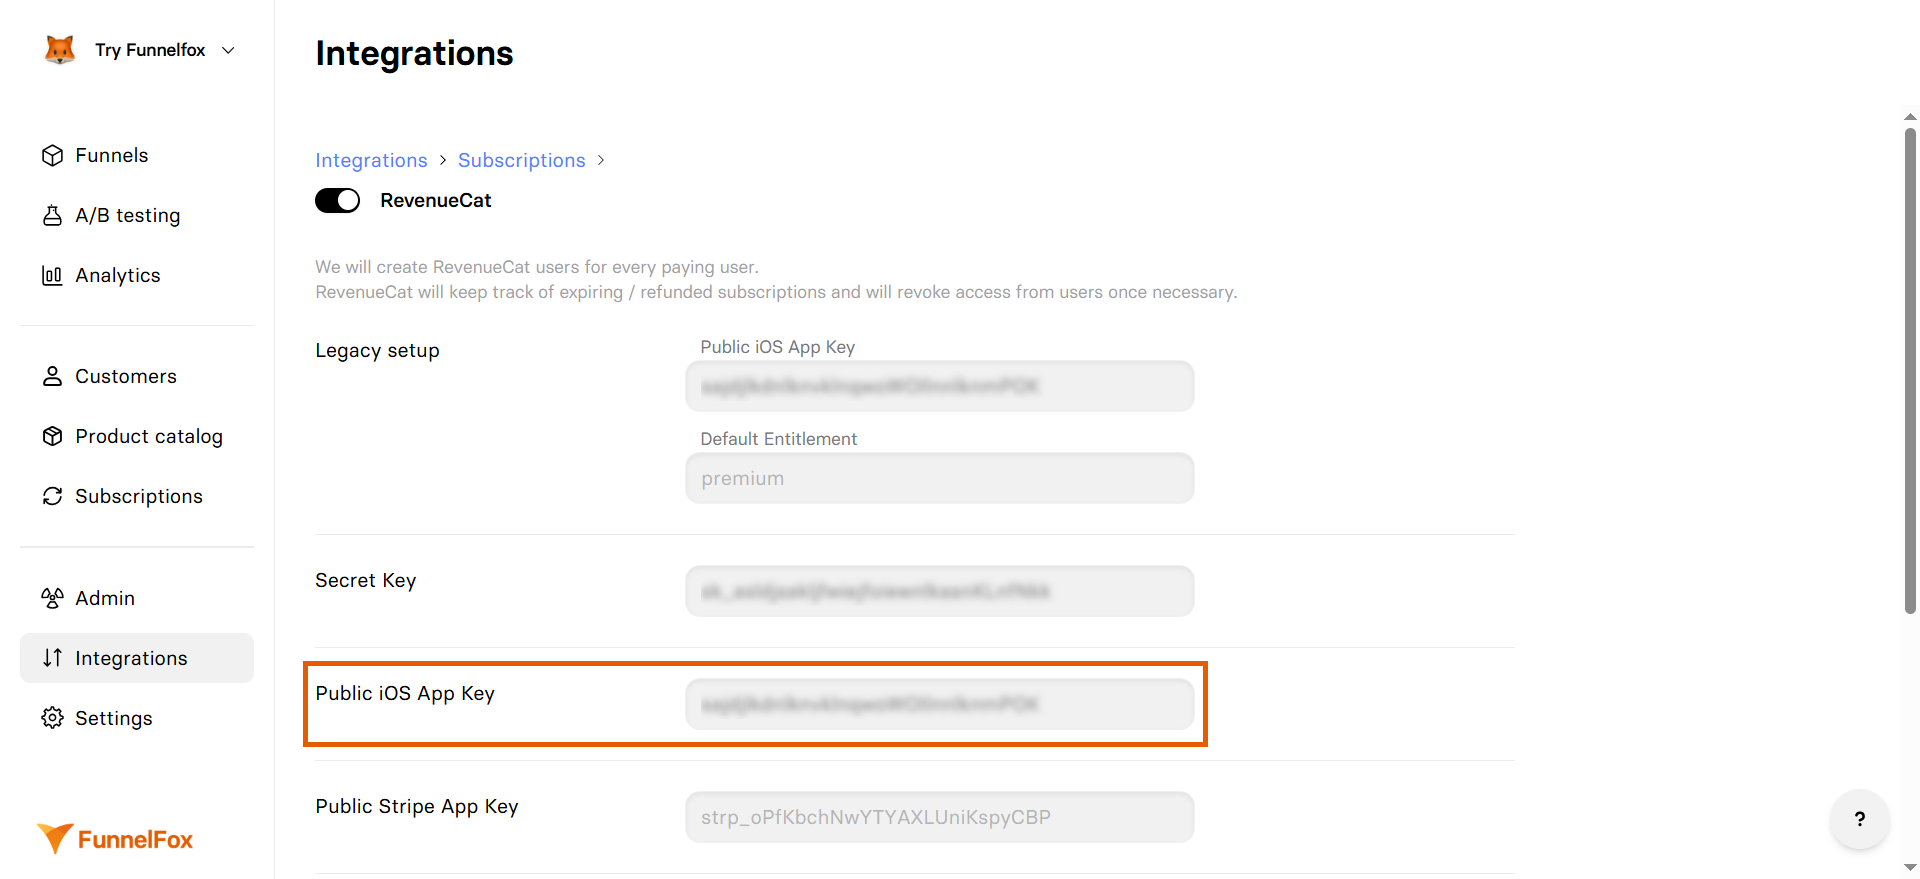
- Go to Integrations > RevenueCat in FunnelFox.
- Paste the key into the Public iOS App Key field. The key will also automatically appear under the Legacy setup.
Configure secret API key
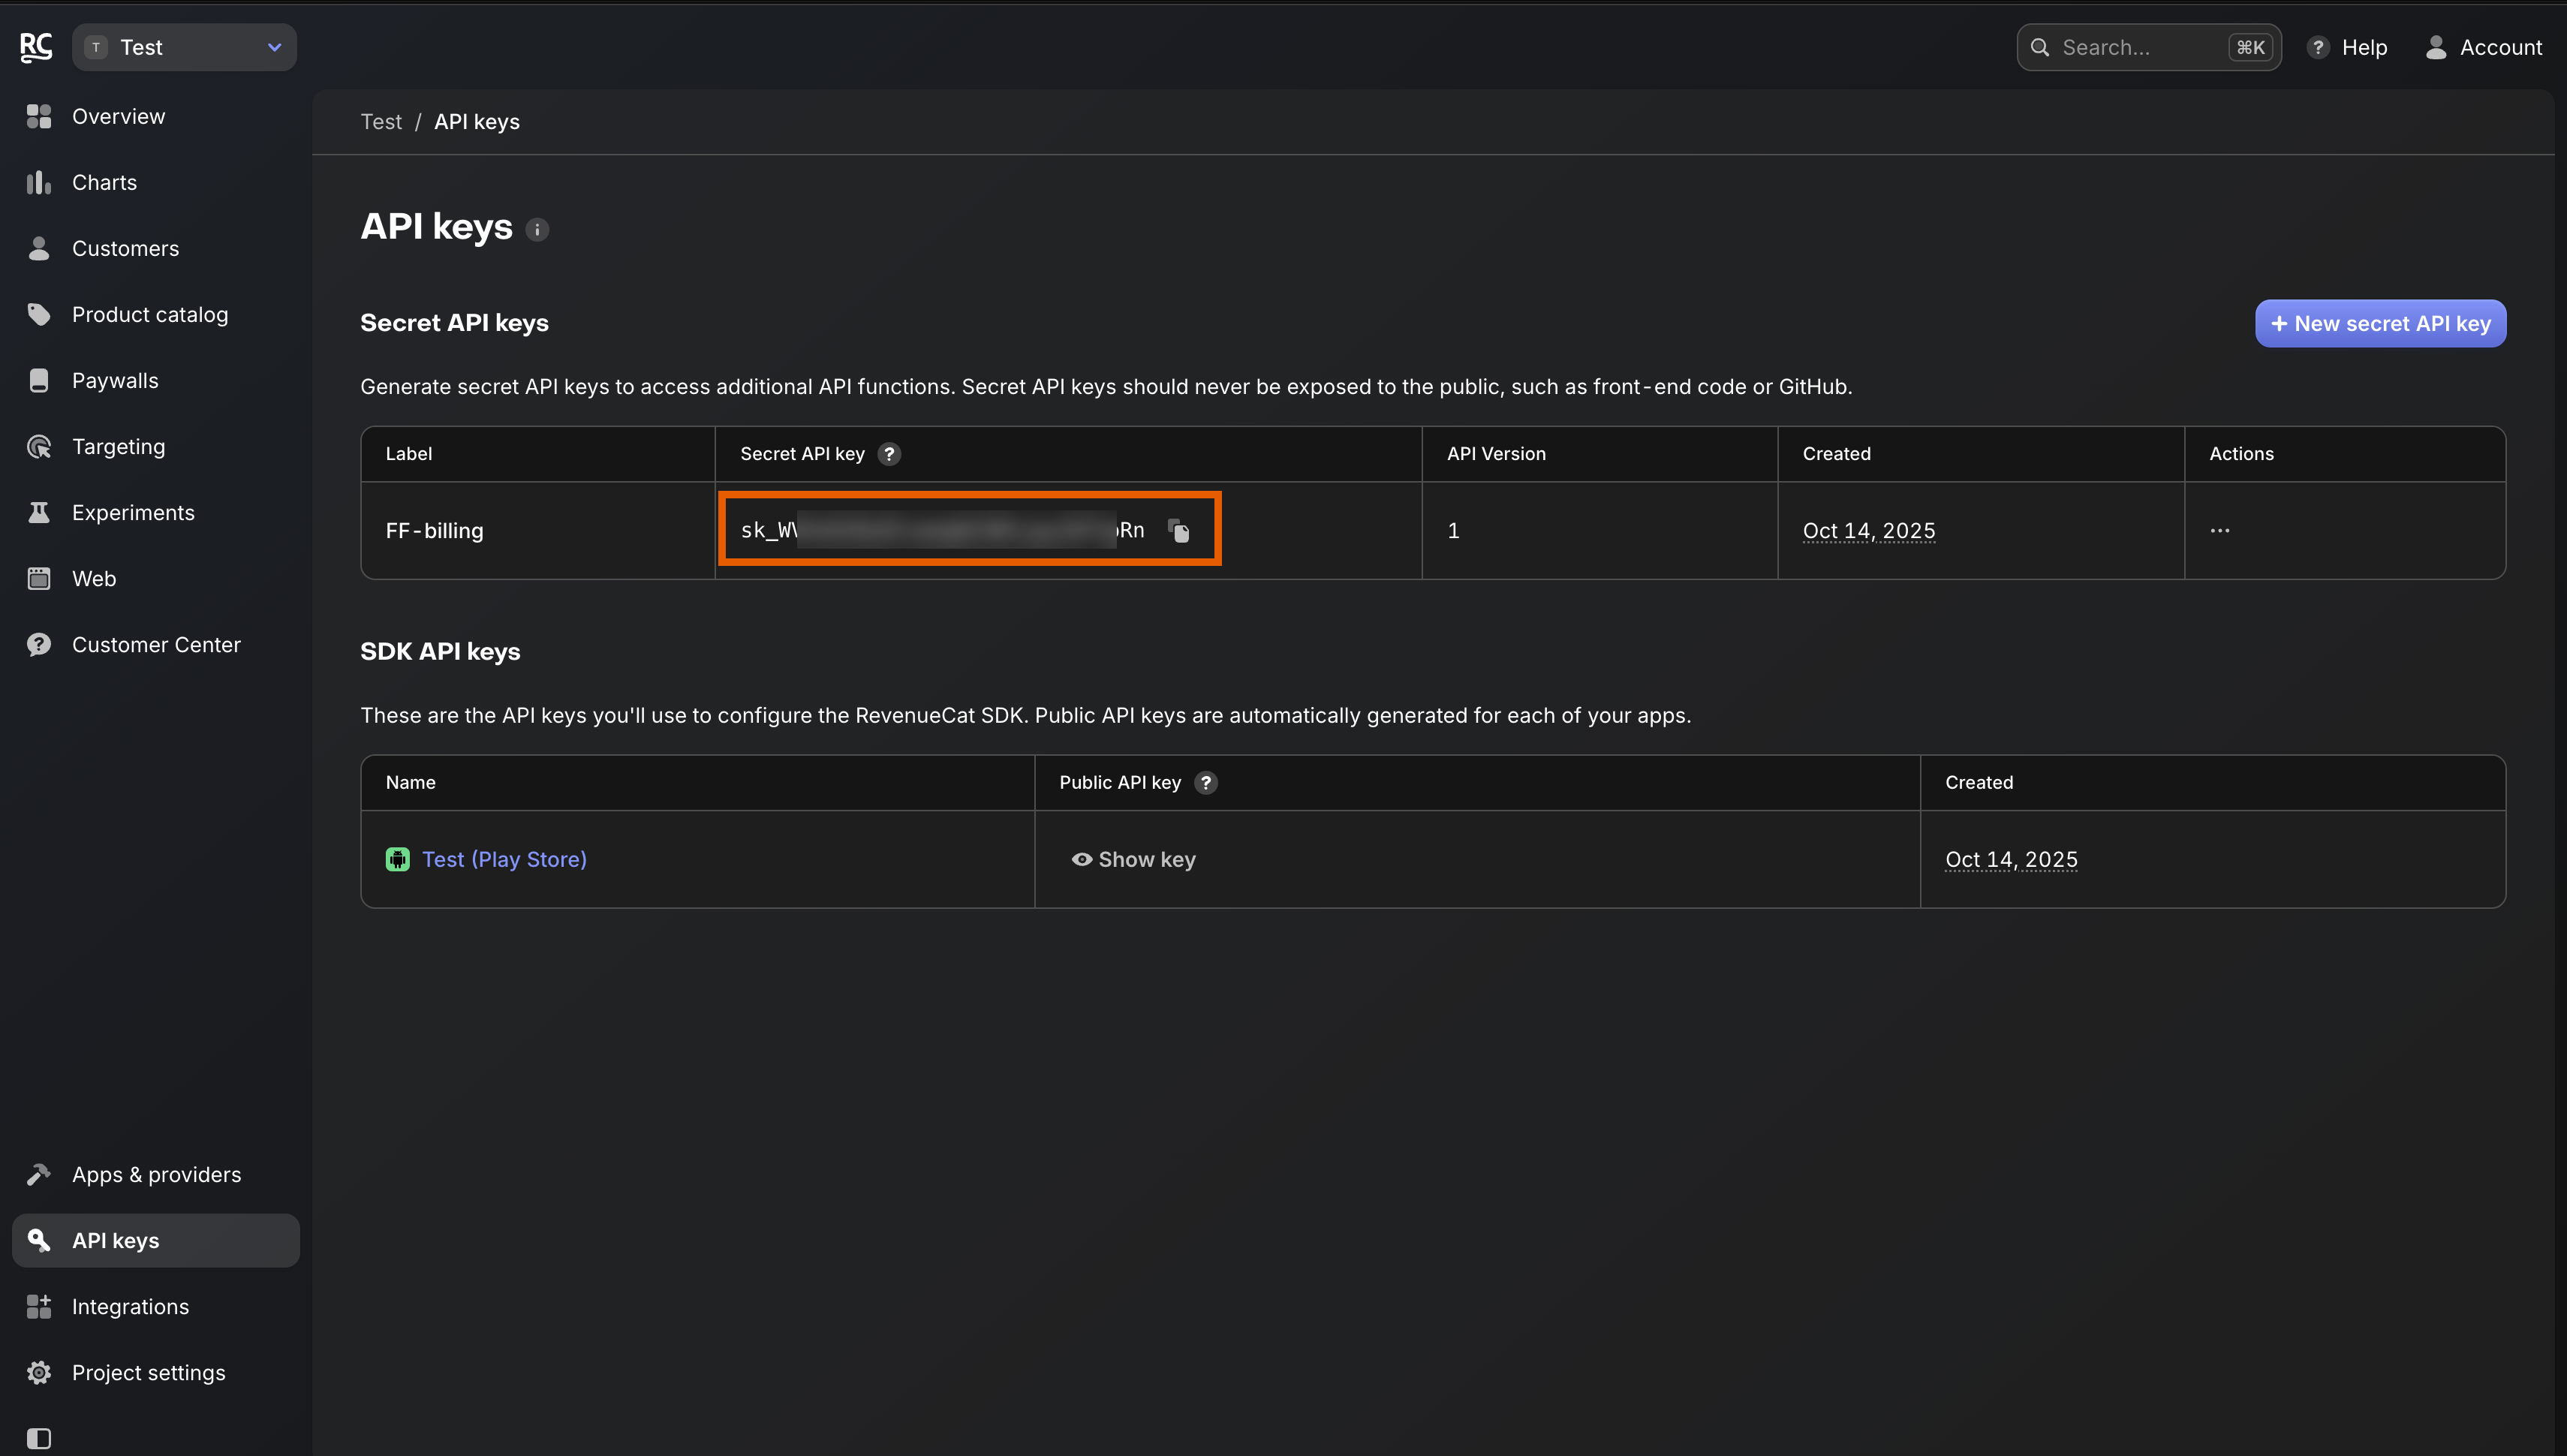
- Go back to your project in RevenueCat and click API keys.
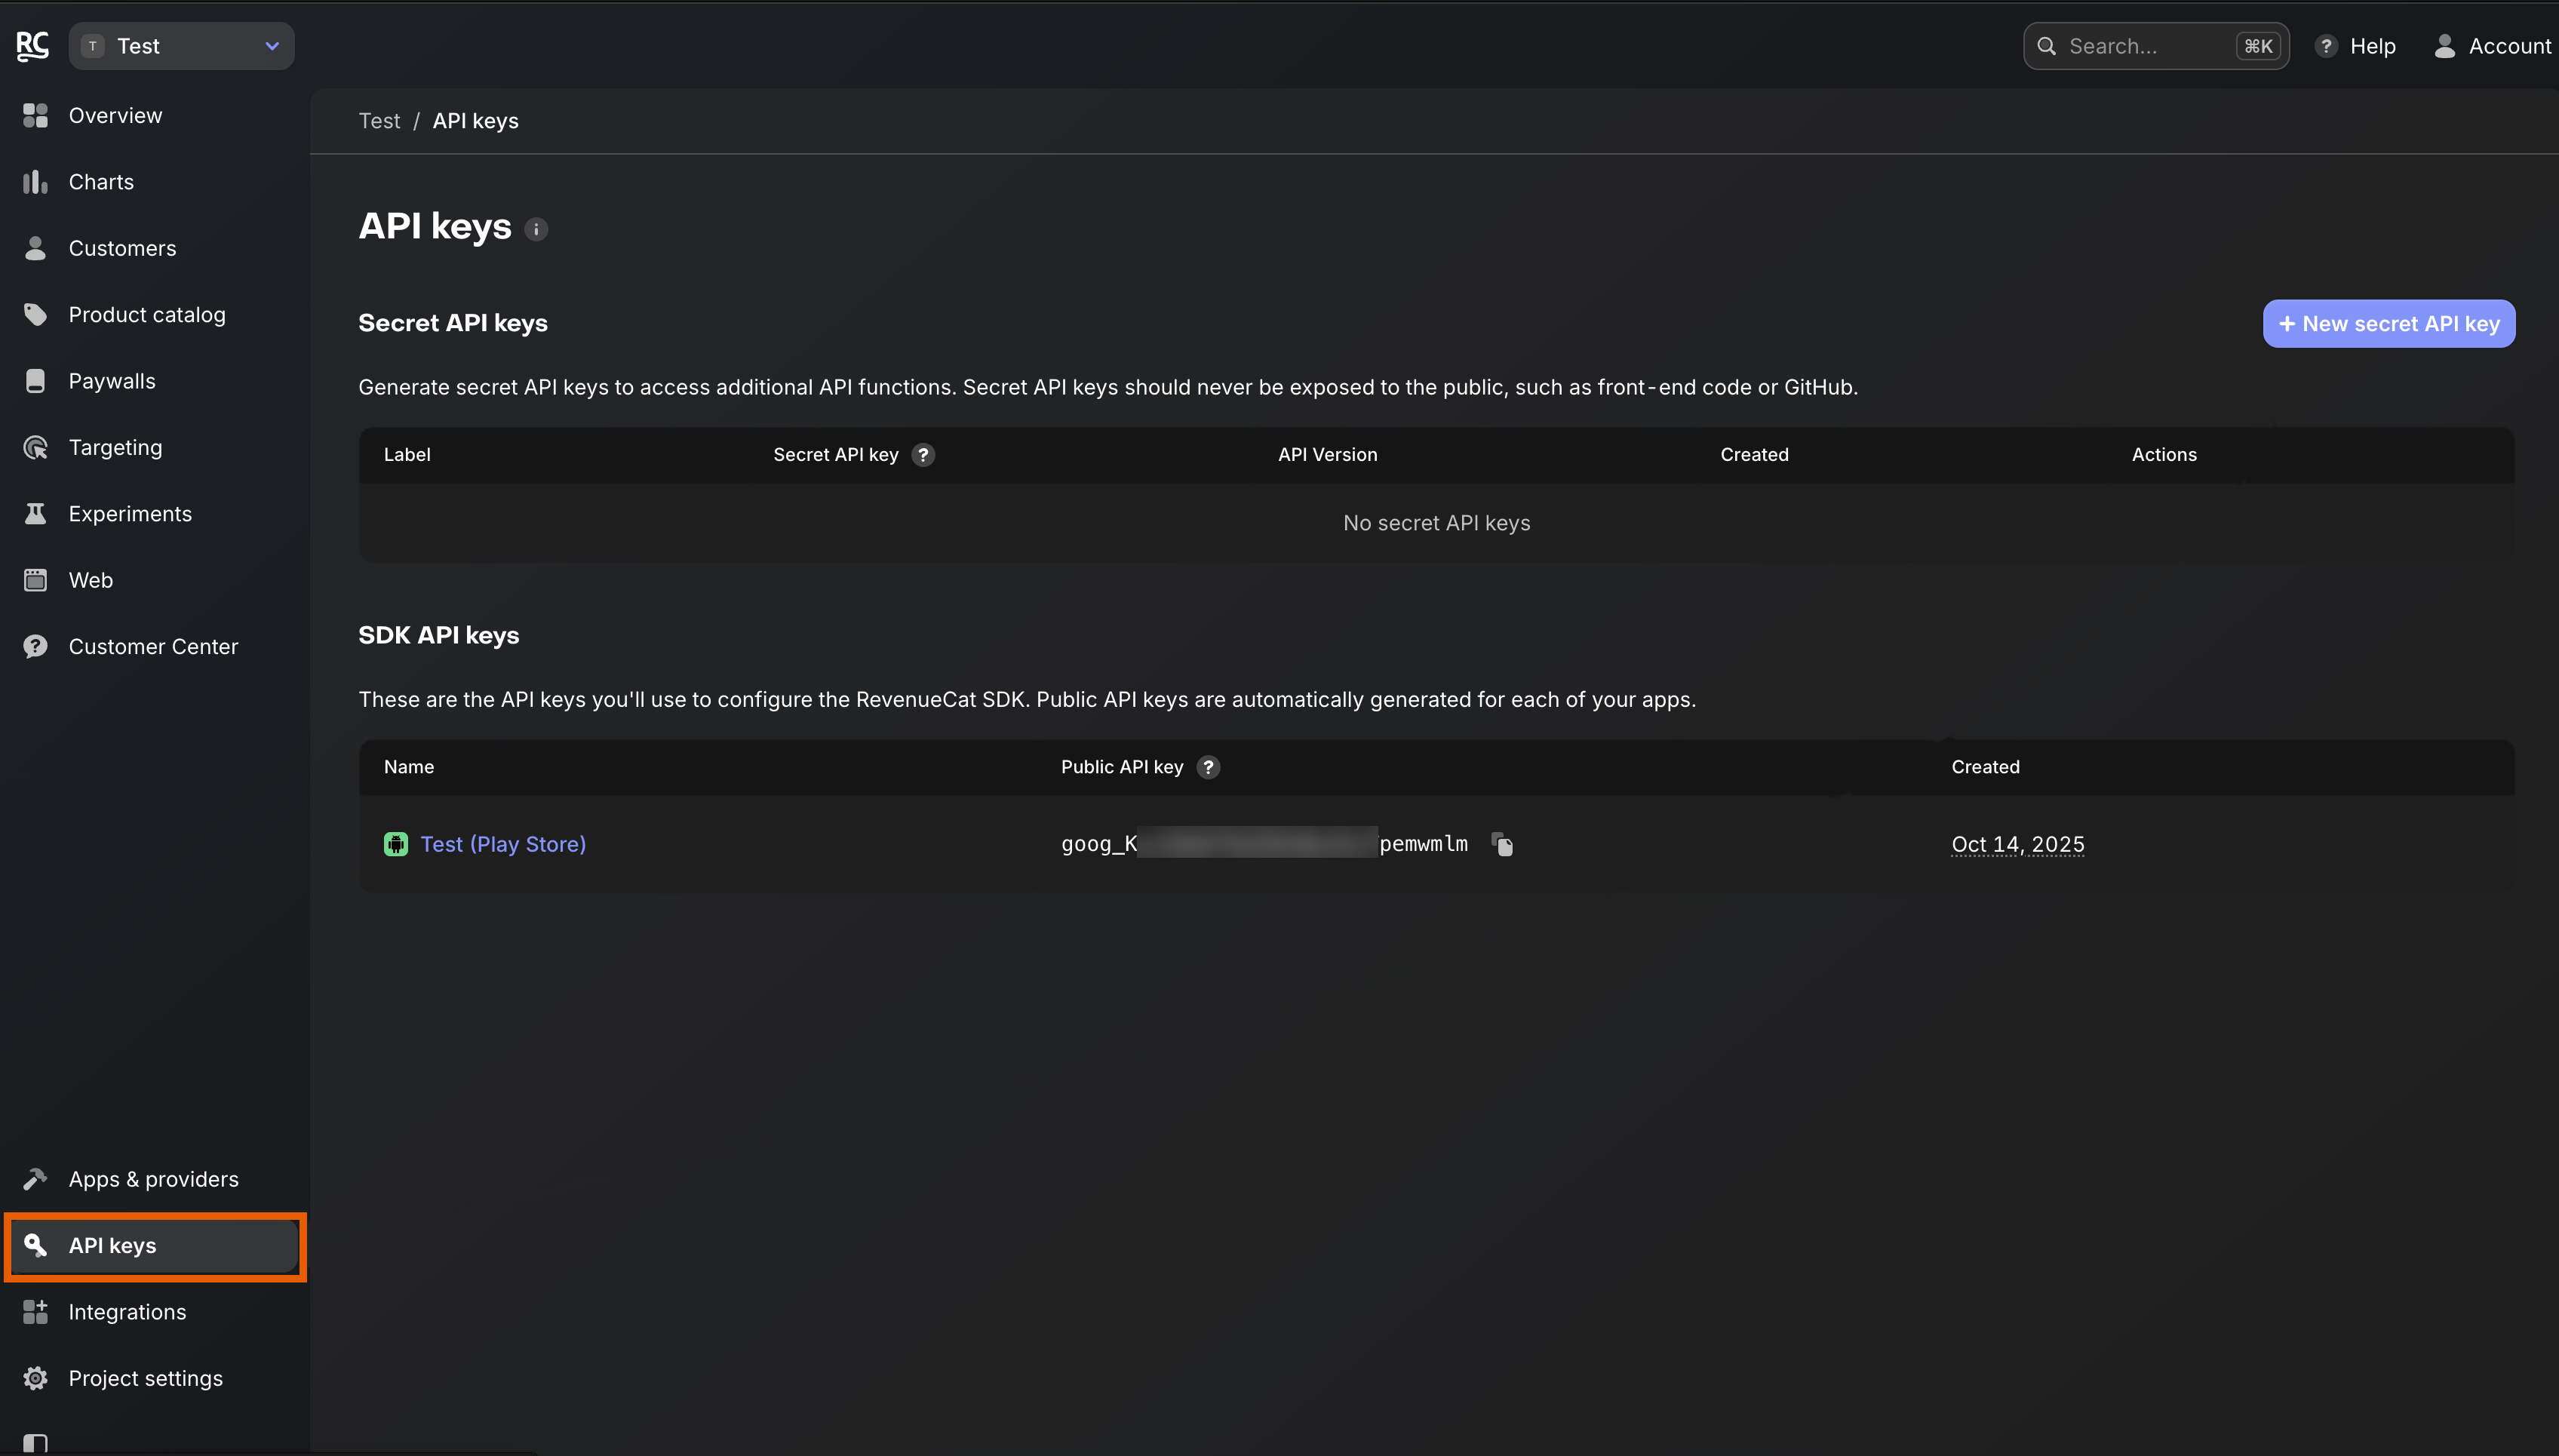
- Click + New secret API key at the top right.
- Enter API key details, then click Generate:
- Name: Enter any name you like
- API version:
V1
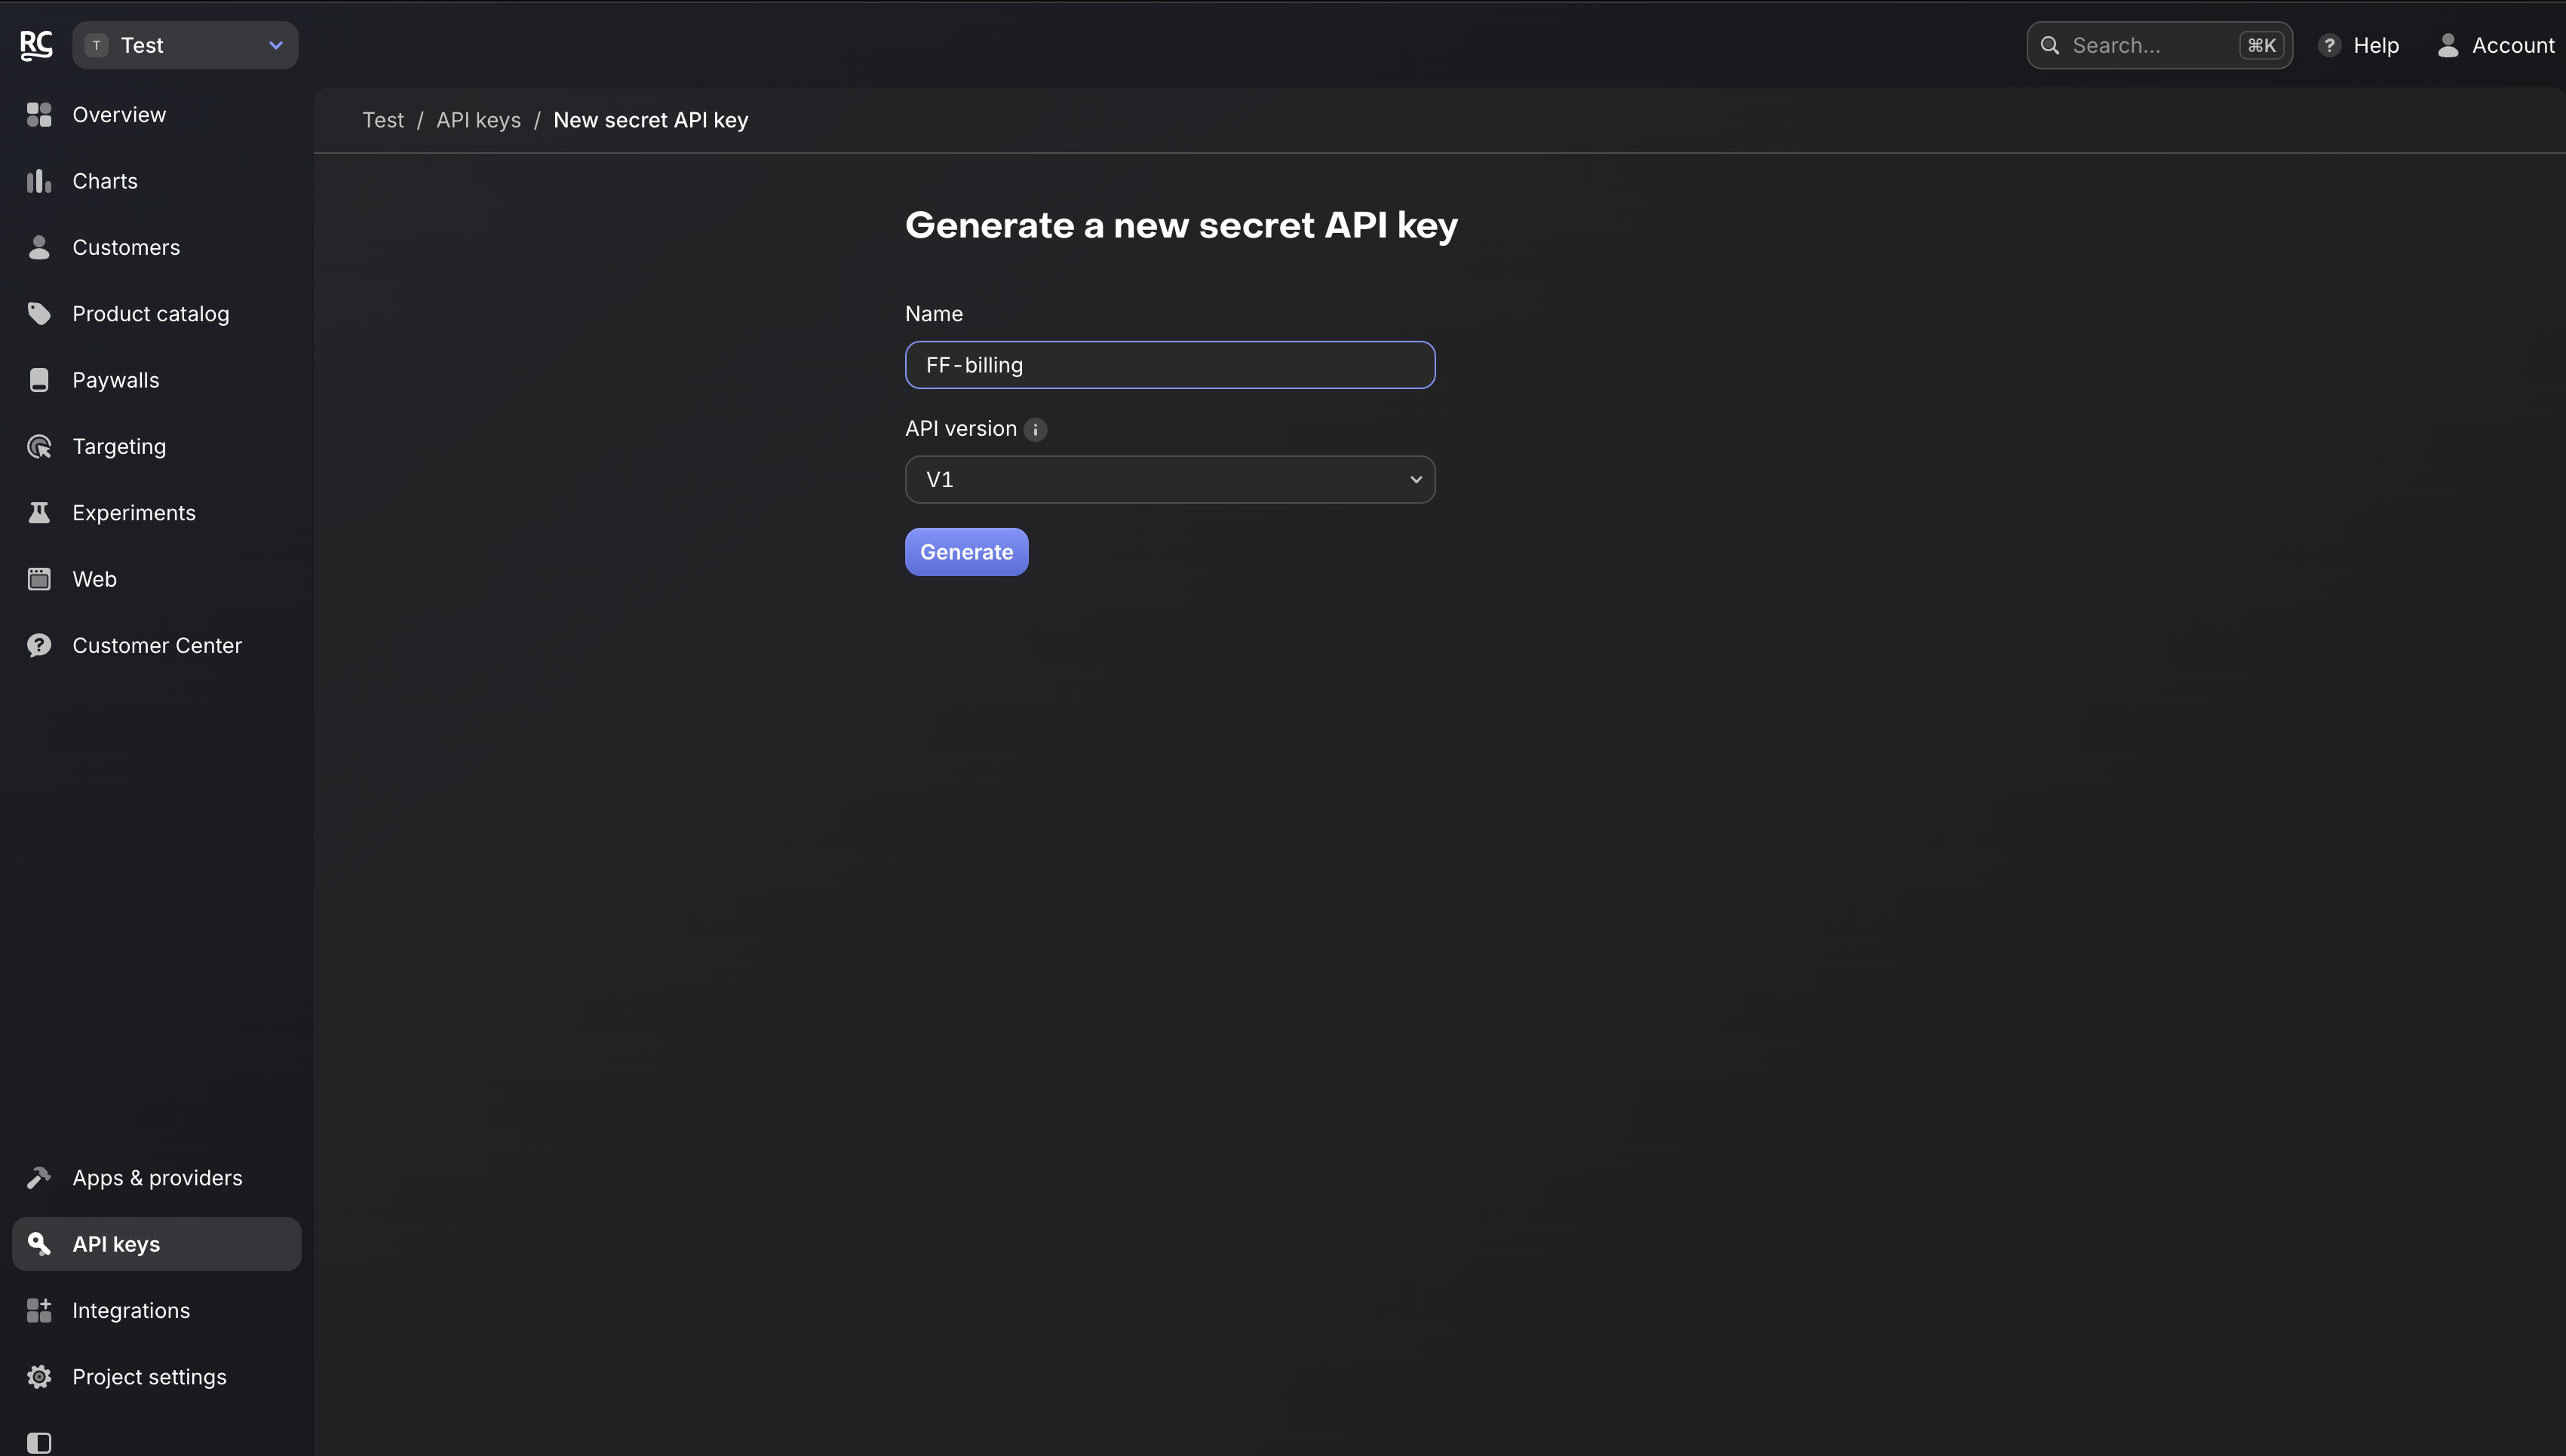
- Copy the Secret API key.
- Go back to RevenueCat settings in FunnelFox and paste the key into the Secret Key field.

Configure entitlement
- In your RevenueCat project, go to Product catalog > Entitlements.

- Click + New Entitlement on the right.
- Enter entitlement details, then click Add:
- Identifier:
premium - Description: Any description you like
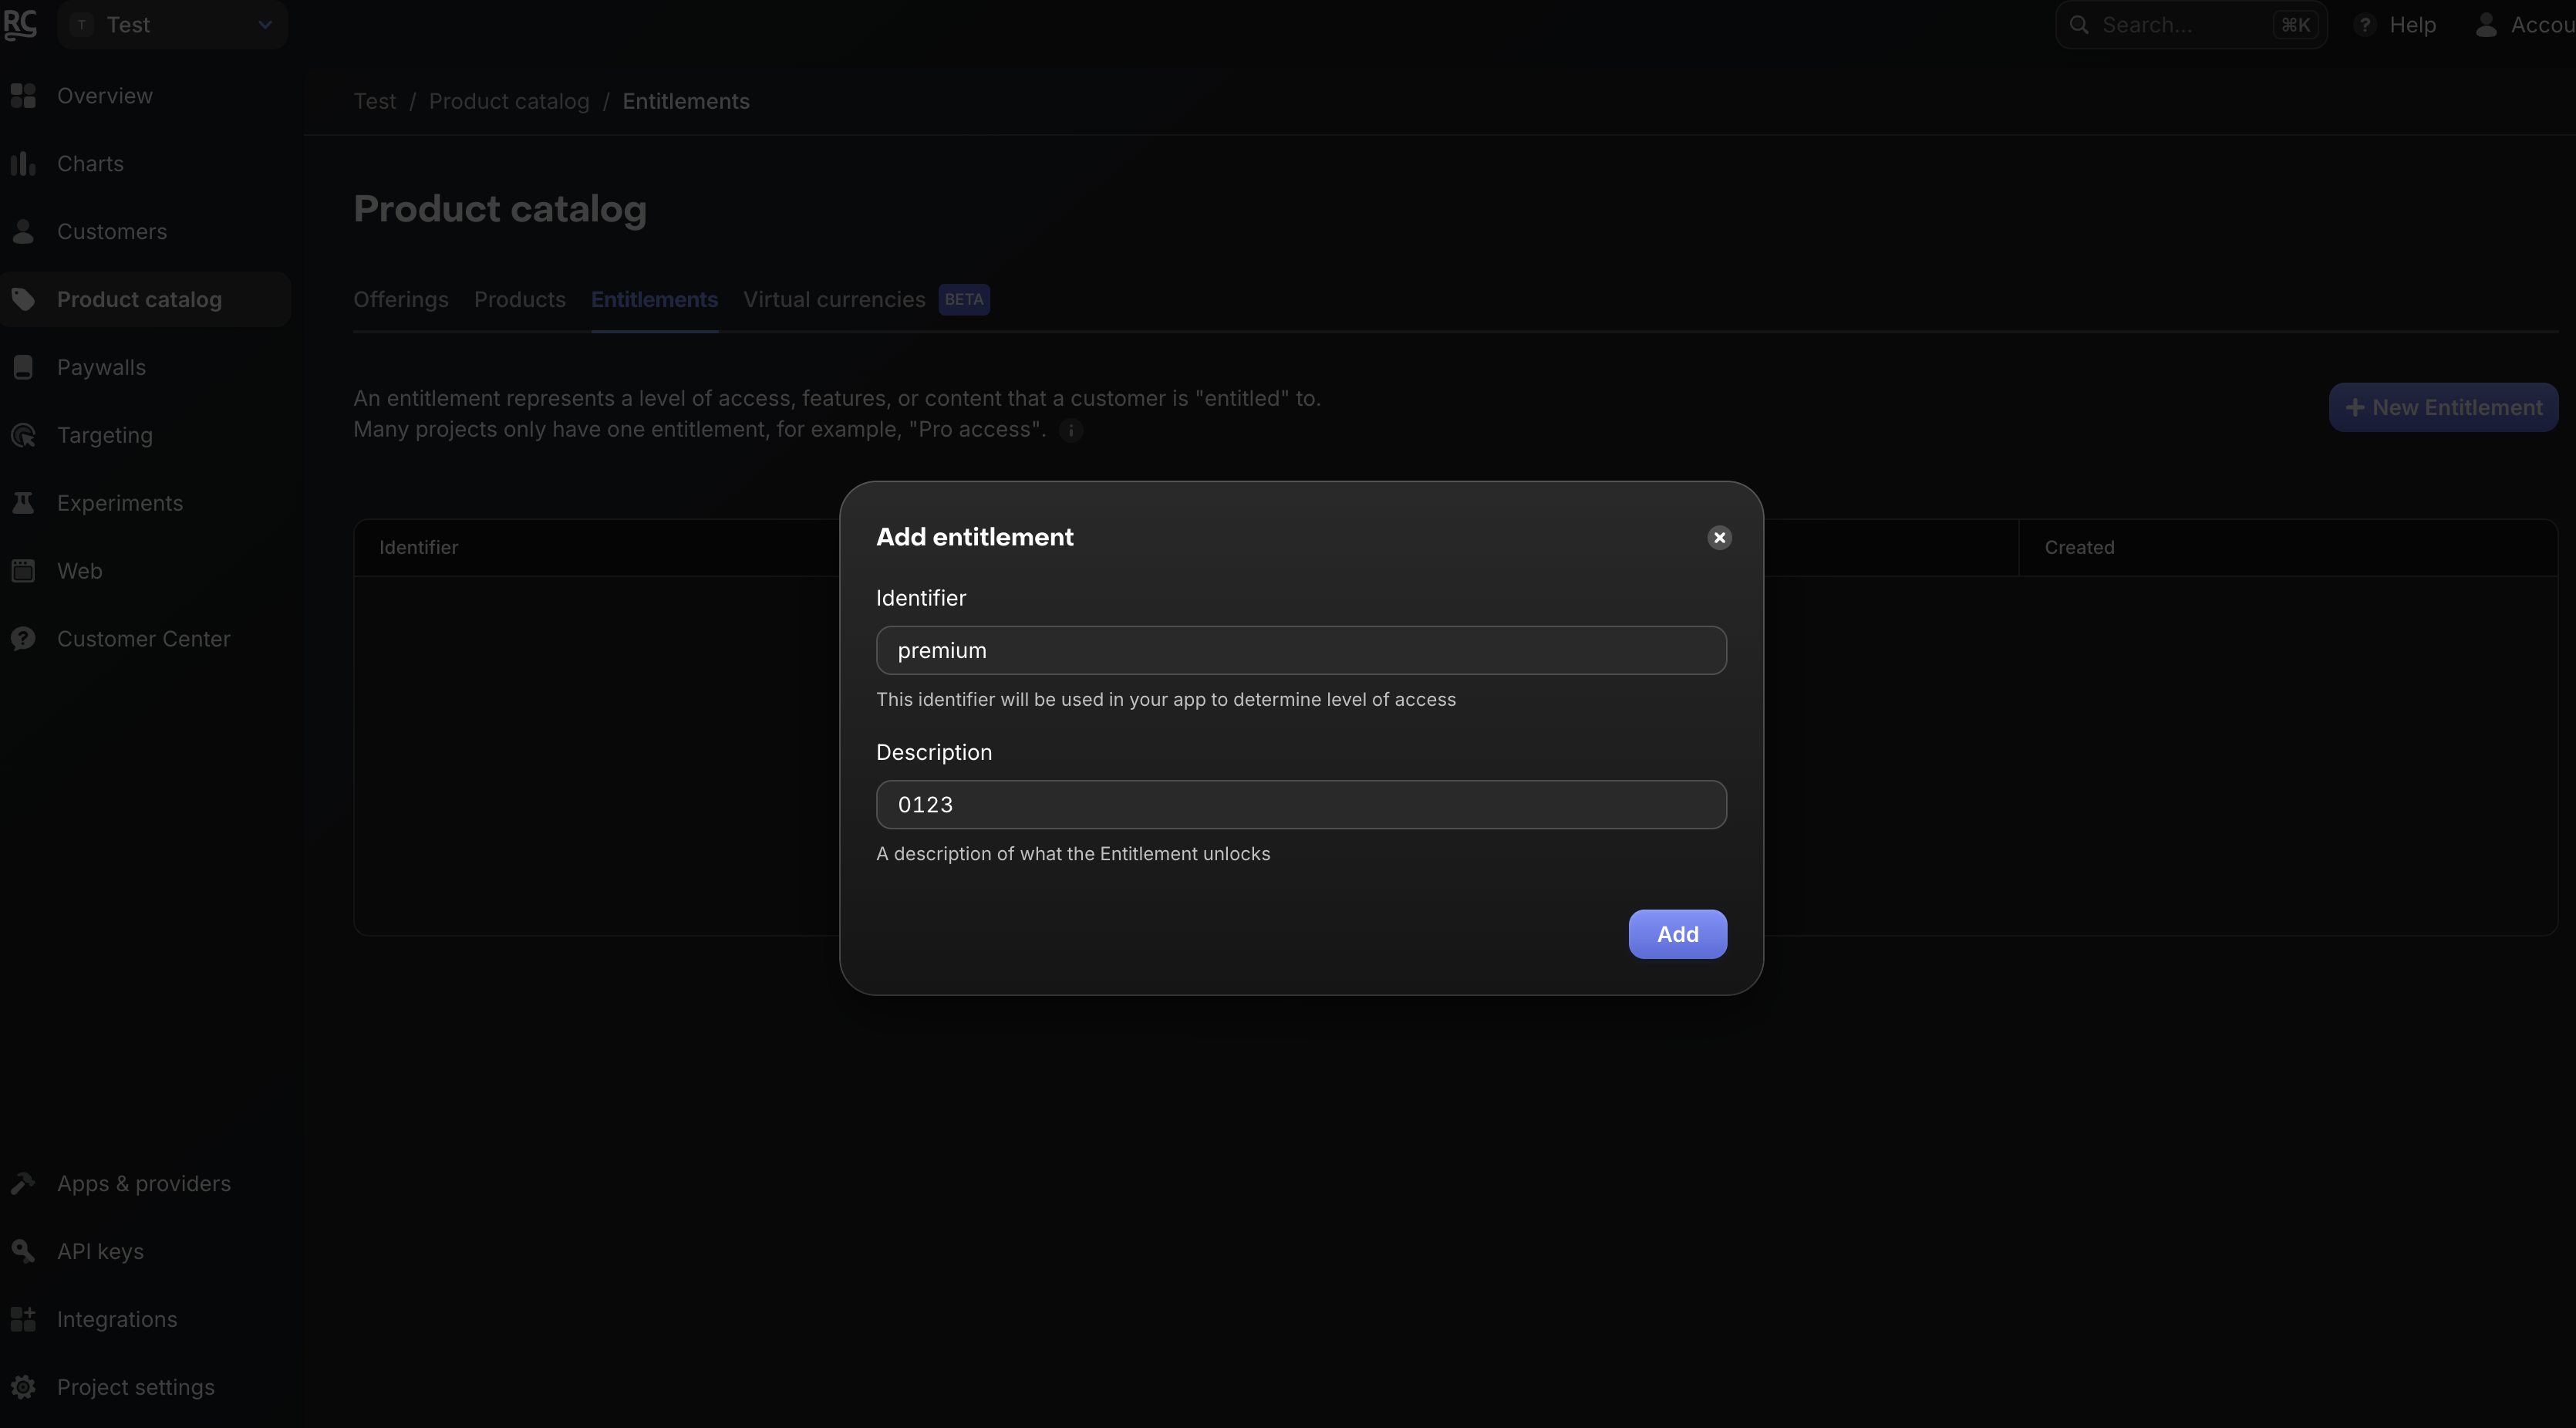
- Go back to RevenueCat settings in FunnelFox and enter the same identifier value
premiuminto the Default Entitlement field.
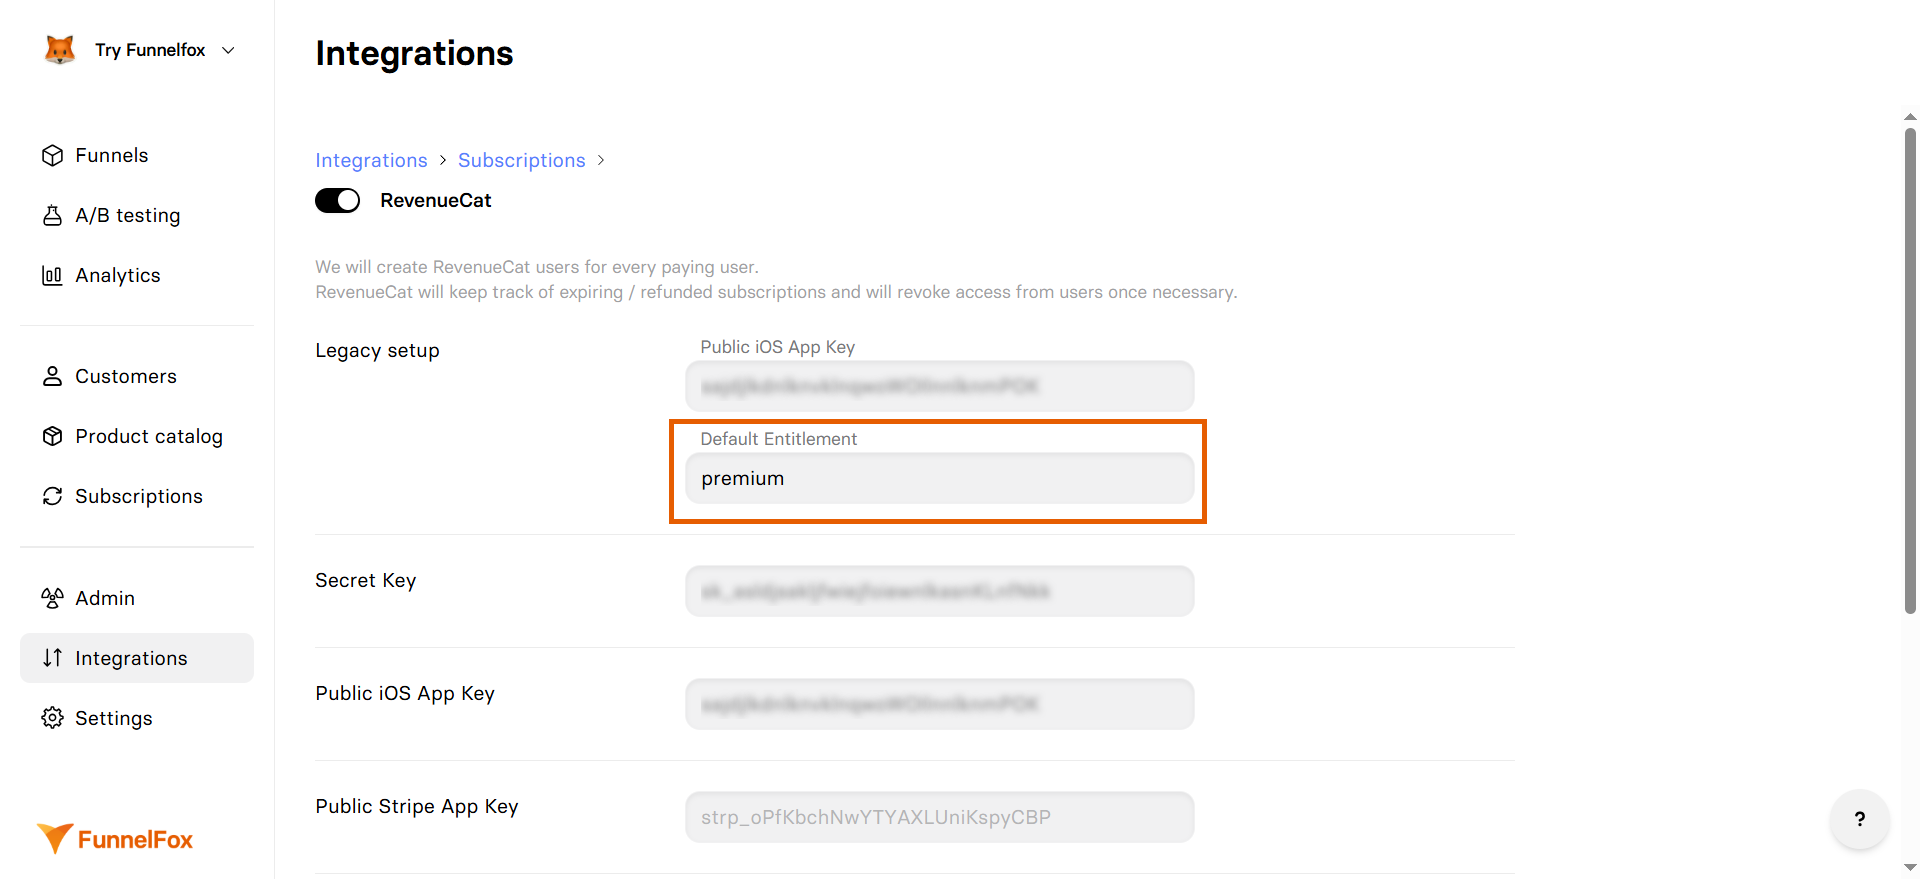
- Click Save changes.
Customer profile creation
User ID
FunnelFox creates RevenueCat customers with an App User ID. The logic depends on when your FunnelFox project was set up:- FunnelFox projects created Nov 1, 2025 or later
- FunnelFox projects created before Nov 1, 2025
Email is no longer used as the default App User ID for FunnelFox projects created after November 1, 2025.
- Custom input: If you add an input element with the
_USERID_element ID, its value becomes the App User ID. - From your backend: When you fetch the user ID from your backend, set it using custom code inside a Raw HTML element:
- Profile-based ID (default): If none of the above are provided, FunnelFox uses
fnlfx_+ FunnelFox profile ID.
Unlike Adapty, RevenueCat integration doesn’t support URL parameters for existing customer IDs. Users must be identified through your app.
User attributes
FunnelFox sets the following attributes in RevenueCat customers:| Attribute | Value | Description |
|---|---|---|
| User’s email | If collected in the funnel | |
| fnlfx_profile_id | Profile ID | FunnelFox’s internal profile ID |
User identification
Your app needs to identify users and check their subscription status. For example:React Native
Learn about user identification for iOS, Android, and more in RevenueCat’s documentation.