
How pricing localization works
A localized price has three parts, and all three must agree:- A price in your PSP: One price or product per currency, created in your PSP dashboard.
- A locale that selects it: Each locale points its Checkout element at one of those prices.
- Display text that matches: Plan picker, Price picker, and Text elements show text you type, so you update it in every locale.
Set up pricing localization
Create your prices first, then point each locale at the right one.1. Create price for each currency
Create one price per currency in whichever payment provider holds your product catalog.- Stripe
- Paddle
- Solidgate
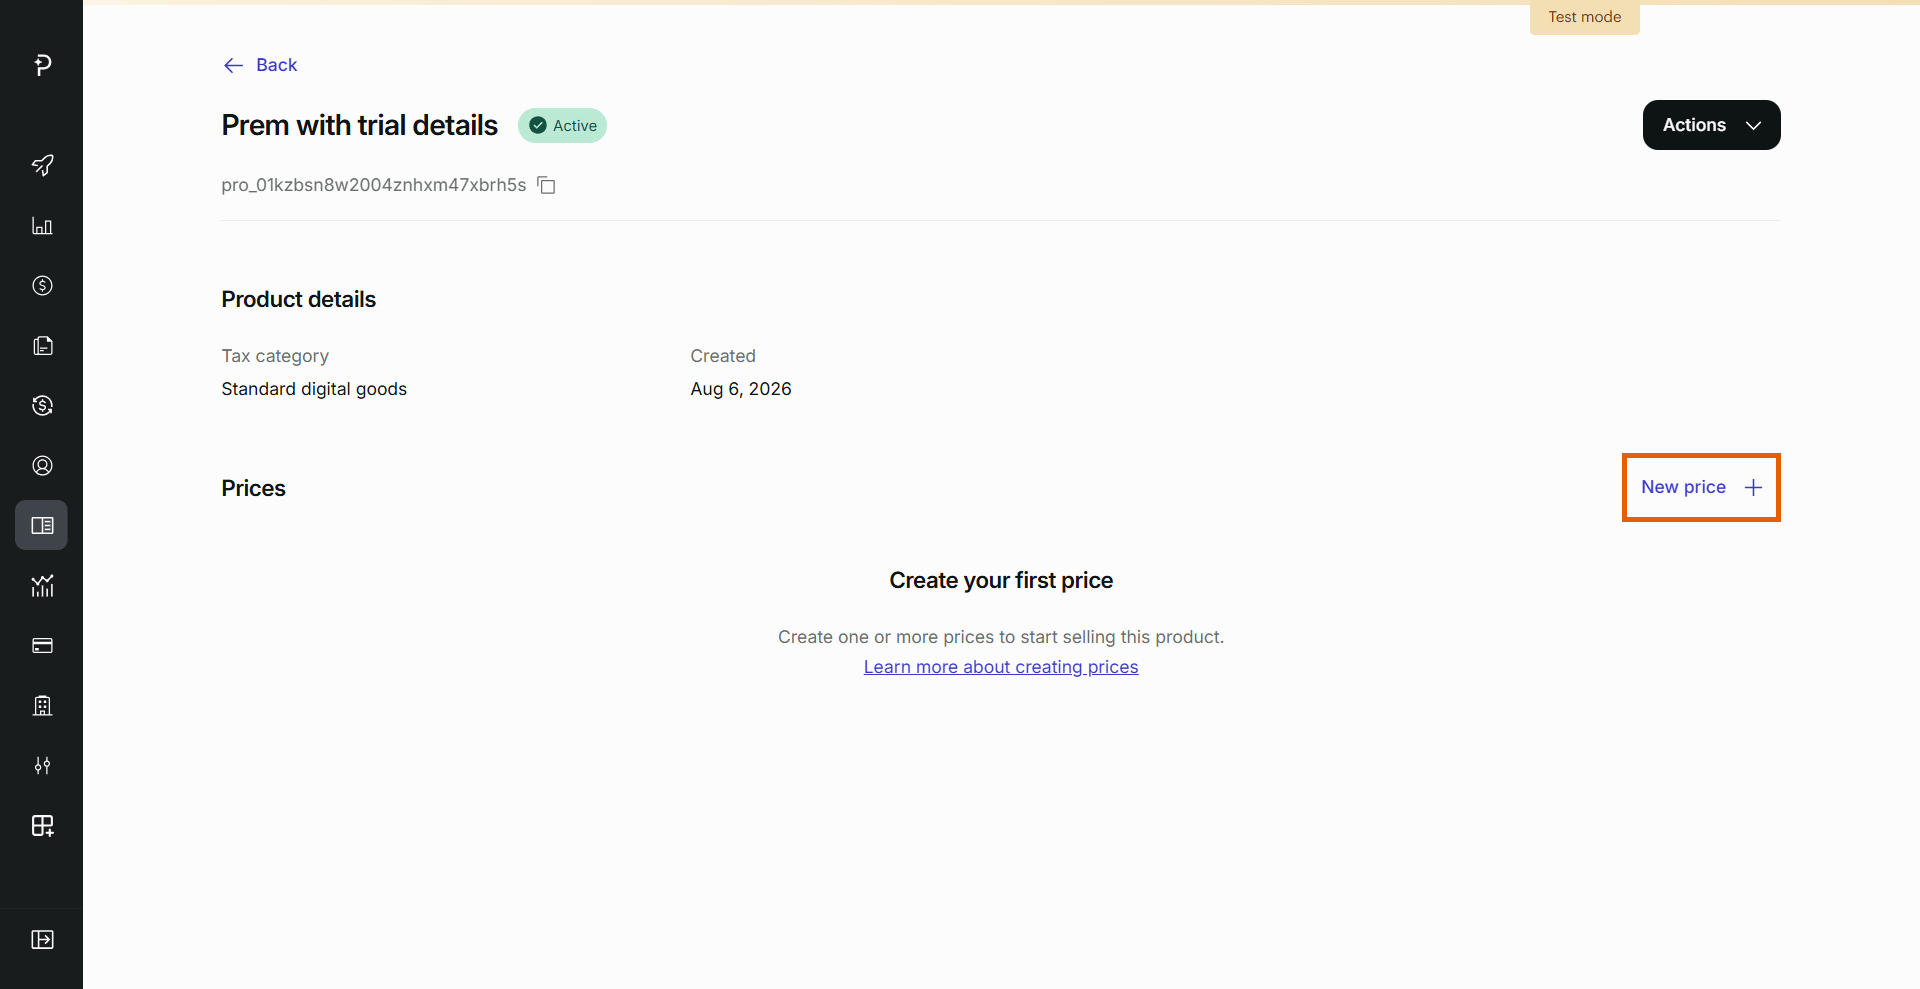
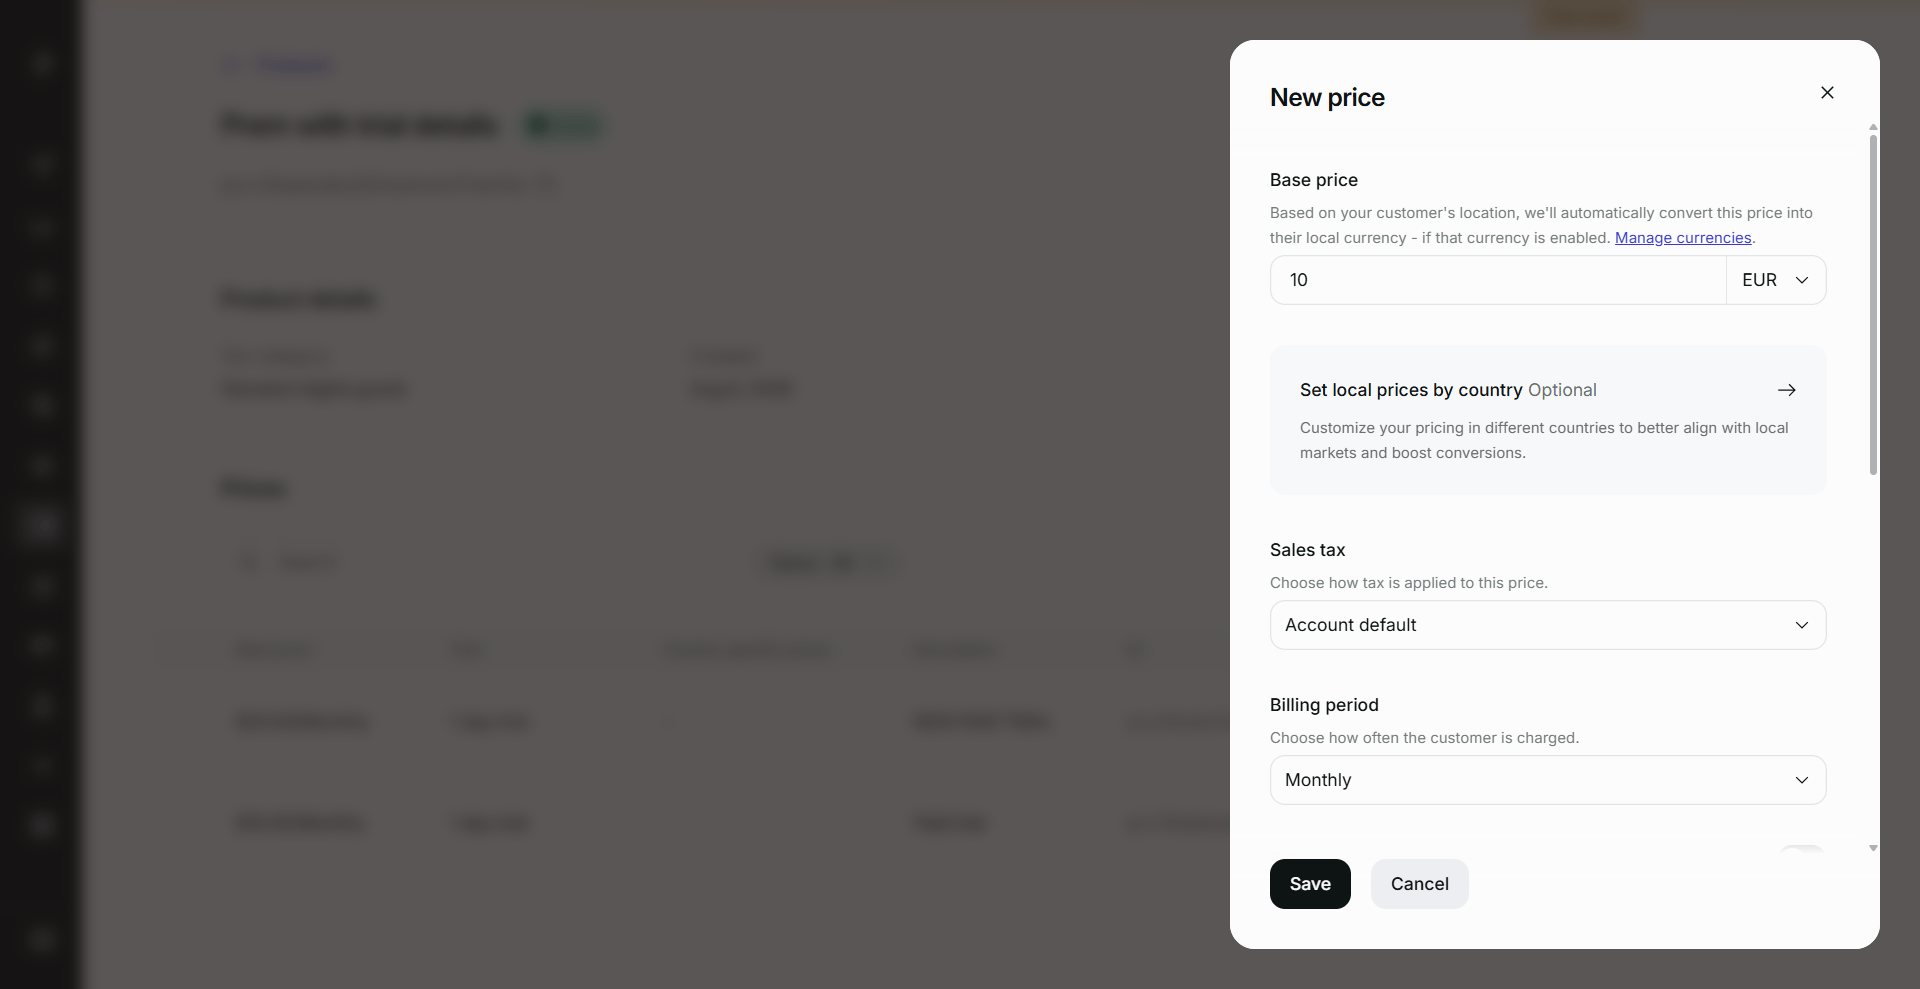
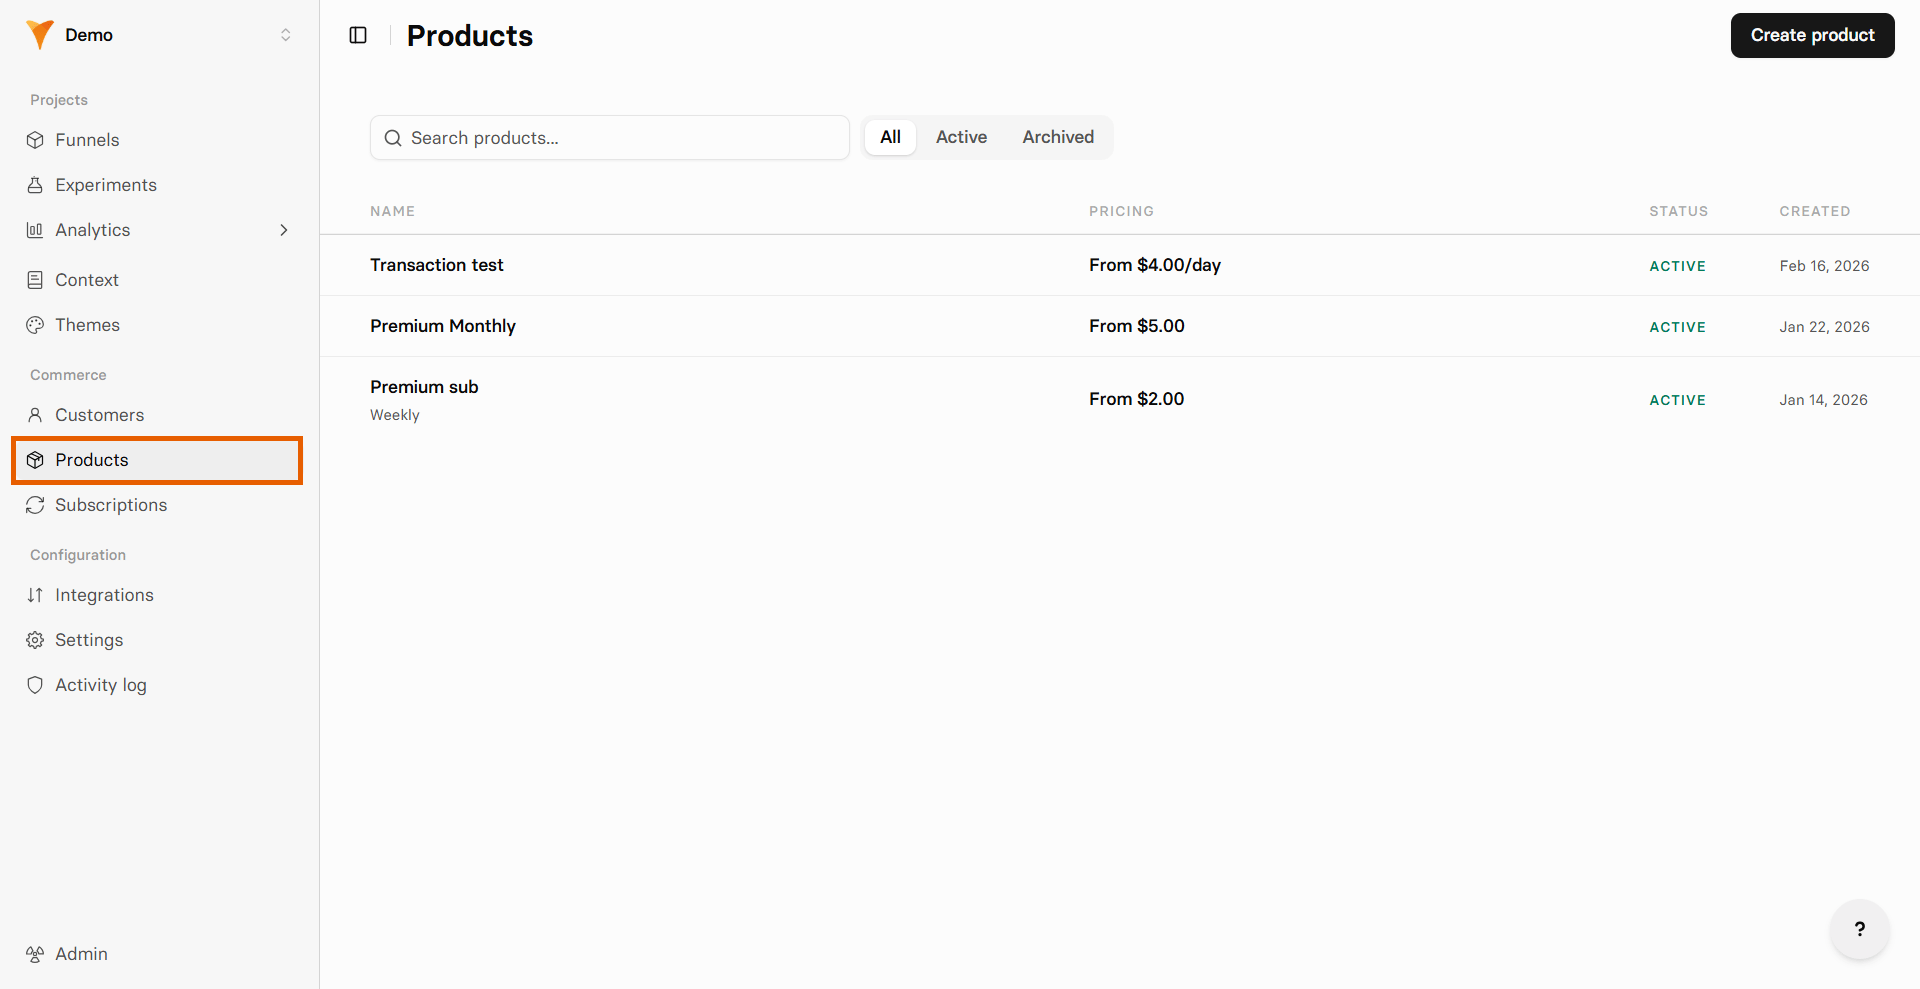
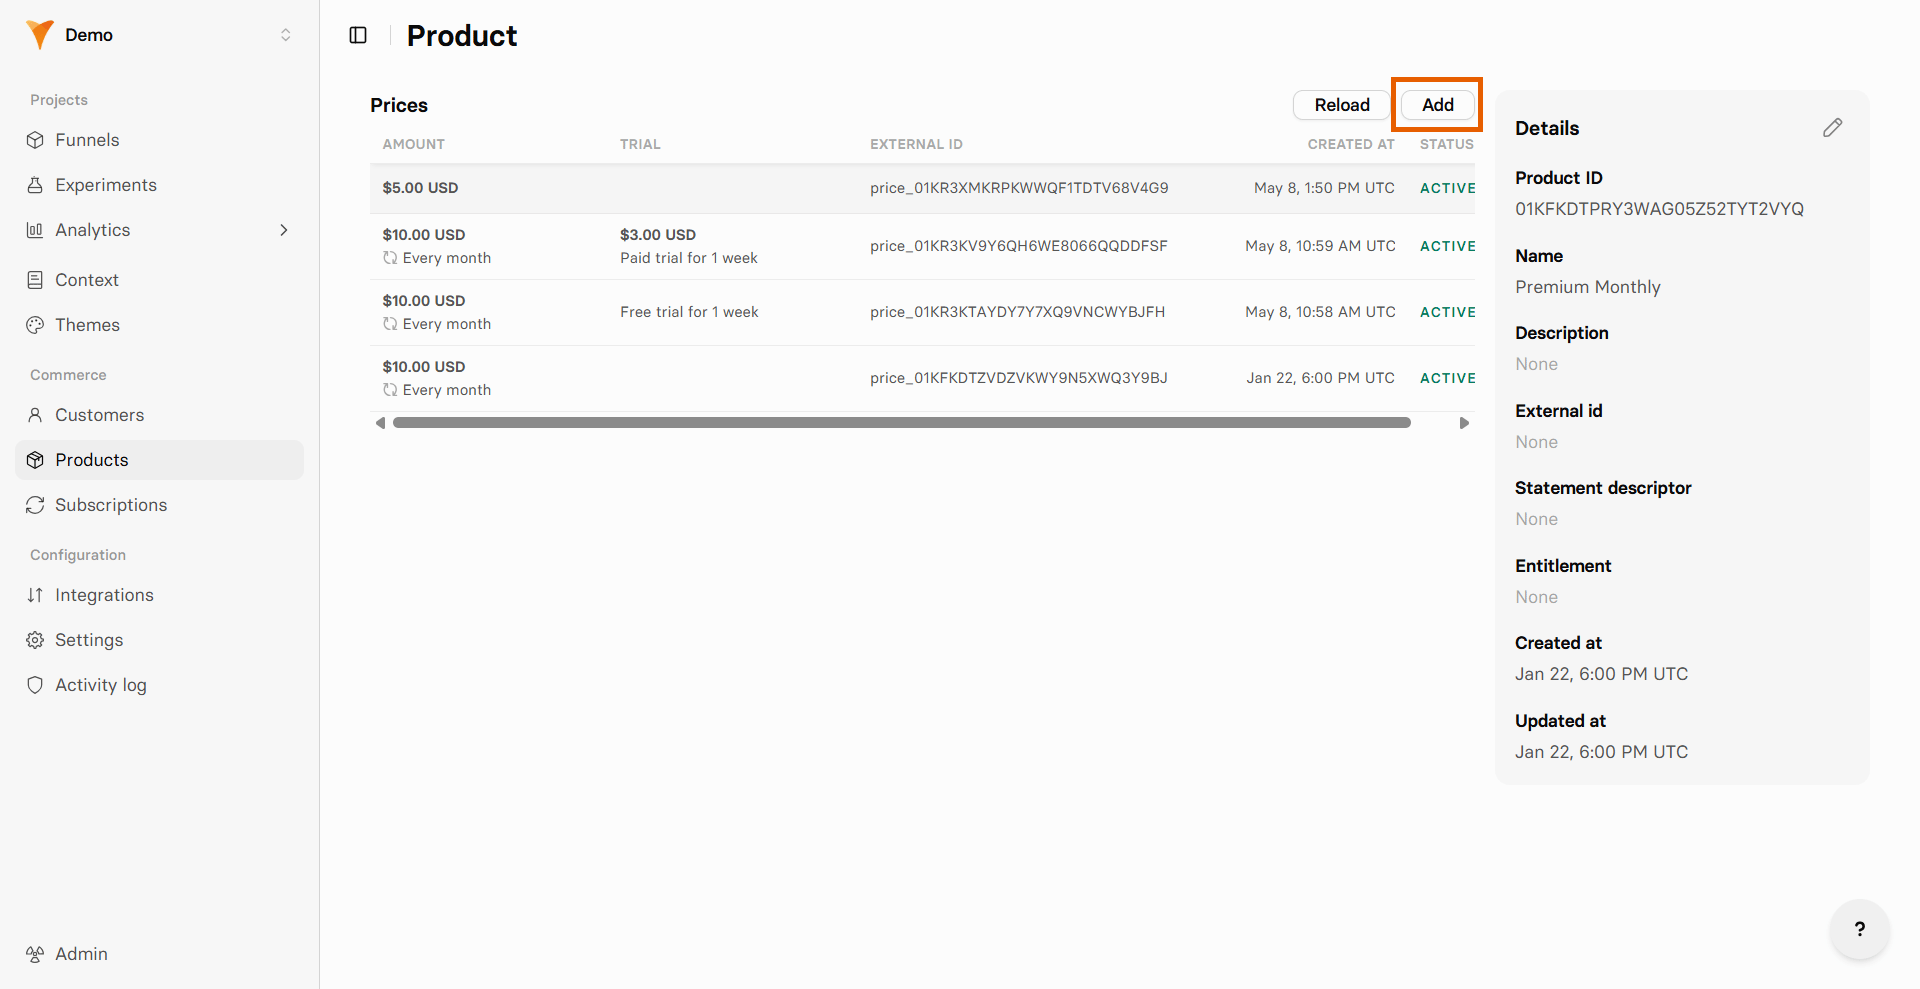
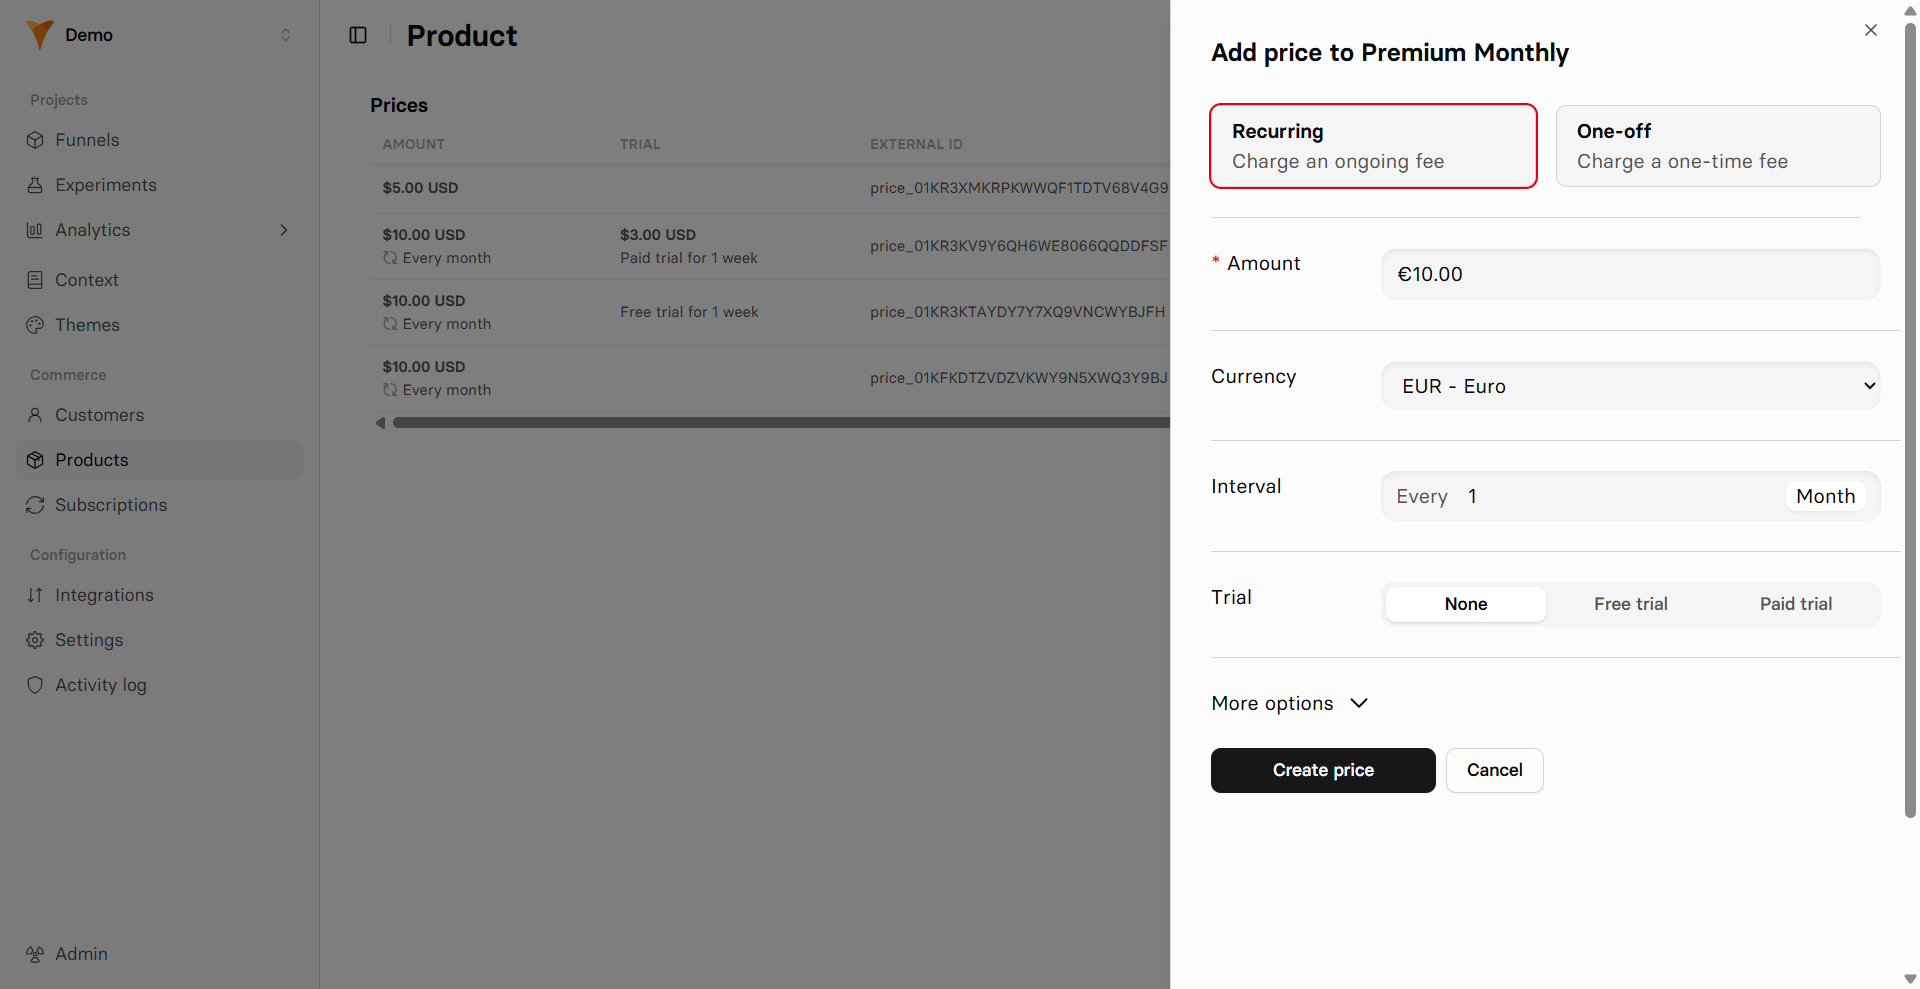
- FunnelFox Billing
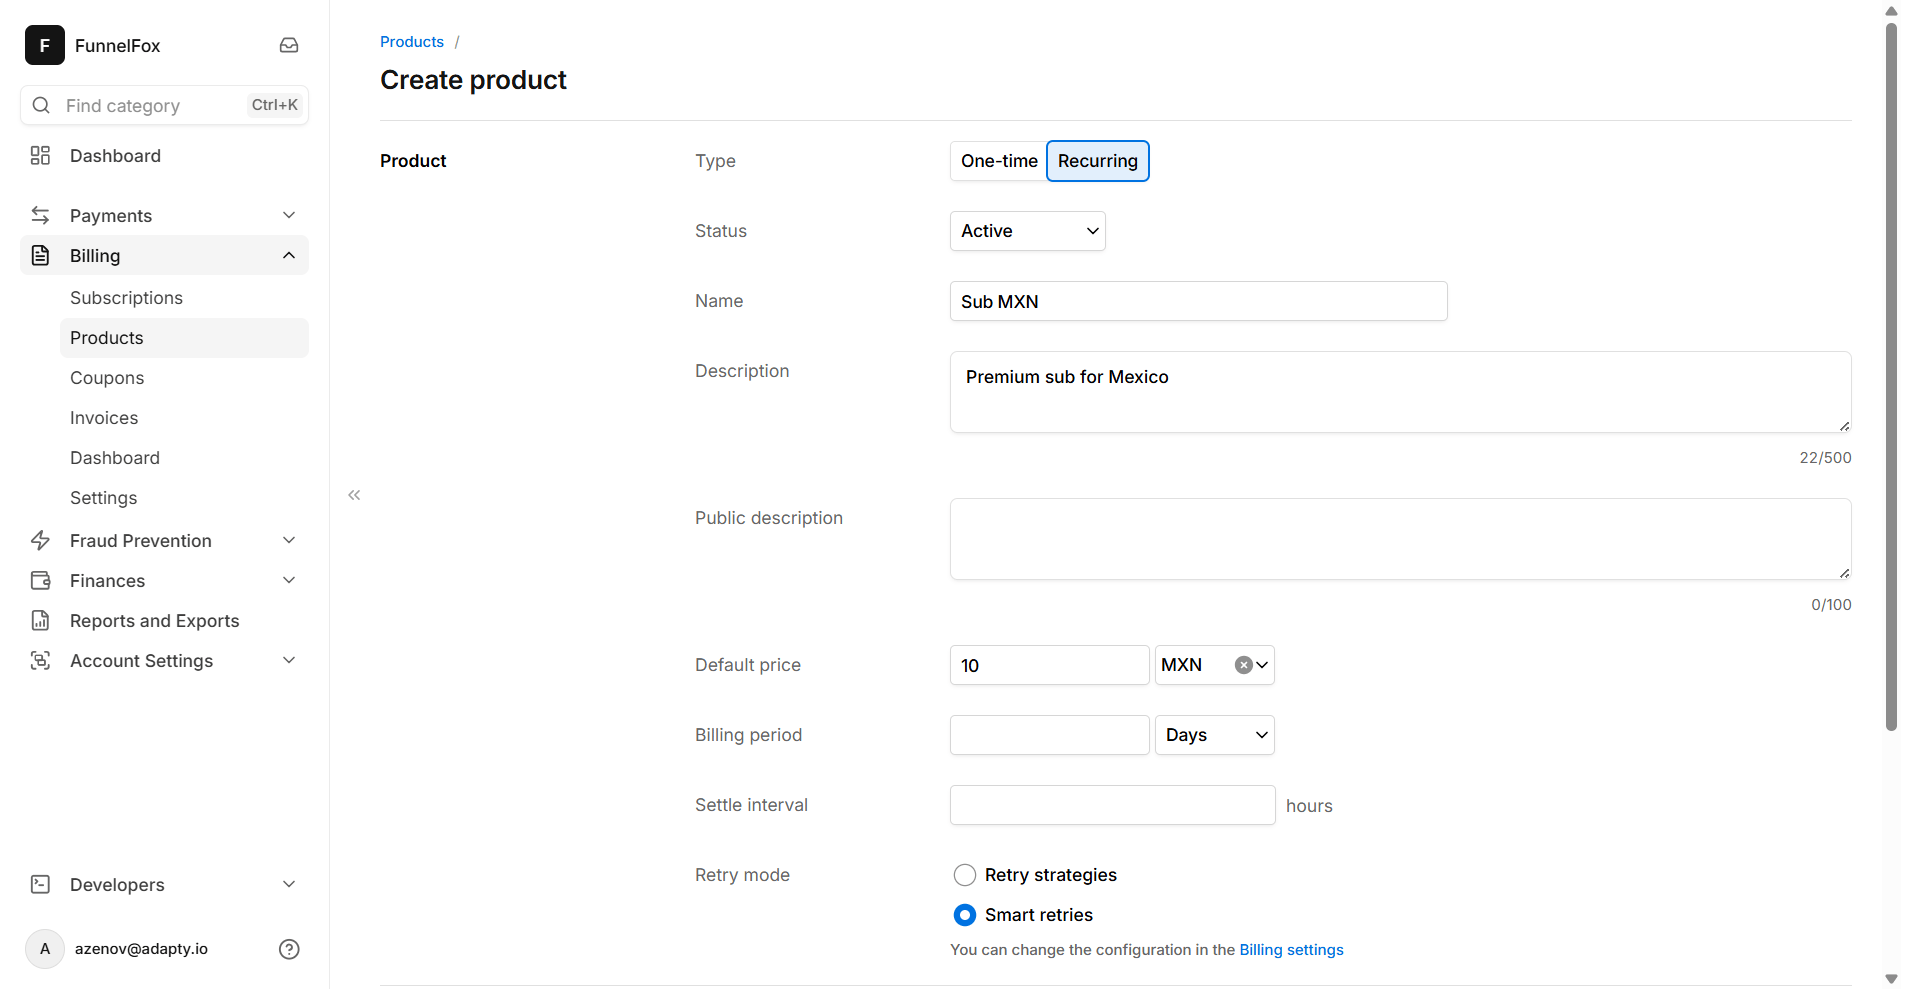
Create one Stripe price
per currency. Several prices can live on the same Stripe product, so one
product can carry your USD, EUR, and GBP prices.For a paid trial, also create one
one-time Stripe product per currency to charge for the trial.FunnelFox automatically syncs your Stripe products when the Editor page is reloaded.
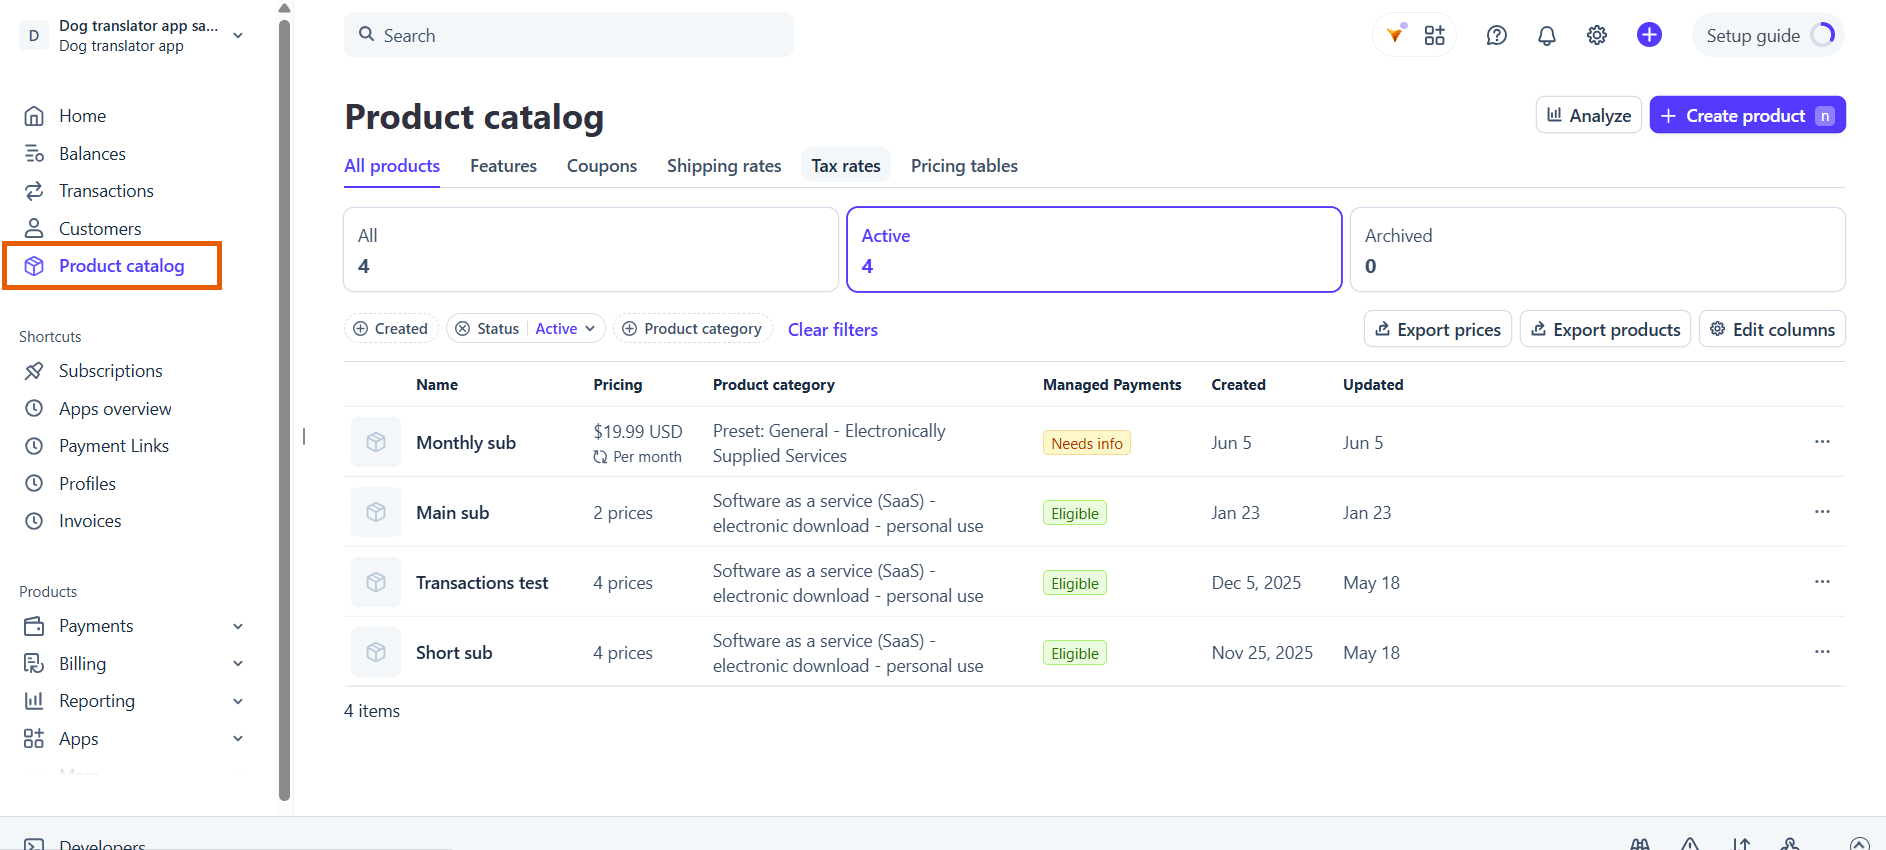
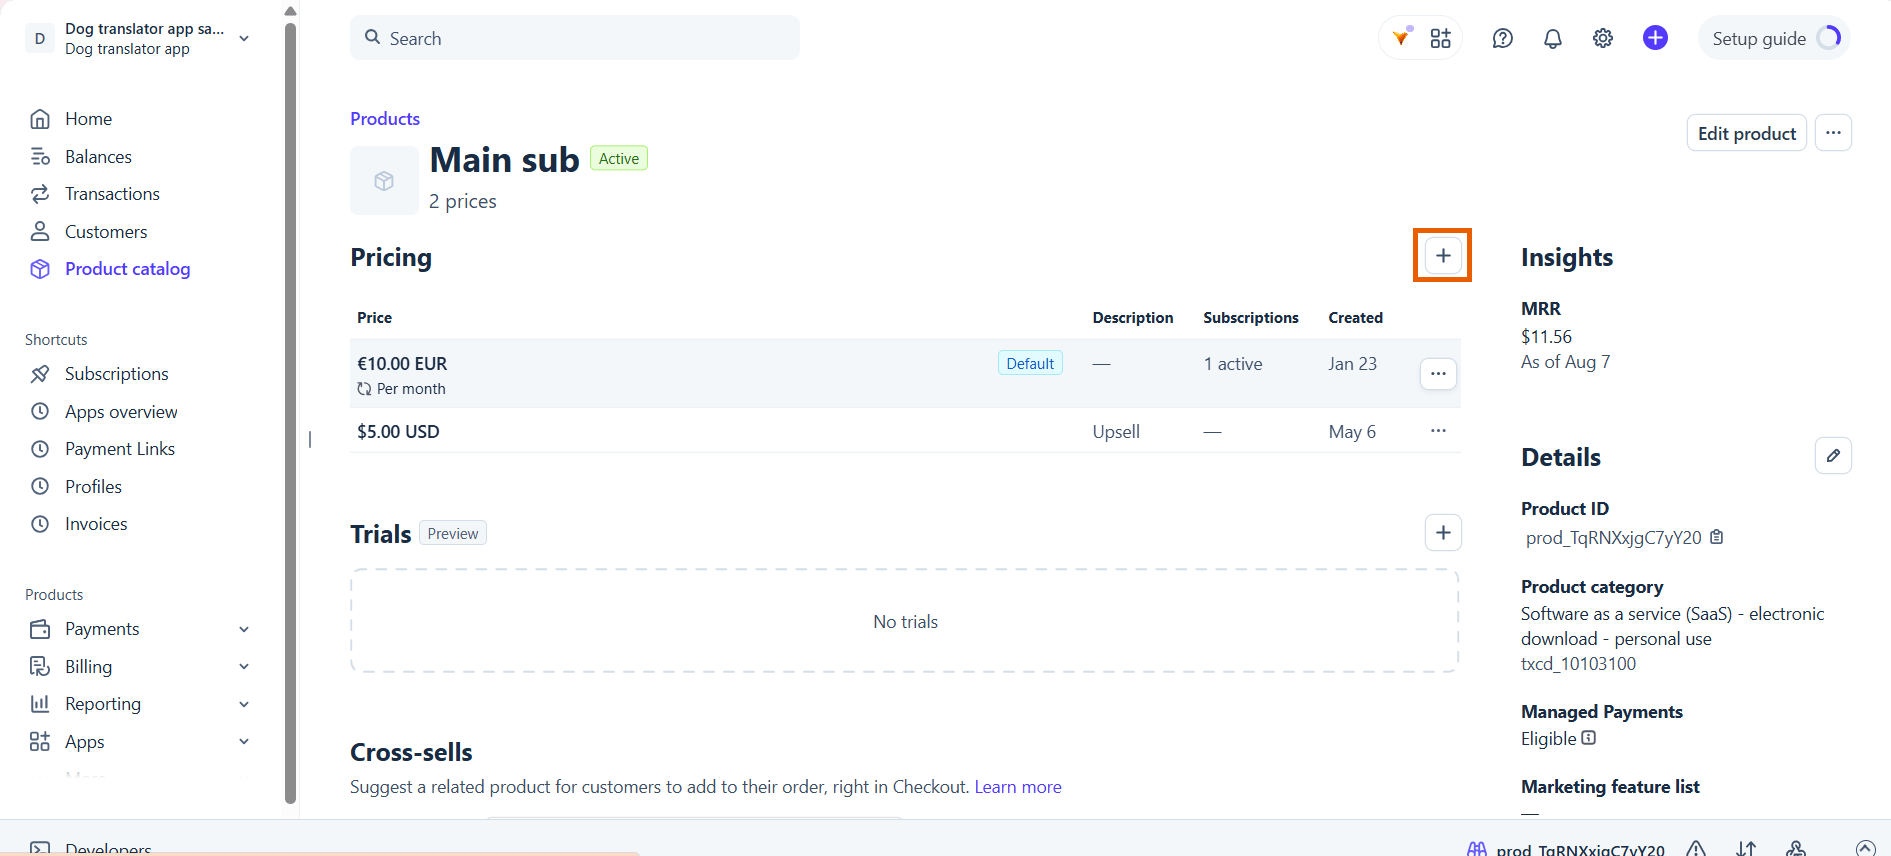
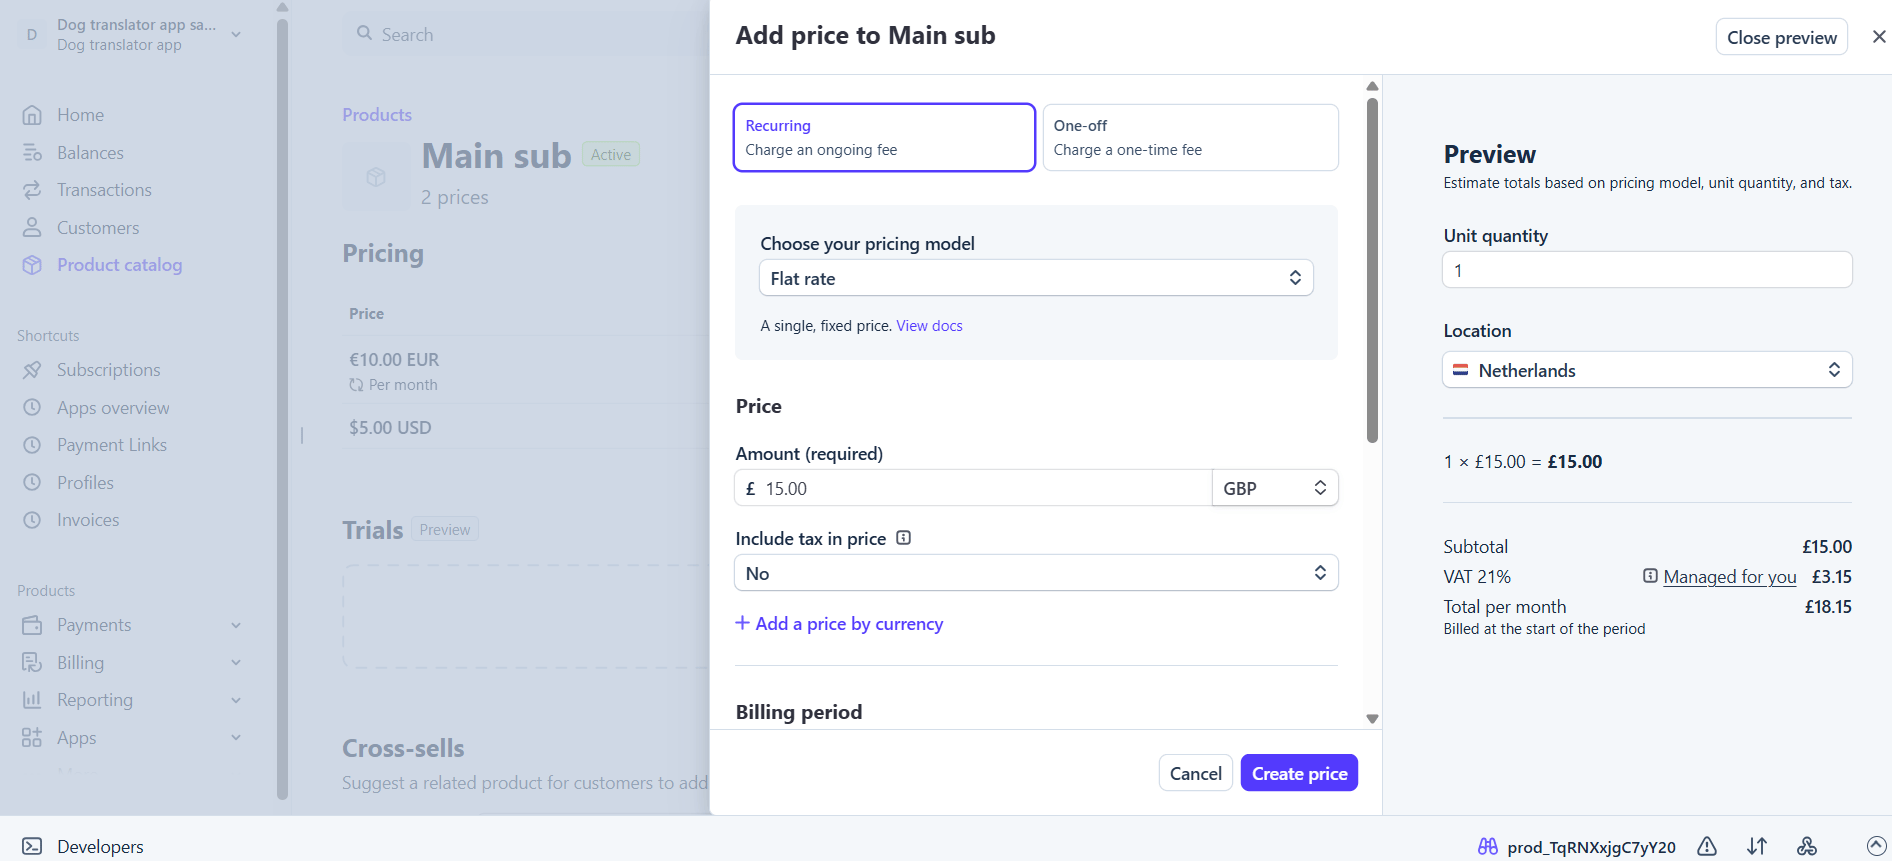
How to create prices in Stripe
How to create prices in Stripe
- Go to Product catalog in your Stripe dashboard.
- Click the product to open it.
- Click + under Pricing.
- Enter the price details, including the currency.
- Click Create price.
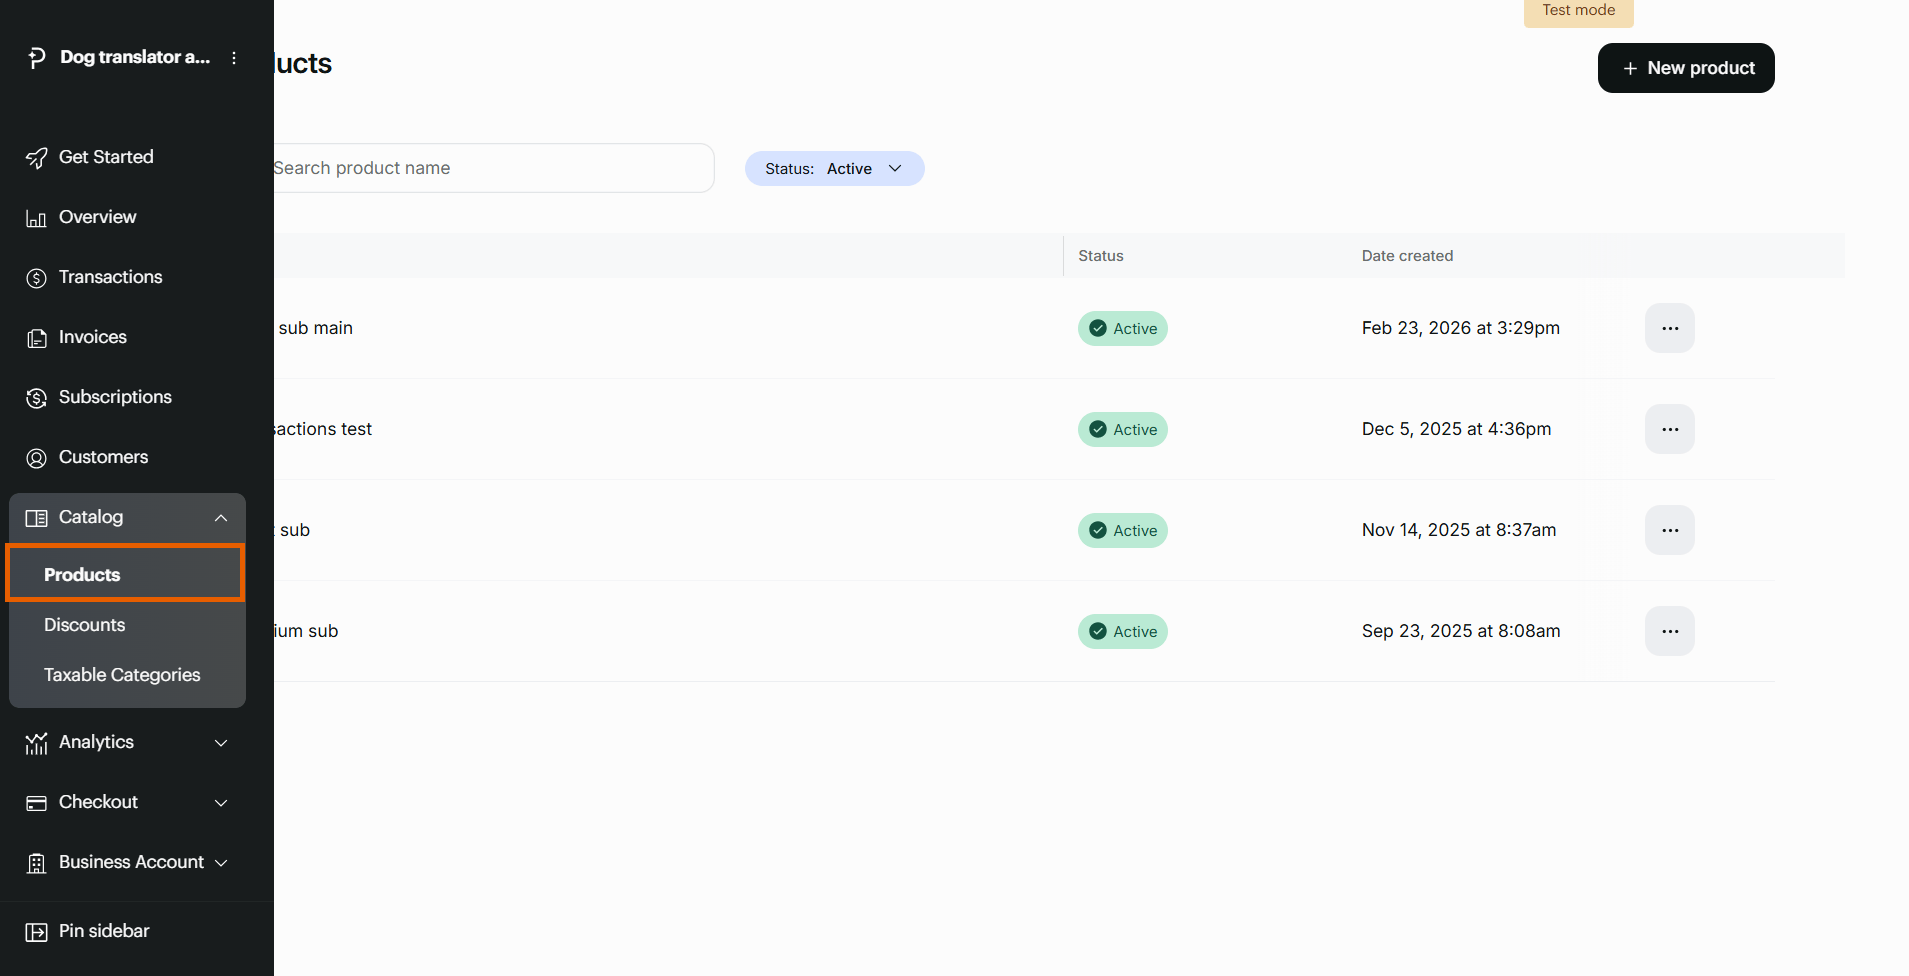
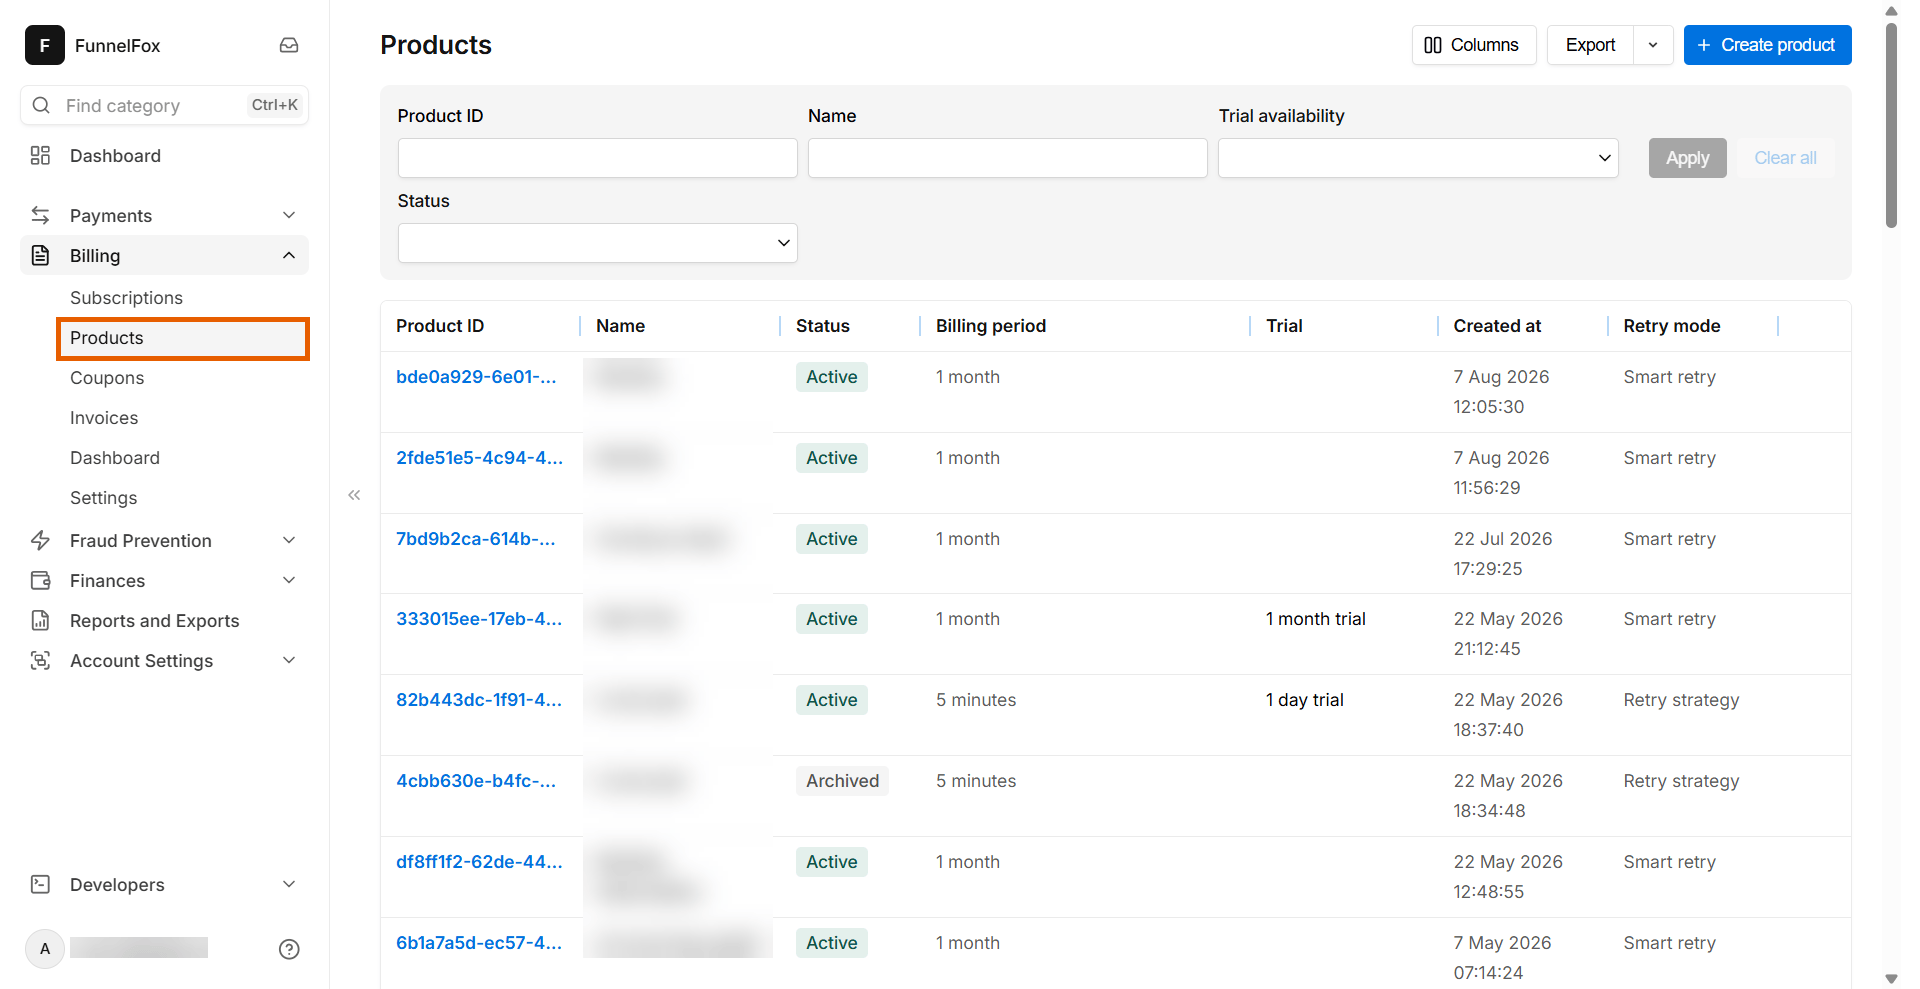
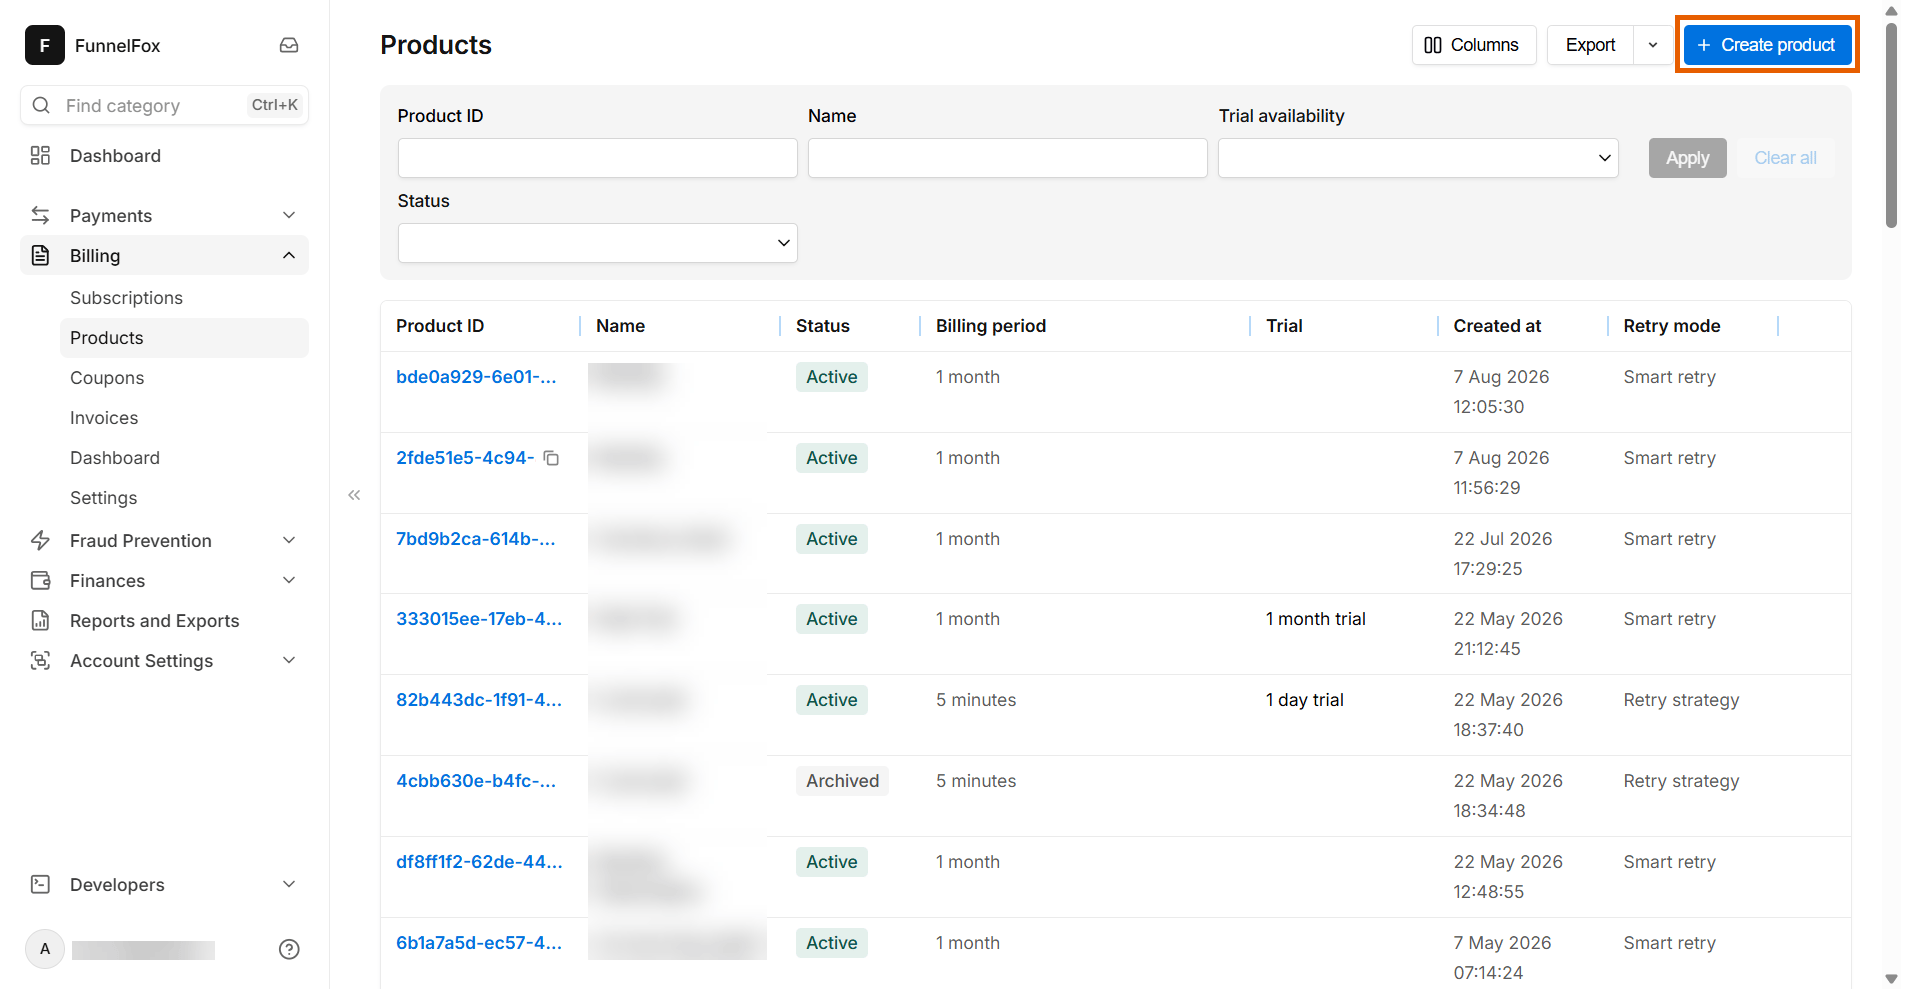
On the Stripe via FunnelFox Billing integration path, products aren’t fetched
from Stripe. Create your per-currency prices on the Products page in FunnelFox instead.
2. Select price in each locale
Repeat these steps for every locale that needs its own currency.1
Open the locale
Open the funnel in the Editor and switch to the locale using the language switcher on the top right of your canvas.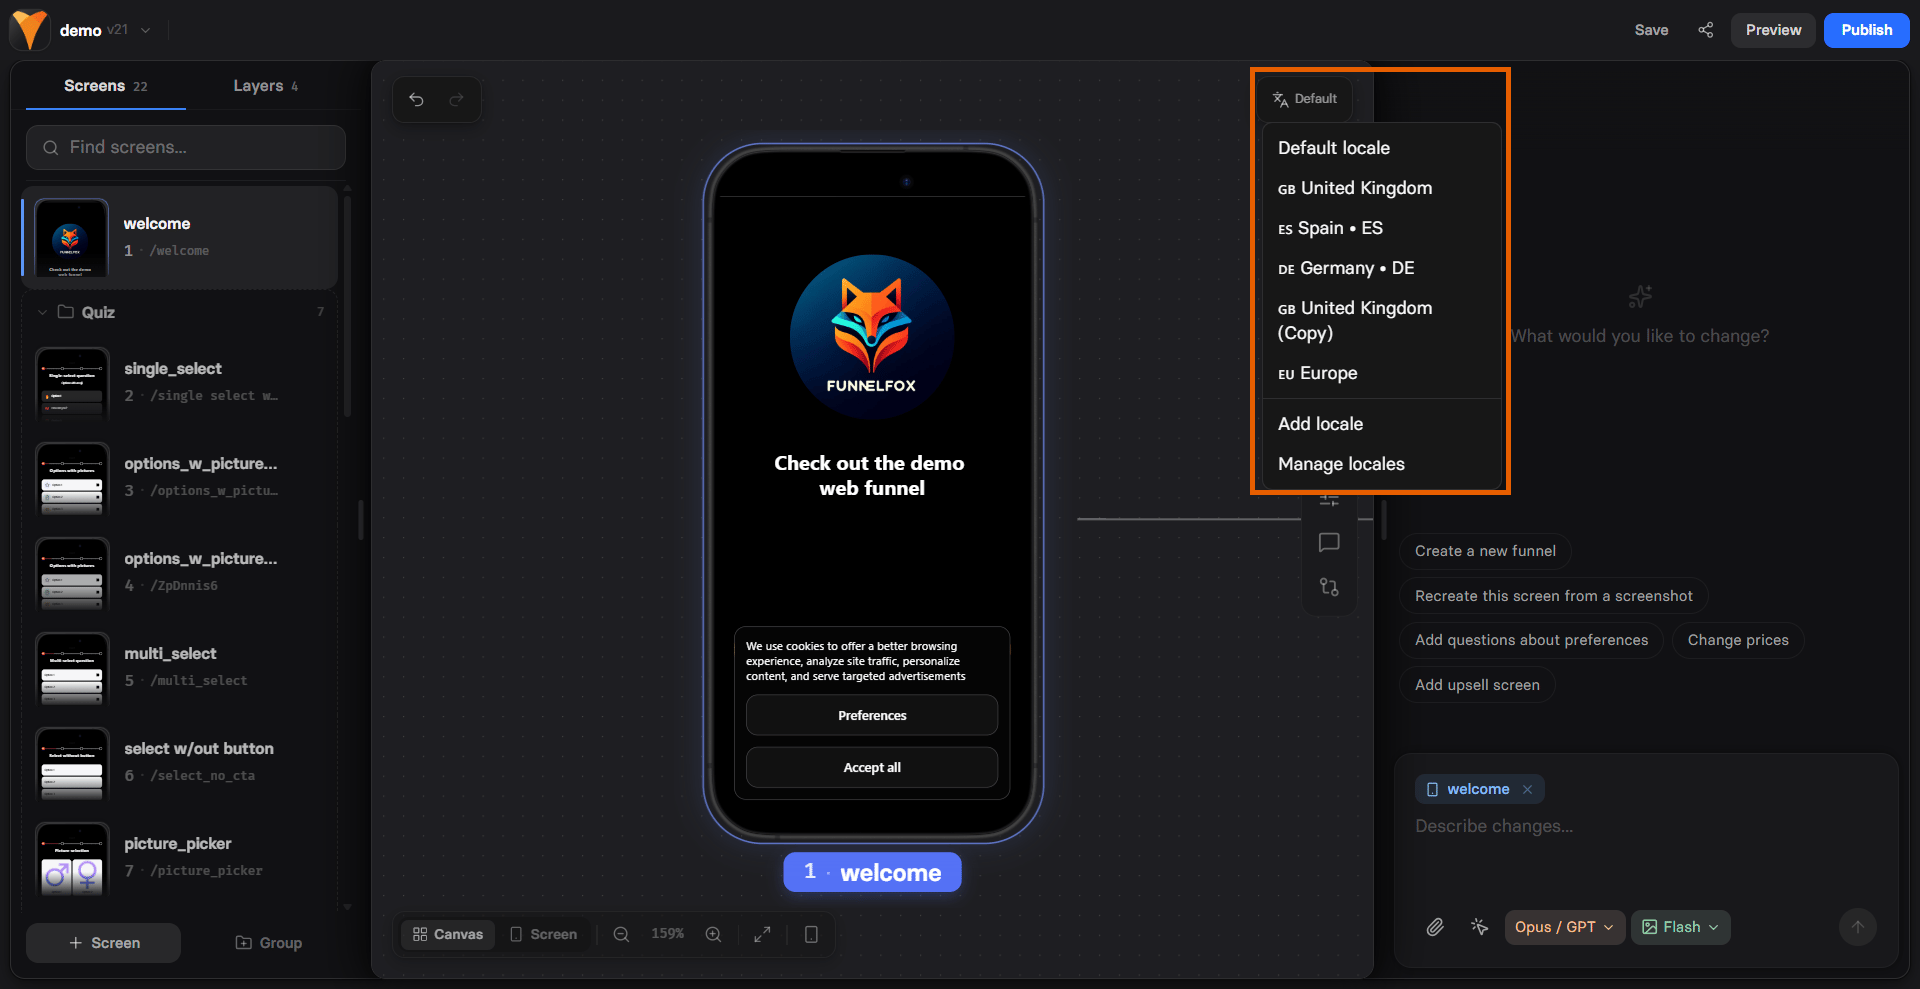
2
Open the Checkout element
Select the Checkout element, open Properties in the selector on the right
and go to the Parameters tab of your Checkout.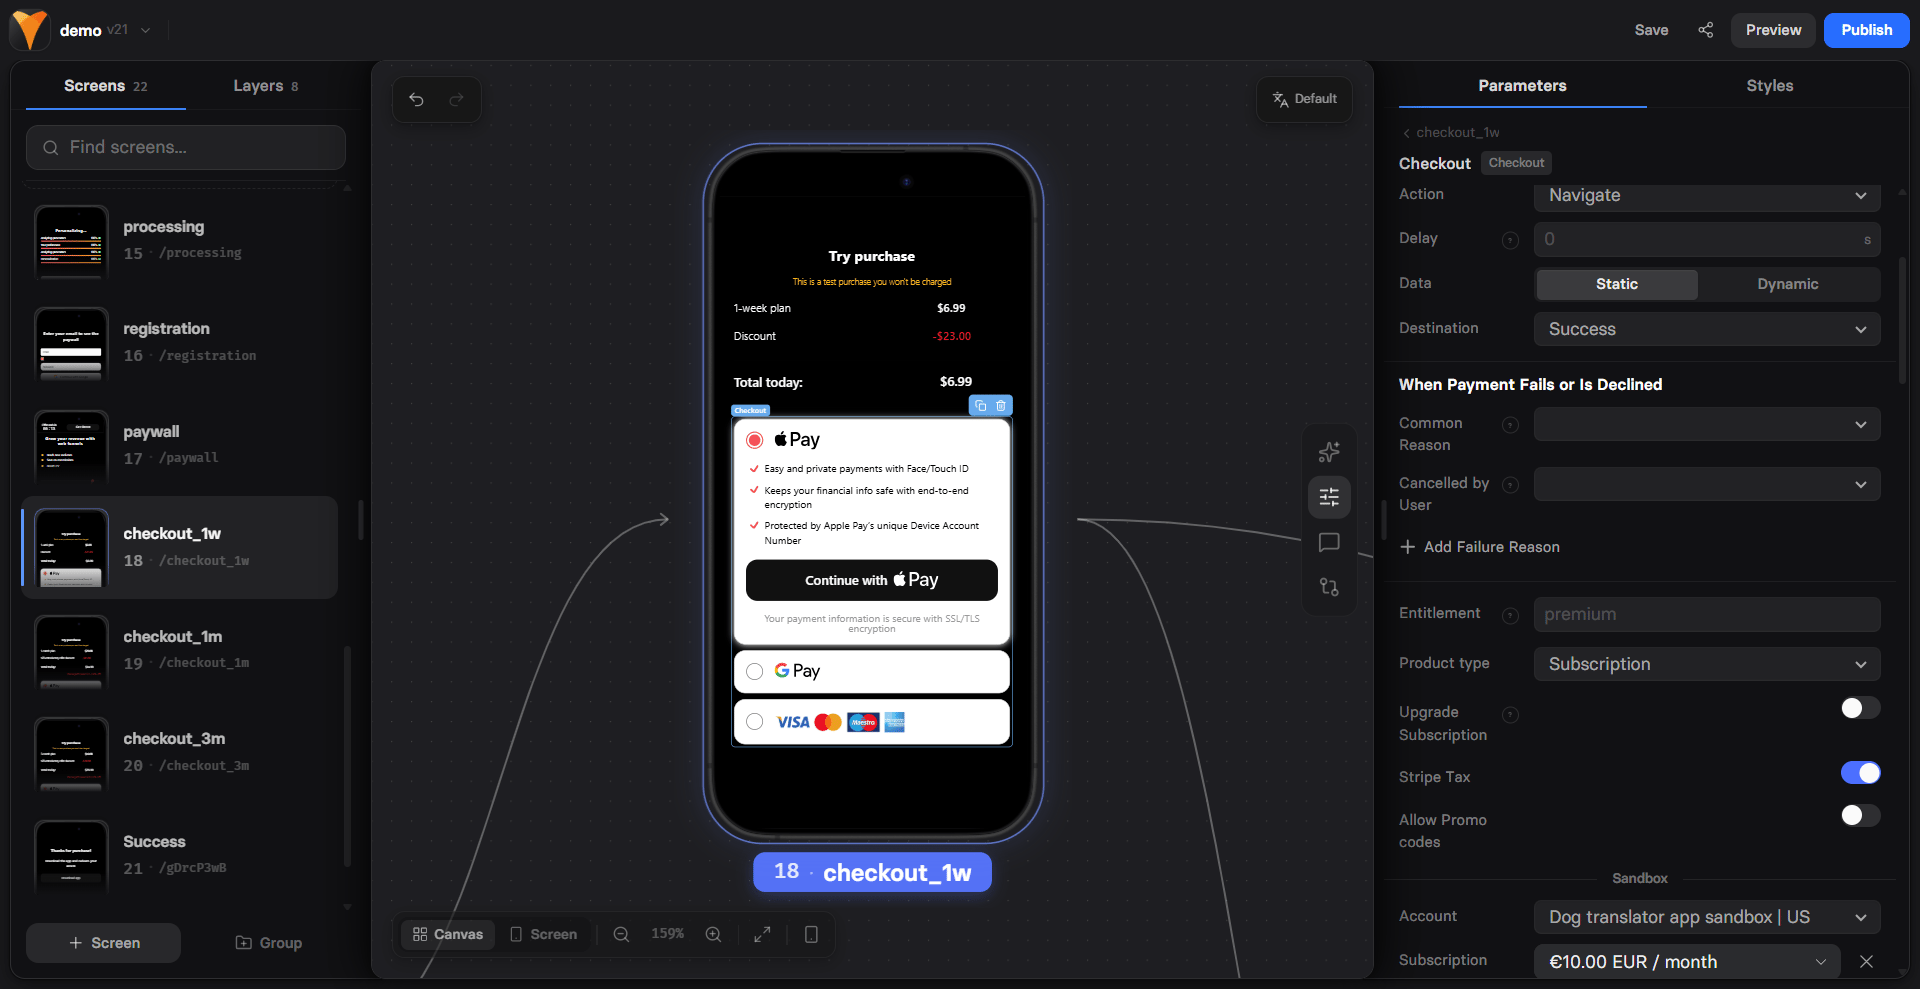
3
Select the price for this locale
Select the price you created for this locale’s currency.Learn about
checkout configuration
for each PSP.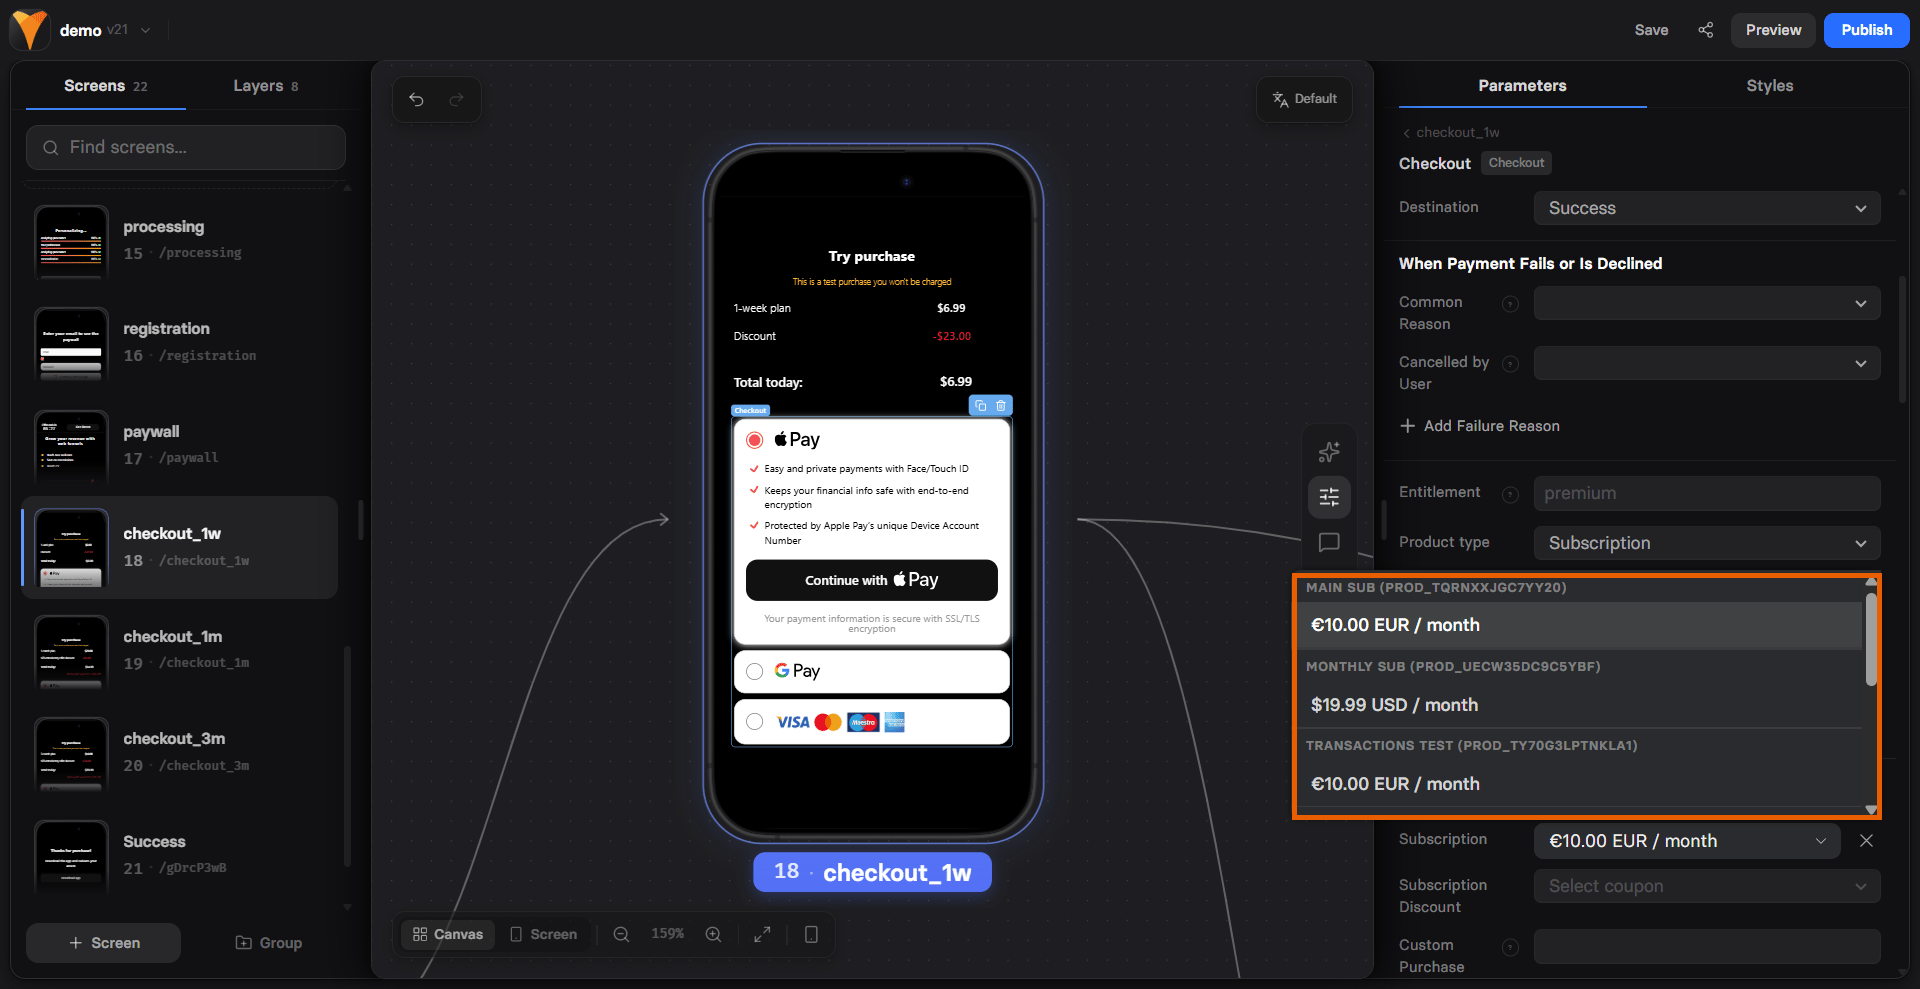
4
Repeat for every locale
Each locale keeps its own price selection. Locales you skip keep using
the default locale’s price.
If you don’t see a price you’ve just created, reopen the funnel.
3. Update displayed price
The price your visitor reads on the paywall is text you type. It isn’t bound to the price your Checkout charges, so update it in every locale.- Plan picker: Open Properties > Parameters of each plan and update Price and Old Price. Learn about configuring plans.
- Price picker: Update Price Text on each price option.
- Text elements: Update any amount or currency symbol written into your headlines, body copy, and disclaimers.
4. Test and publish
1
Save every locale and publish
Save each locale you edited, then publish the funnel. A locale with
unsaved changes blocks publishing.
2
Open each locale on the published funnel
Add the Learn about
overriding a locale via URL.
ff-locale parameter to your published URL to check each
currency without a VPN:3
Check the displayed price against the Checkout
Confirm the amount and currency in your Plan picker
match the amount and currency in the Checkout.
4
Run a test payment
Use your PSP’s test cards to confirm the right price is charged:
Troubleshooting
Visitors see the wrong currency
Visitors see the wrong currency
Check your locale matching rules
first, since a catch-all locale higher in the list may be winning. Then
open the locale in the Editor and confirm the Checkout points at the price
for that currency.
The displayed price doesn't match the amount charged
The displayed price doesn't match the amount charged
Plan picker and Price picker show text you type, while the Checkout
charges the PSP price it points at. Open the locale and align the two.